In this article we are going to explore how to configure an Availability Group between a clustered instance and a standalone instance, showing, step-by-step, how to setup a possible Disaster Recovery environment.
Introduced on SQL Server 2012, the Availability Groups brought the expectation to be an improved version of the database mirroring, which will be discontinued soon. The AlwaysOn Availability Groups was improved on SQL Server 2014, giving the capability of have more replicas, better troubleshooting possibilities and improving its availability. Comparing the Availability Groups with the database mirroring, in a very high level, we gained the possibility of have a listener to dynamically redirect the connection to the current active instance and also the capability of distribute the read workload between readable replicas. However, only the primary replica is able to write.
If you search about “how to setup an AlwaysOn Availability Group” probably you are going to find some articles out there, but all of those talking about the typical setup, where the Availability Group is being done between two standalone instances. In this article I’m going to do something different, the idea here is configure the Availability Group between a clustered instance and a standalone one, this way we can explore the differences between the typical and the not so typical 🙂
This said, let me make an example of what is going to be our lab environment:
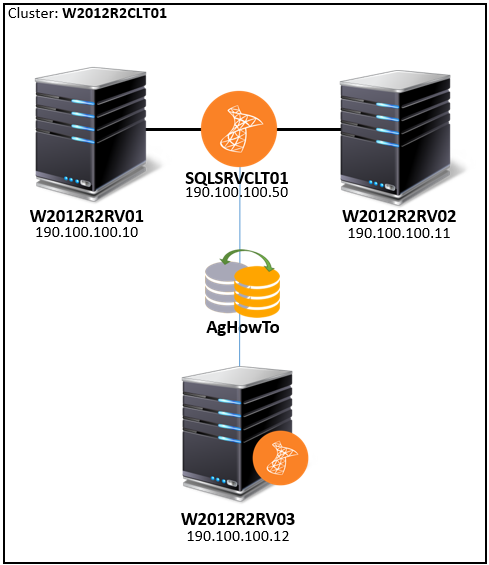
For this setup, I will be using SQL Server 2014, Enterprise edition, in a Windows Server 2012 R2 environment. However, this will also work in an environment with SQL Server 2012.
Requisites
In order to go ahead with this, we need to already have something done. Basically we will need a clustered instance installed in an AlwaysOn Failover Cluster, of course, and a standalone SQL Server instance installed in another server, which must also be part of the Windows Failover Cluster. Just a note here: the term AlwaysOn, is a brand used by Microsoft that is grouping two technologies: the Failover Cluster and the Availability Groups.
In order to make it work, we are going to use the famous AdventureWorks2014 sample database . This database will be initially placed in the clustered instance SQLSRVCLT01 and in order to successfully have this being synchronized to the W2012SRV03 instance, we need to assure that the same path used to store the database files exists on both instances, and preferable with disks with the same size … 🙂
In our case, the database AdventureWorks2014 is stored in the following paths:
- F:\SQL_DATA\AdventureWorks2014_Data.mdf
- G:\SQL_LOG\AdventureWorks2014_Log.ldf
As you can see in the image bellow, we have all the tree nodes added to the same cluster.
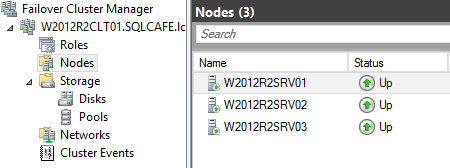
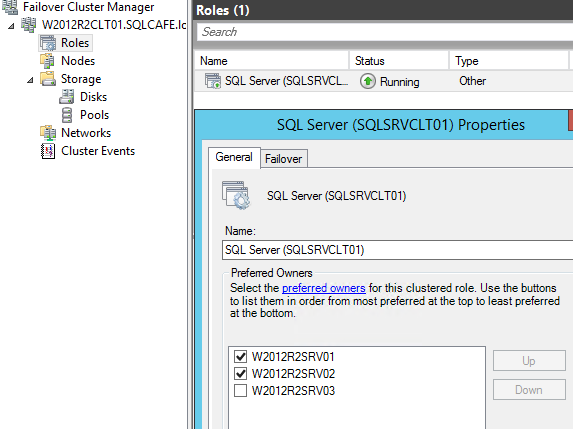
The clustered instance is only installed in the nodes W2012R2SRV01 and W2012R2SRV02, so it will never be active at W2012R2SRV03.
Let’s Start!
To begin, I’m going to show how to configure the basis of an Availability Group, with two readable replicas.
By the way, when we talk about Availability Groups, we are talking about database replicas. Even a main database is a replica, the “Primary Replica”. All the others are “Secondary Replicas”, it doesn’t matters if you have 2, 3 or 4 replicas…
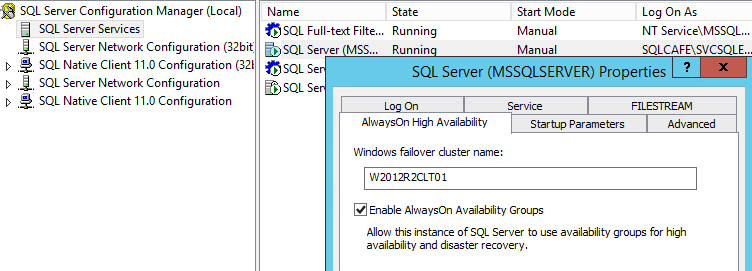
First of all, we need to activate the AlwaysOn High Availability feature in the instances. In order to perform that, open the SQL Server Configuration manager and go to the “SQL Server Services Node”. Let’s start from the standalone instance.

Now, look for “SQL Server (<INSTANCENAME>)”, right-click it and go to “Properties”. In the properties window, choose the tab “AlwaysOn High Availability” and check the box “Enable AlwaysOn Availability Groups”.
Now you can click “Ok” and restart the instance. You can do this, right there, in the Configuration Manager.
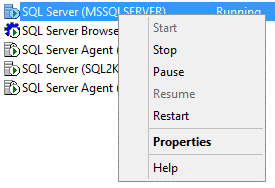
Follow the same steps for the clustered instance. The catch here is that you need to perform this in the node where the instance is active.
As you can see, if you try to enable the feature from a passive node, the following message will be shown:
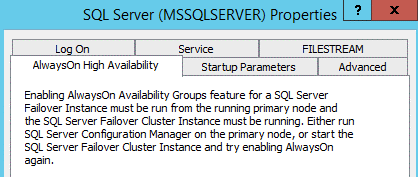
This way, perform the steps from a node where an instance is active.
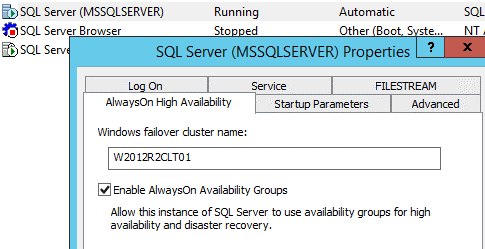
Once more, restart an instance. As this is a clustered instance, do this from the Failover Cluster Manages, by taking the SQL Server service Offline and then Online again.

Yes! We are done with the first part!!! 🙂
Preparing the database
Now that our instance is ready to support Availability Groups, it’s time to take care of the database that we are going to join to the Availability Group.
As said in the beginning of this article, we are going to use the AdventureWorks2014 database. This database is already attached to the clustered instance. I choose this one to be the start point, but you can choose any other “replica”.
In order to make the database a real candidate to be placed into an Availability Group, we need to meet some prerequisites:
- A database must be in the FULL recovery mode
- A database should have at least one FULL backup
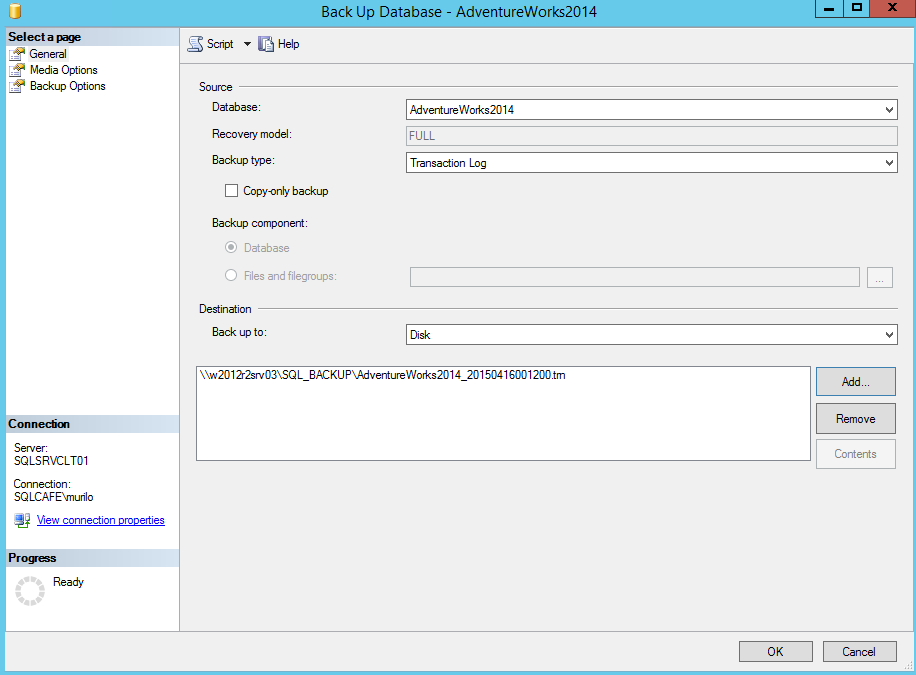
- A database needs to have at least one T-Log backup
With an intention to assure this, let’s check the database properties and change the Recovery Model from “Simple” to “Full”.

Now we need to perform one FULL backup of the database. I’m going to store this backup to use in another step in this article.
With the full backup done, we can perform the T-Log backup. Notice that I’m storing the backups in a fileshare on W2012R2SRV03. The reason is that I’m going to restore this database in the standalone instance running on that server.
We are doing this in a lab, so the environment is fully controlled by me, but in a real environment, you may have Backup Agent running continuously, and making transaction log backups periodically… Make sure to stop those backups during this configuration period, otherwise you won’t be able to synchronize the databases between the replicas.
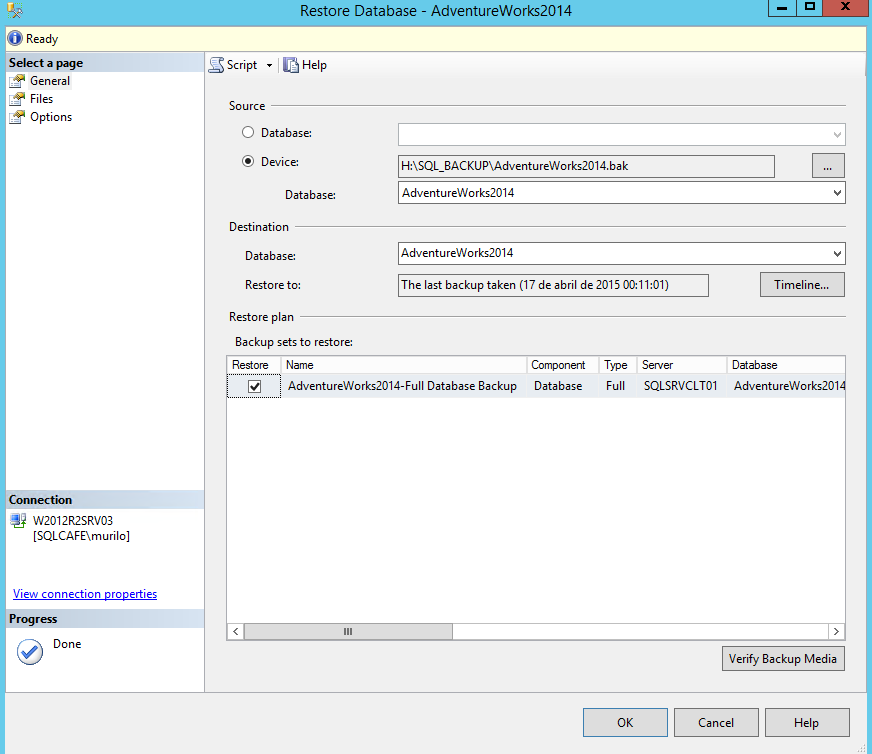
With the FULL and transaction log backups done, it’s time to restore a database in the other instance, the future Secondary Replica. In our case, this will be the instance W2012R2SRV03. So let’s work in the restore of the FULL backup previously made.
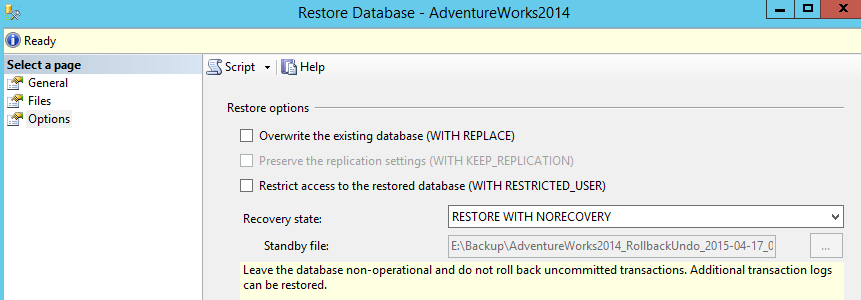
Make sure to set the “Recovery State” to “RESTORE WITH NORECOVERY”.
After the completion of this restore, we can start the transaction log backup.

Again, make sure to select the option to RESTORE WITH NORECOVEY, as shown:

After those steps, we will have the following scenario, where the clustered instance has a database in the normal “online” state and the standalone instance has the database in the restore state.
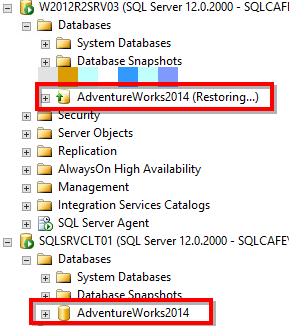
Now we are ready to start creating the Availability Group!! So check the second part of this article in order to see the next steps.
In this article, we introduced the basic configuration and requisites in order to have an Availability Group setup between a clustered instance and a standalone instance. In the continuation of this article, we will show how to create the Availability Group itself, how to configure the listener, logins synchronization, etc… Keep in touch 🙂
Next articles in this series:
- AlwaysOn Availability Groups – How to setup AG between a clustered and standalone instance (Part 2)
- AlwaysOn Availability Groups – How to setup AG between a clustered and standalone instance (Part 3)
- Understanding backups on AlwaysOn Availability Groups – Part 2 - December 3, 2015
- Understanding backups on AlwaysOn Availability Groups – Part 1 - November 30, 2015
- AlwaysOn Availability Groups – Curiosities to make your job easier – Part 4 - October 13, 2015

