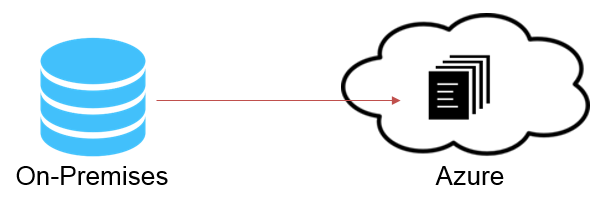
Do you know that since SQL Server 2012 you can have your entire database stored in Azure, even if you have your server on-premises? This article will introduce you to this capability, showing the basic steps to allow your instance to be in contact with your Azure Blob Storage Account.
We already started a series of articles exploring all the possibilities in order to have a Hybrid scenario, mixing SQL Server and Azure. In the previous article, we talked about the possibility of perform backup to the cloud, directly or using the Managed Backups feature, which automates the FULL and transaction log operations, based on rules.
In order to backup database files to Azure, we need to have an active Azure Blob Storage account. In this article we are going to take advantage of the same feature, but with another objective: store database files in Azure.
Yes, you can have you server, in your datacenter, under your control, within the reach of your hands, but the database files are in Azure…

That moment when someone asks “why I would do this?”
Well, there are few reasons… To start, don’t think in this feature like “I will put mdf, ndf and ldf files in Azure Blob Storage, and that’s it”. No. The main idea is not that… Of course you can do this, but this is a feature that opens a new horizon.
Having your files in Azure you will inherit all the advantages of store files in the cloud:
- Durable & highly available – Azure Blob storage automatically replicates your data, maintaining 3 copies within a single region.
- Geo-redundancy – This option creates 3 additional in another Azure site for higher availability and disaster recovery, complementing the previous data replication.
- “Unlimited” space – Well, there’s a limit, of 500 TB per Azure Blob Account. You can have up to 50 accounts per azure subscription.
- You pay for what you use – Check the price per GB here.
We are going to see all the possibilities, but let’s start from the very basic…
You can place your entire database in the Azure Blob Storage, but is this for you? It depends. Remember that you will be adding a new failure point in the system, probably your internet connection. And here is another problem, is the performance acceptable? How critical is your database?
You see, this is not for everyone. I cannot define a rule, but smaller and not highly accessed databases are the better candidates for this. The best is always test!
But as said before, don’t look to this feature like this… This is flexible! There are other two interesting options that we can take advantage:
- Use this solution in a hybrid database as archival solution.
- Create a low-cost disaster recovery solution.
We will approach those items in this article.
From which version I have this capability?
You can store both data and log files in Azure since SQL Server 2012 Cumulative Update 2.
What are the prerequisites?
Here are the steps to follow, in order to be able to store files in Azure:
Have an Azure Blob Storage Account
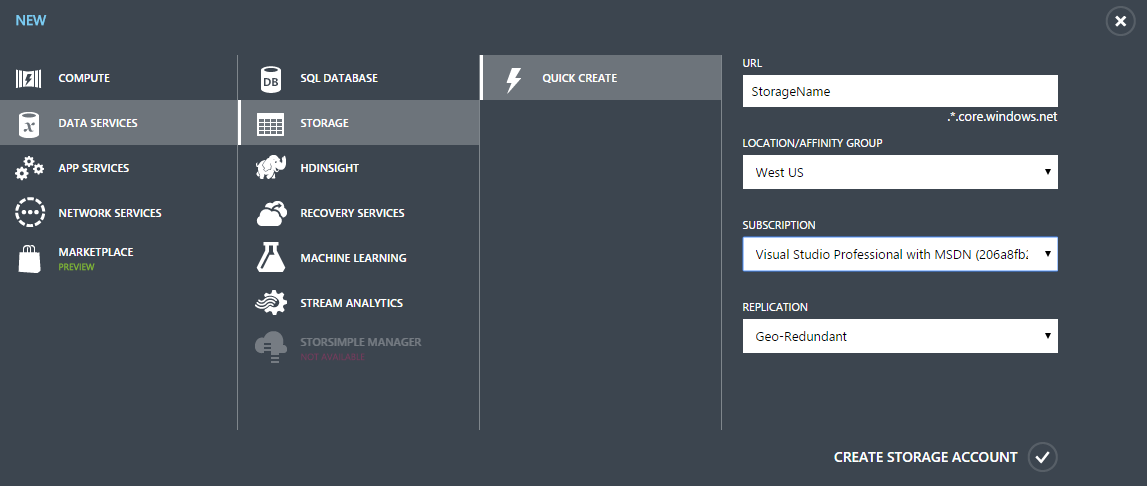
Using your Azure subscription, click on the “+ New” button, in the left-bottom of the Azure Portal, and follow the options: “Data Service”➜”Storage”➜”Quick Create”. Fill all the information and click on “Create Storage Account”:After a successful creation, you will be able to find your account in the “Storage” menu:

Create a credential.
The method is basic:
This step looks easy, but it isn’t… First of all, the Credential Name should be exactly the same as the Container URL, to make story shorter, after a research, I found a method using PowerShell, explained at this blog:
http://sqlcommunity.com/SQL-TEAMS/SQLCAT- Download the PowerShell script (see the previous link).
- Download you Publishing Profile from the following URL: https://manage.windowsazure.com/publishsettings/
Execute the following command, as Administrator, from the PowerShell Console:
.\SASPolicyTokens.ps1 -PublishSettingsFile “C:\pprofile\publishing_profile.publishsettings” -SubscriptionName “Visual Studio Professional with MSDN” -StorageAccountName “TestAcct” -ContainerName “dbfiles” -NumContainers 1 -StoredAccessPolicy “SQLPolicy” -StartTime “3/1/2015” -ExpiryTime “3/1/2016” -LogFilePath “C:\pprofile\creds.txt”
- The command will generate a txt file, with the commands to be executed on SQL Server. The command is going to create the required credentials.
Now that you are done with the credentials challenge, you can create/attach the database pointing to that container.
Here is a sample code to create a Hybrid database:
12345678CREATE DATABASE [HybridDatabase]ON PRIMARY( NAME = N'HybridDatabase', FILENAME = N'https://YourAccount.blob.core.windows.net/YourContainer/HybridDatabase.mdf' )LOG ON( NAME = N'HybridDatabase_log', FILENAME = N'https:// YourAccount.blob.core.windows.net/ YourContainer /HybridDatabase_log.ldf')GOIf your credentials are well created, this command will run with success… Make sure that your firewall is not blocking the connection!!
Now you know the basics! You are already able to store an entire database using the Azure Blob Storage. In the next part of this article I will explain the already referred scenarios:
- Hybrid database as archival solution
- Low-cost disaster recovery solution
Keep in touch, because, in the second part, is where you will find the real reason to use this capability 🙂
Tools
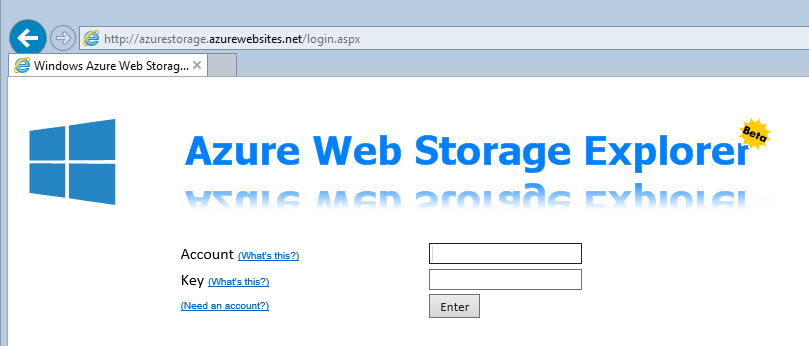
Before finish this first part, I’d like to introduce two free tools that will make your life easier… If you already used the Azure Blob Storage before, you know that manage a big amount of files is not easy, using the Azure Portal… After a research, I found a free tool called “Azure Storage Explorer”. This tool is Windows based, light and has all that we need to manage our files…awesome! You can download the tool in the following URL:
http://azurestorageexplorer.codeplex.com/But you may say: “My friend, this is a production server, I won’t install that thing there!”. Well, ok… Good news for you! There is a web-based version of this tool “Azure Web Storage Explorer”. Just connect to the following link, authenticate and enjoy!
http://azurestorage.azurewebsites.net/That’s it for now. I hope that this first part has been clear. I invite you to read the second part in order to see all the options that this capability brought to contribute in a hybrid database solution deployment.
Latest posts by Murilo Miranda (see all)- Understanding backups on AlwaysOn Availability Groups – Part 2 - December 3, 2015
- Understanding backups on AlwaysOn Availability Groups – Part 1 - November 30, 2015
- AlwaysOn Availability Groups – Curiosities to make your job easier – Part 4 - October 13, 2015


