In this article, we are going to learn to deploy serverless applications to the AWS Cloud using the AWS SAM CLI. This article is a part of the three-article series “Develop and Deploy Serverless Applications with AWS SAM CLI”. If you have some idea about how to develop and test your serverless applications locally using the AWS SAM CLI, then you might proceed with this article. However, if you want to learn more about developing and running your code locally, I would strongly recommend reading the previous articles of this series, Getting started with the AWS SAM CLI and Set up a local serverless environment using the AWS SAM CLI, which explains in detail the various configurations required to start and run the serverless functions on your local.
A quick recap
Although you might be following all the articles in the series from the beginning, I would like to take a moment and just revise a few of the key points that are extremely important for deploying the functions to the AWS Cloud, and we will be using those for this tutorial.
First of all, we have learned about the AWS SAM CLI and the workflow that the SAM uses to develop and deploy serverless applications to the cloud. We have seen what the benefits are of using the SAM CLI as opposed to developing our code directly on the AWS Lambda using the online code editor provided by the AWS Management Console.
In the second part of the series, we have learned how to set up a local development environment of a serverless application using Visual Studio Code and how to create AWS Lambda Functions using the pre-built templates provided by the AWS SAM. We have also learned to add our own lambda functions in the template and configure the YAML file that we will use to create the deployment package. Finally, I have demonstrated how to run and test the lambda function locally both by triggering the function individually as well as by simulating the API Gateway in the local machine.
Understanding the deployment workflow
Once the testing of our serverless application has been completed, we are now ready to get this deployed to the AWS Cloud. In order to do that, we need to create a package using the SAM utility.
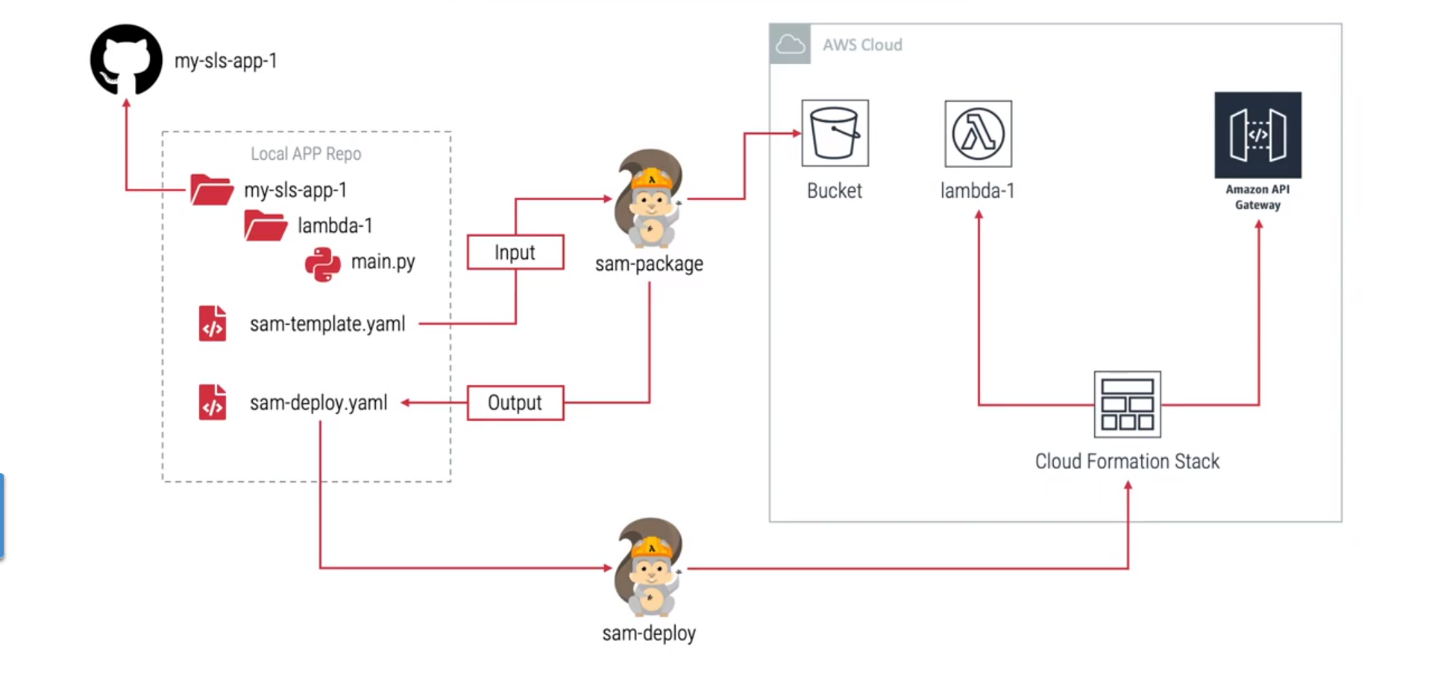
Figure 1 – AWS SAM Workflow
If you recall this figure from the first article in the series, you can see that the “sam-template.yaml” file that we configured is considered as an input to the sam-package. The sam-package reads the definition of all the resources that we defined and then creates an output, which is also a YAML file with the name “sam-deploy.yaml”. This output file is now compatible to deploy the resources to the AWS Cloud Formation Stack. Additionally, the sam-package also makes a zip file of the entire serverless application and uploads it to a bucket in S3.
When the final sam-deploy command is run, it reads the definitions from the “sam-deploy.yaml” file and deploys the resources to the Cloud Formation Stack. The Lambda Application is created from the code that was previously uploaded to the S3 bucket using the sam-package command. In this way, you can create as many resources as you would want to have in your application. In this tutorial, we will only go ahead with the Lambda Function and the API Gateway.
Deploying the serverless application
Now that we have some idea about the workflow of the sam-package and the sam-deploy commands, let us go ahead and execute these and get our code deployed to the AWS cloud.
First, we need to run the sam-package command, which will create the final “deploy.yaml” file for us and also upload a zip package of the code into a bucket in S3. If you do not have a bucket in S3, please go ahead and create one first before proceeding further with this tutorial. I have already created a bucket with the name “sam-sls-demo” which I will be using to store the zip into. You can run the following command to create the package.
sam package –template-file template.yaml –output-template-file deploy.yaml –s3-bucket sam-sls-demo
As you can see, the sam-package takes in the following three arguments.
- Template File – This is the template file that we have configured in our previous steps while running the application locally
- Output Template File – This is the output of the sam-package, which will generate the final deployment configurations for us, and this can be used to deploy the resources to the Cloud Formation Stack
- S3 Bucket – This is the name of the bucket in S3, where the zip of the application will be uploaded. The URL for this zip file will be updated in the output deployment configuration file
Figure 2 – Packaging the contents of the serverless application using SAM CLI
You can also see that a new “deploy.yaml” file has been generated by the sam-package, which is now available for our deployment.
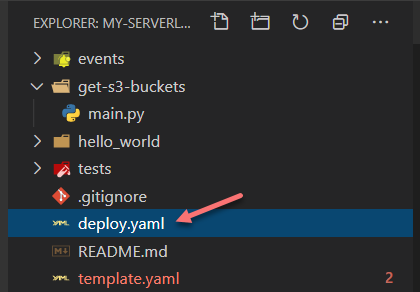
Figure 3 – Deploy.yaml file generated by the AWS SAM CLI
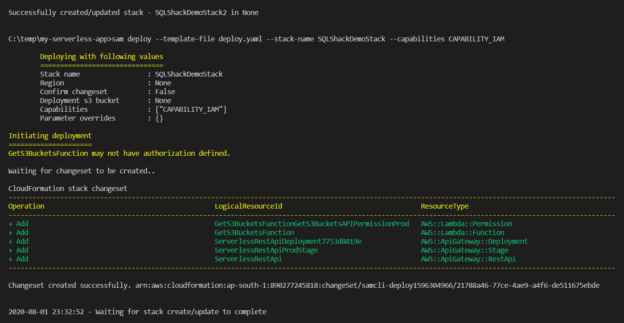
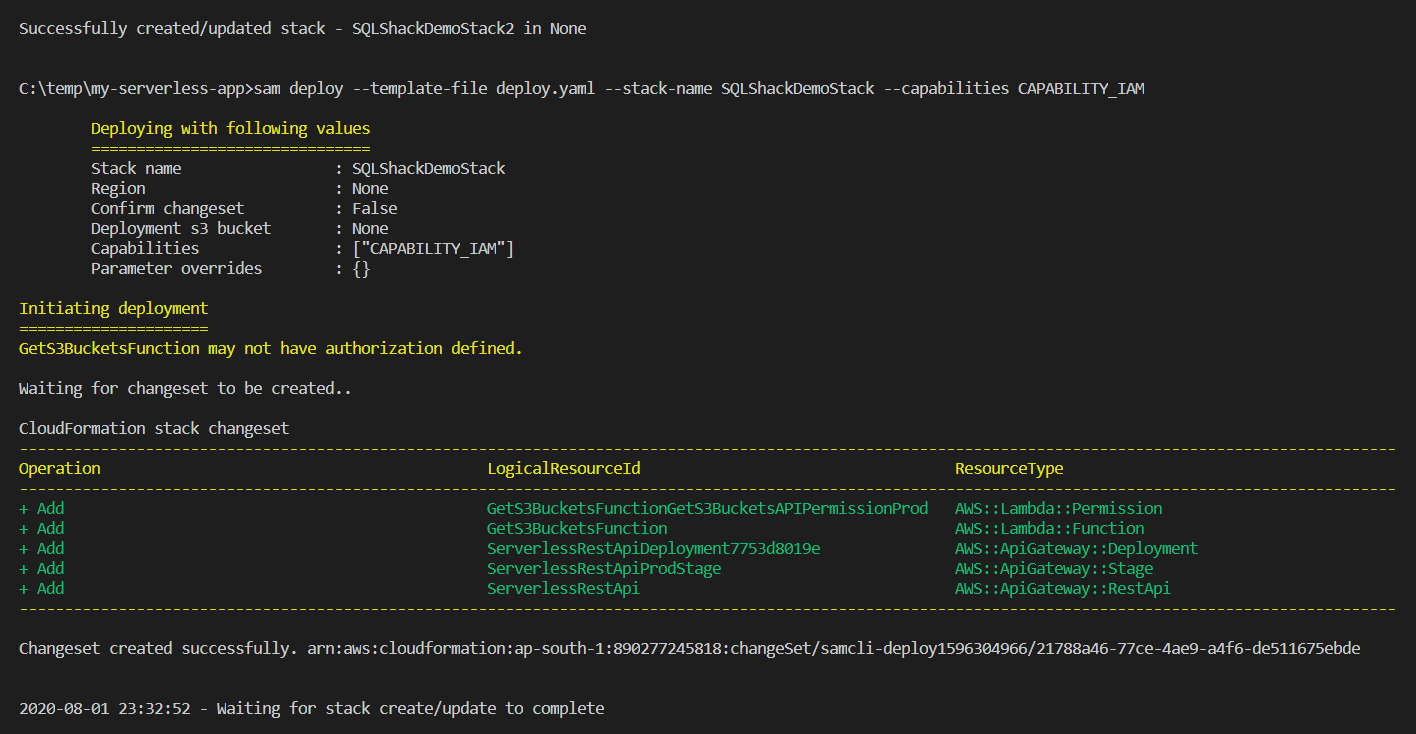
Now, let us get this deployed to the Cloud Formation Stack using the following command.
Figure 4 – Deploying the serverless application
As you can see in the figure above, the deployment of the serverless application is in progress and will be completed in a few minutes. Once deployed, you will see a message like below.
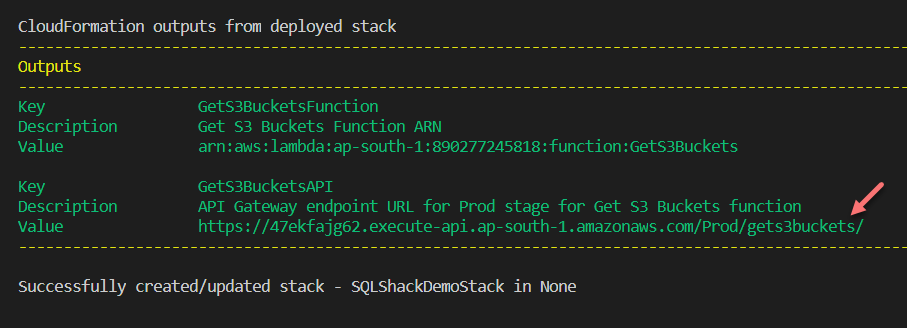
Figure 5 – Application deployed successfully to AWS using the SAM CLI
Testing the serverless application in AWS
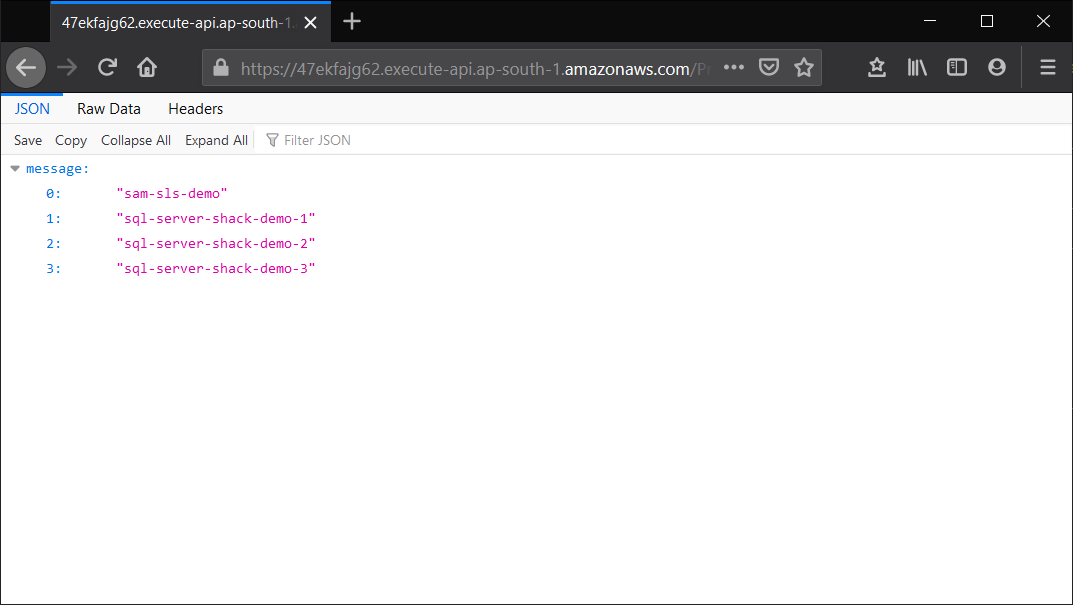
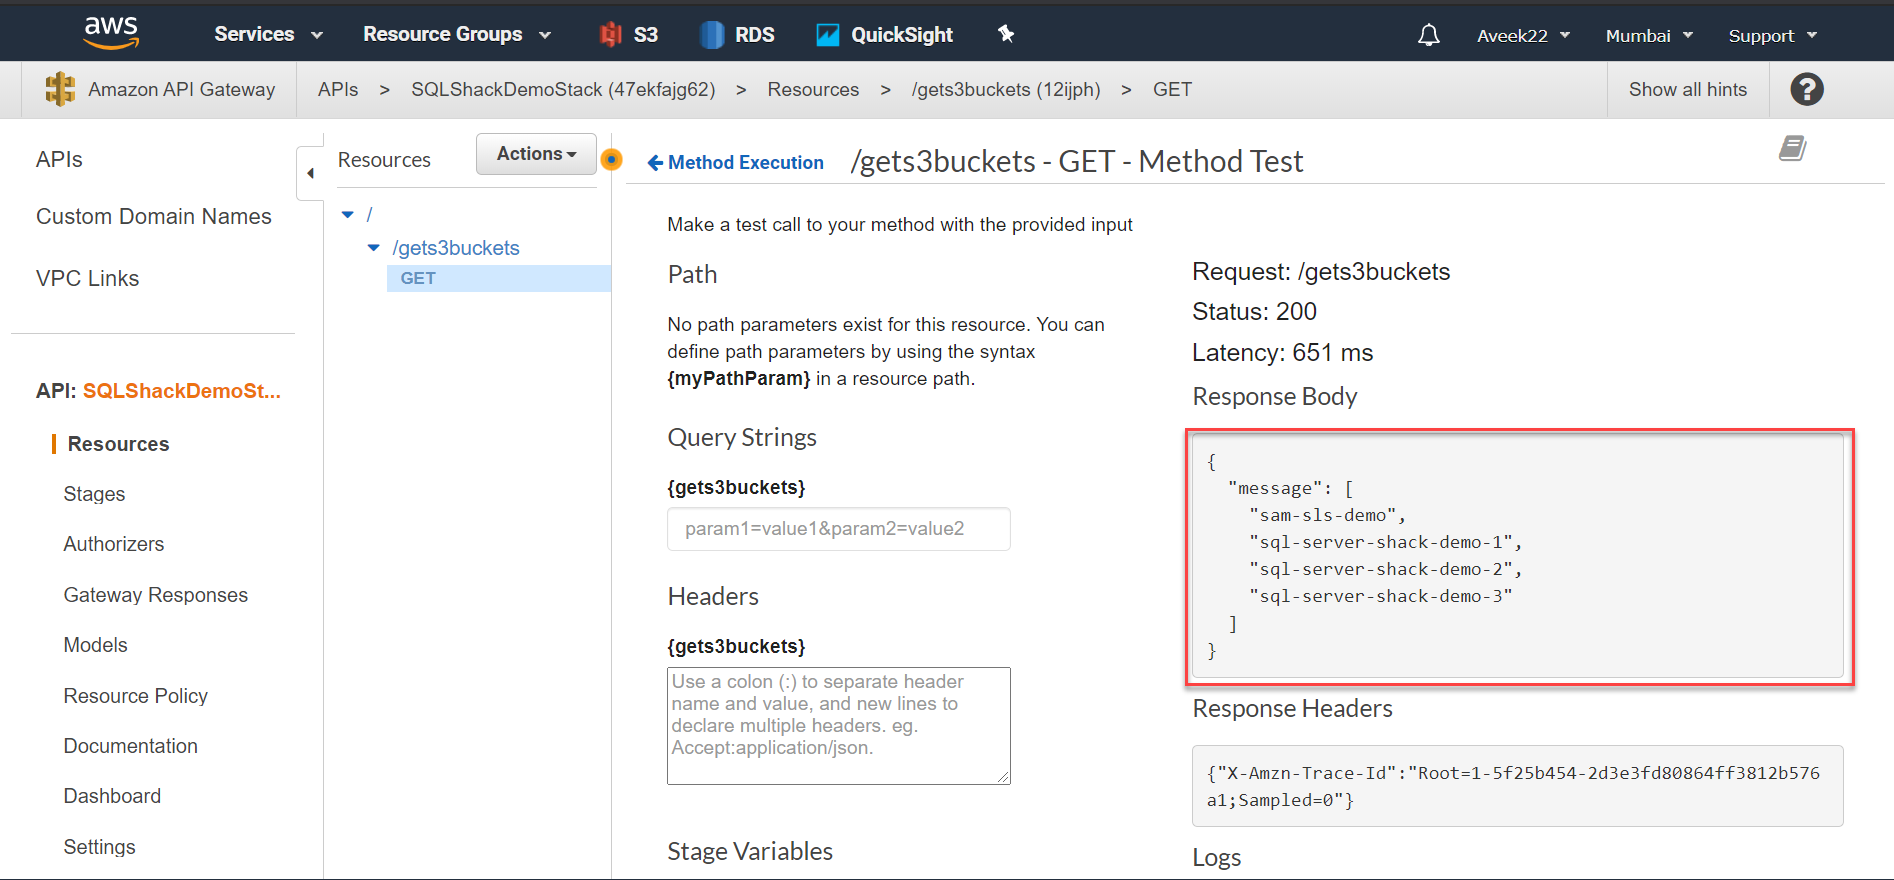
As you can see in the figure above, there is a URL to call the API Gateway, which in turn will trigger the lambda function to return the list of the buckets in S3. Copy and paste this link to a web browser. You will get a list of all the buckets present in the S3.
Figure 6 – Calling the API Gateway and trigger AWS Lambda
If you open the API Gateway from the management console on AWS, you can see that the API has already been created by the Cloud Formation Stack along with the described methods in it. This way of creating the API is robust, and the code can also be version controlled, everything was defined in the YAML file. In case you need to modify the existing API or add new methods to this, you can just alter the “template.yaml” file and run the commands again. The Cloud Formation Stack will automatically detect the changes and update the API method accordingly.
Figure 7 – Testing the API in the API Gateway
Additionally, you might also want to execute the lambda function individually without calling the API Gateway. In that case, head over to the Lambda Functions in the AWS Management Console and open the function that you want to execute. You might need to configure an event for running the Lambda Function directly. Since our application does not expect any event, you can just build a JSON payload that can be used as the event here.
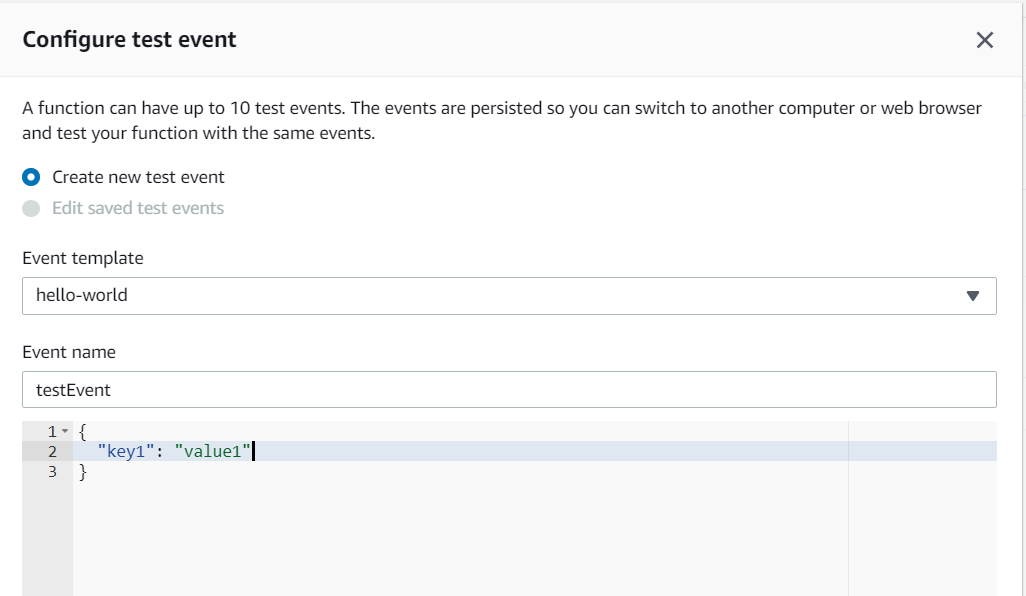
Figure 8 – Configuring the event
Once the event is configured, click on the Test.
Figure 9 – Executing the AWS Lambda Function
Conclusion
In this article, we have learned how to deploy the serverless application that we have built on our local using the AWS SAM CLI. The SAM CLI makes a zip archive of the lambda code that we have created and then uploads it into an S3 bucket of our choice. This also generates another YAML file that defines the resources for the Cloud Formation Stack. Once the deploy command is run, the SAM CLI takes the deploy configurations from the YAML and sets up the cloud formation stack for us.
Table of contents
| Getting started with the AWS SAM CLI |
| Set up a local serverless environment using the AWS SAM CLI |
| Deploy serverless applications using the AWS SAM CLI |
See more
To boost SQL coding productivity, check out these SQL tools for SSMS and Visual Studio including T-SQL formatting, refactoring, auto-complete, text and data search, snippets and auto-replacements, SQL code and object comparison, multi-db script comparison, object decryption and more

- Getting started with PostgreSQL on Docker - August 12, 2022
- Getting started with Spatial Data in PostgreSQL - January 13, 2022
- An overview of Power BI Incremental Refresh - December 6, 2021

