Introduction
In previous articles, we learn how to configure PostgreSQL ODBC drivers, how to configure ODBC drivers for Azure Database for MySQL, the differences between OLE DB, ODBC, and ADO.net, how to configure Linked Servers using ODBC DRIVER. This time we will use the ODBC Drivers to connect in SSIS.
ODBC (Open Database Connectivity) is an API used to access database systems. It is also used now to connect to CSV files, APIs, and other stuff using third-party plug-ins. We will use ODBC now in SSIS.
In this article, we will learn:
- Create ODBC Source connection
- Create a database and table destination
- Create an ODBC connection for the destination
- Create an SSIS package to import data from the Adventureworks table to the Test Database
We will import data from one table into another using ODBC Drivers.
Requirements
- First of all, SSDT was installed in Visual Studio with the SSIS option checked.
- A new integration services project was created.
Create an ODBC Data Source Connection
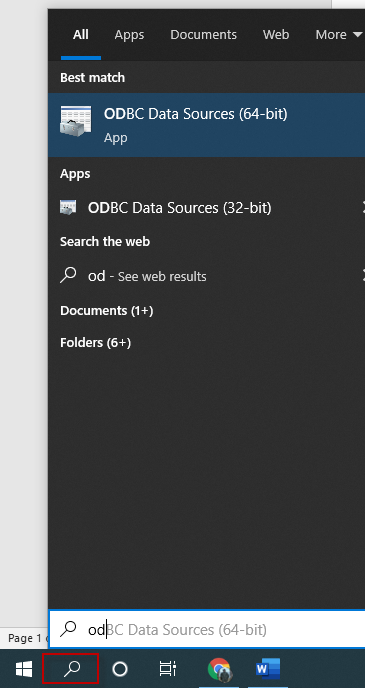
First of all, we will create the ODBC Data Sources. Write OD in the Windows textbox search to search for the ODBC Data Sources and open it.
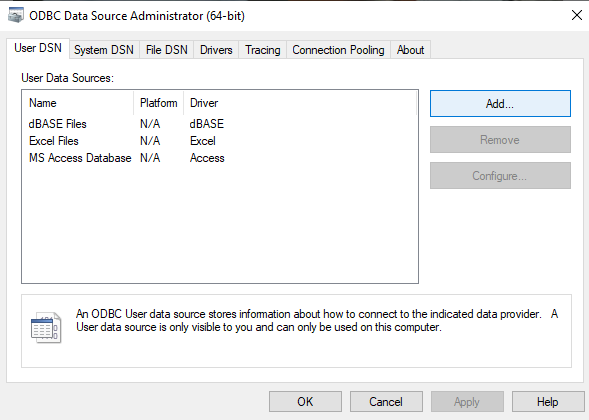
In the ODBC Data Source Administrator, press the Add button to add a new Data Source.
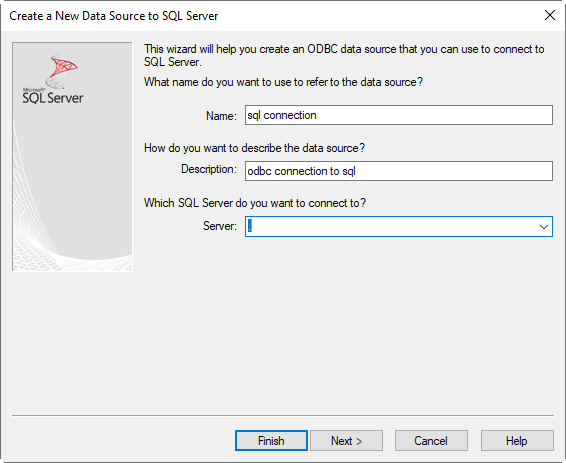
Write a name for the data source, optionally a description, and provide the SQL Server name. We will work with the SQL Server ODBC drivers.
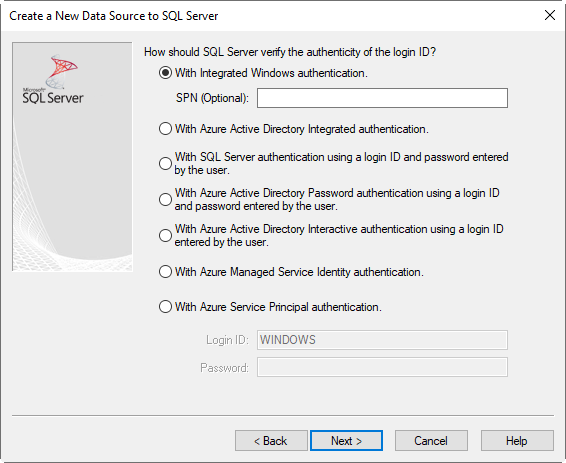
There are several options to authenticate with the ODBC drivers for SQL Server. In this example, we will connect to the SQL Server on-premises using With Integrated Windows authentication. You can also connect using AD Authentication or a SQL Server login. The other options are Azure Authentication methods that are out of the scope of this tutorial.
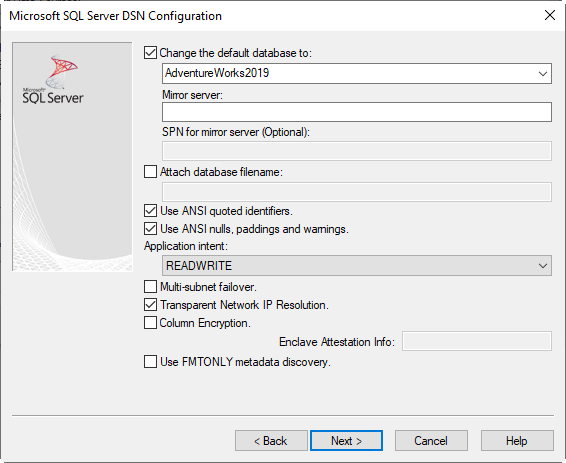
Check the Change the default database to checkbox and select the AdventureWorks database. If you do not have the Adventureworks database installed, use this link:
The ANSI quoted identifiers are used to handle double quotes as a string or not. For more information about Quoted Identifiers, check our article related:
ANSI NULL is used to control the usage of the equal and not equal operator for nulls and Padding is to control the trailing spaces. Finally, warnings control the ISO standard to handle errors. For more information about this topic, refer to this link:
You can also control the permissions to access the database. By default, it assigns read and write permissions, but you can change it to read-only.
You can also use the multi-subnet failover which is used if your SQL Server is in Failover environments. Transparent Network IP Resolution is used in case the IP is not responding. In that case, other IPs associated with the hostname, may respond. By default, is checked. For more information about Transparent Network IP Resolution, refer to this link:
The column Encryption is used to handle the Always Encrypted SQL feature. By default, this option is not checked.
For more information about Always Encrypted, refer, to our links related:
- Using Always Encrypted with the ODBC Driver for SQL Server
- How to configure Always Encrypted in SQL Server 2016 using SSMS, PowerShell, and T-SQL
The FMTOnly is used in SQL Server 2012 or later. By default, this option is disabled. The option is used usually when trying to discover temporary table data or queries that are not supported by the sp_describe_first_result_set stored procedure. For more information, refer to these links:
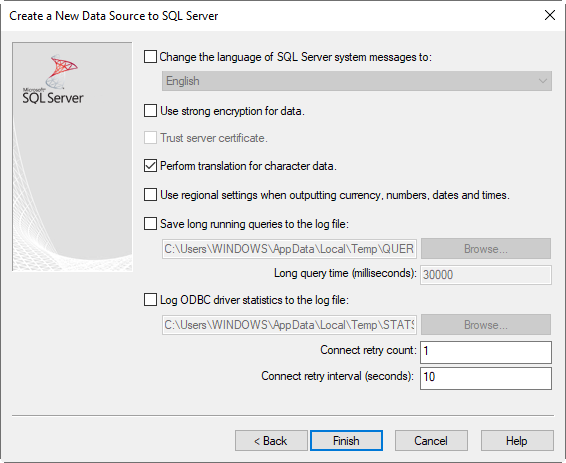
Also, in the next wizard, you can select the languages for the error messages displayed. By default, the error messages are displayed in English.
You can check the strong encryption for data to encrypt the information and use certificates. By default, the option is unchecked. This option will encrypt the data passed through connections.
The perform translation for character data, by default, is enabled. The option converts strings between the client and the server using UNICODE.
We also have the Use regional setting when outputting currency, number, dates, and times. This option is used to take the client’s regional settings. By default, this option is unchecked.
The Save long-running queries to the log file are also unchecked by default. If the queries are long, you can store the information in a log file. You can specify the path of the log file and set the long query time. By default, it is 30 sec.
Finally, you can save the Log ODBC driver statistics to the log file. You can configure the log file path for the statistics and specify the connect retry count and retry intervals. By default, the values are 1 and 10 respectively. Press Finish.
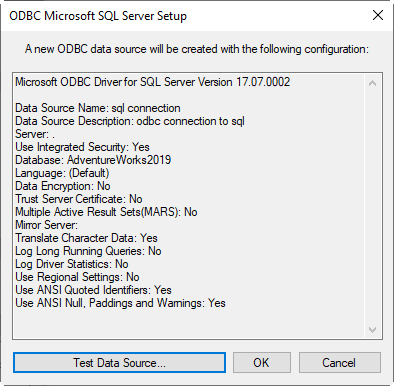
If everything is OK, you will receive a message the new ODBC data source will be created. Press the Test Data Source button.
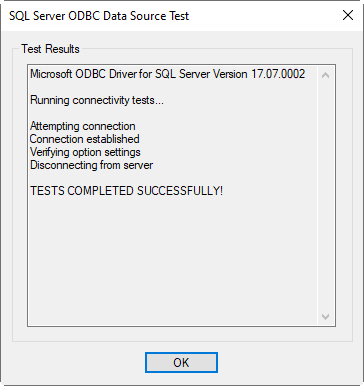
If everything is fine, a TEST COMPLETED SUCCESSFULLY message should be displayed. Press OK.
Create a database and table destination
We will create a new database named test as a destination.
To create the database with a table, use the following command lines:
|
1 2 3 4 5 6 7 8 9 10 |
CREATE DATABASE TEST GO CREATE TABLE dbo.[Culture]( [CultureID] [nchar](6) NOT NULL, [Name] nchar NOT NULL, [ModifiedDate] [datetime] NOT NULL, ) GO |
The code will create a database named to test and a table named culture. This table will be used to import data from the Adventureworks database and Culture table.
Create an ODBC connection for the destination
We will create another connection named test connection and instead of connecting to the Adventureworks database, we will connect to the test database created previously using the ODBC drivers for SQL Server.
The steps to create the ODBC destination connection are the same used to create the ODBC Source connection, except the name of the connection will be a test connection instead of an SQL connection.
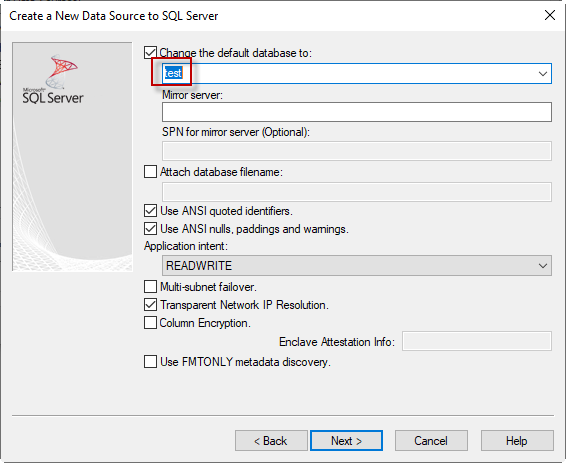
The other difference is that we will change the default database to Test instead of Adventureworks. The rest of the wizard configuration will be the same.
Create an SSIS package to import data from the Adventureworks table to the Test Database
If you do not have an SSIS project created, go to the requirements for help and create a Project.
In the SSIS project, drag and drop the Data Flow task.
Double click the Data Flow task and drag and drop the ODBC Source task and the ODBC destination and join them in a flow.
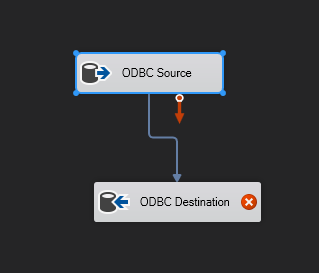
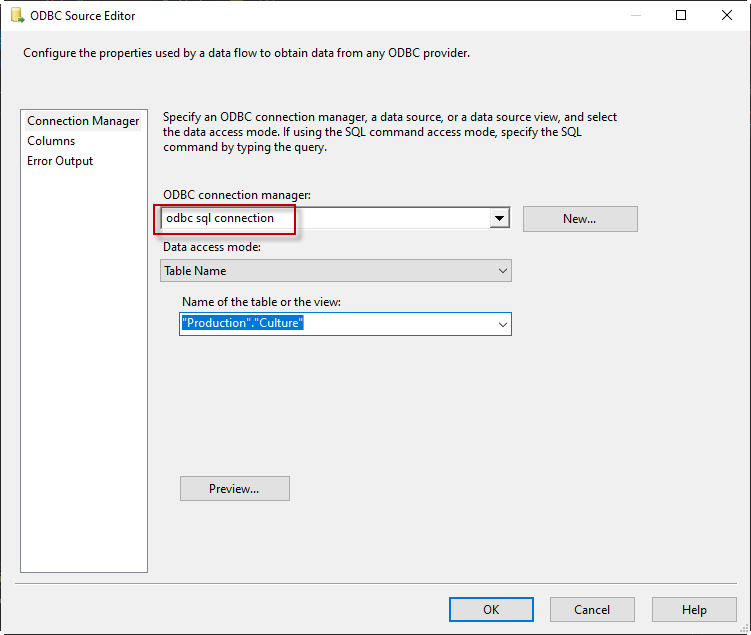
Also, double-click the ODBC Source and press the New button to create a new connection. Select the ODBC SQL connection created as the source connection in ODBC. This connection is using the ODBC drivers for SQL Server.
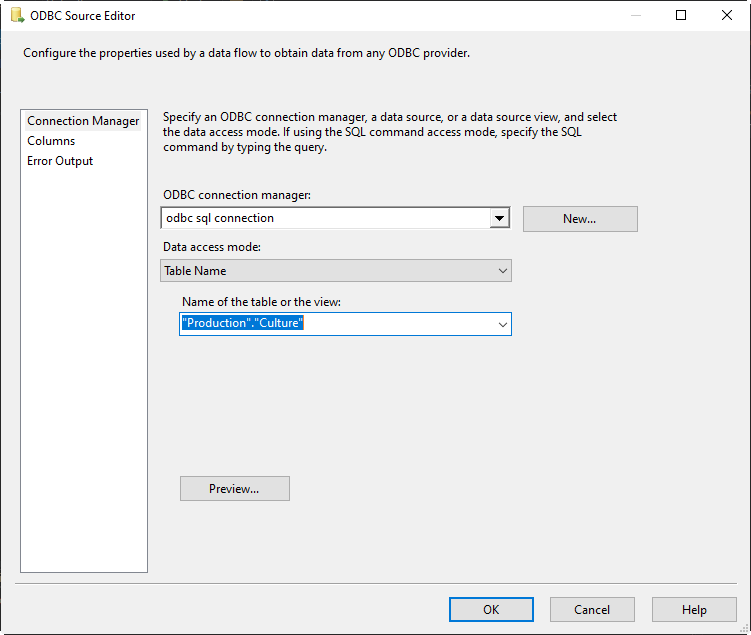
In the Name of the table or the view, select the Production.Culture table and press OK.
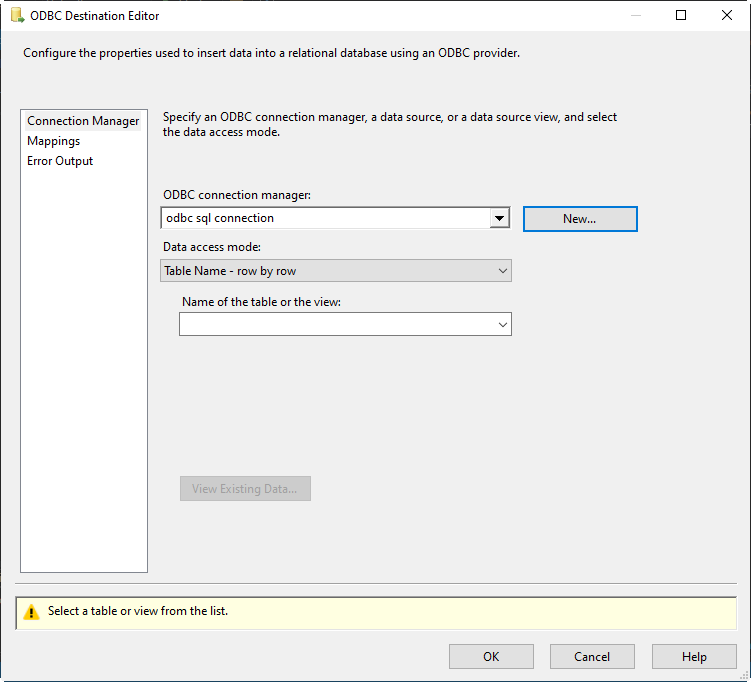
Next, double-click the ODBC Destination Task and press the New button to create a new connection.
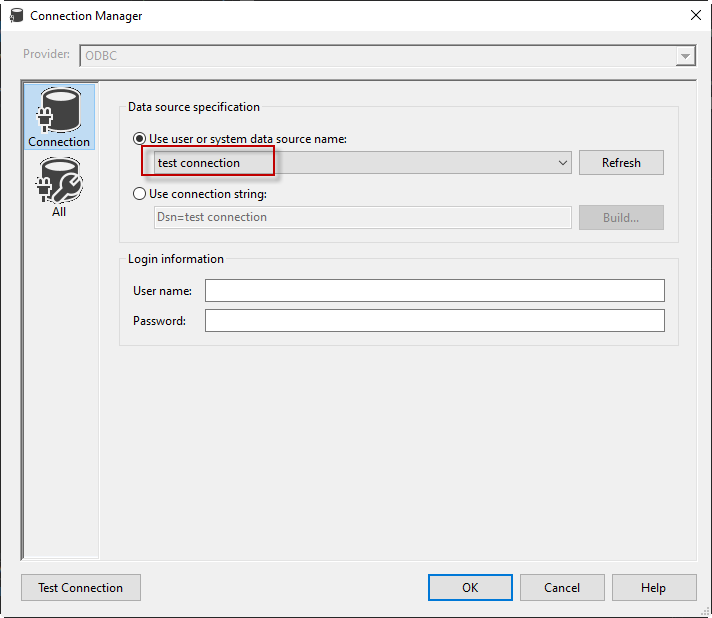
Press the New button to create a new connection.
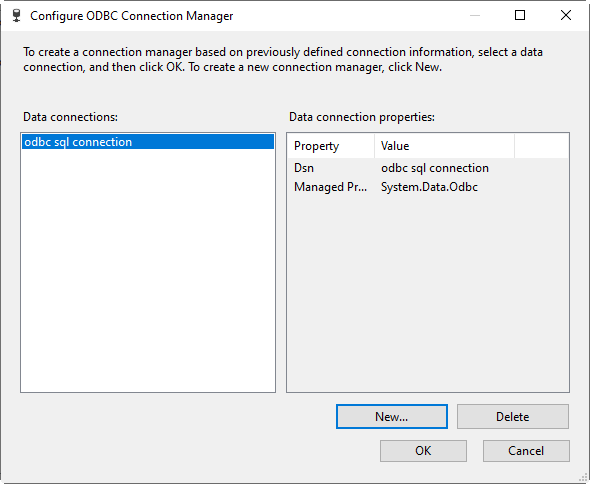
In the Use user or system data source name, select the test connection. This connection was created by the ODBC Data Sources Administrator before.
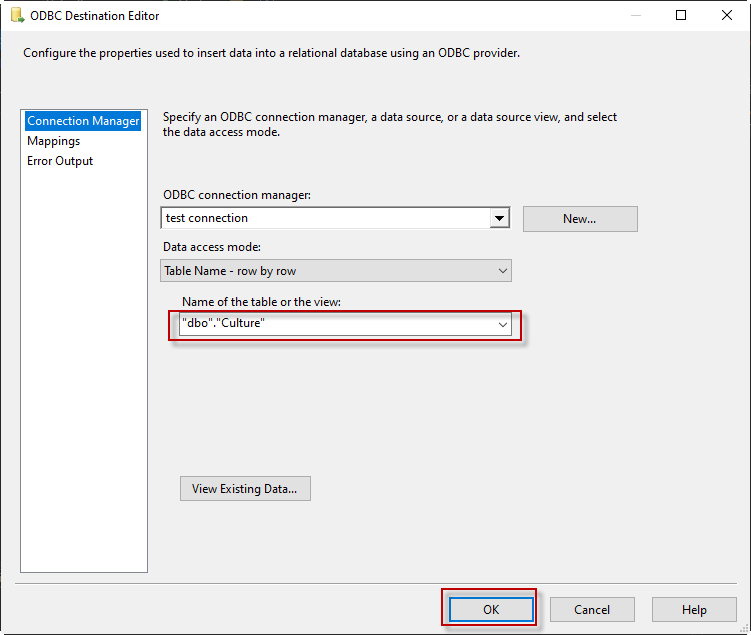
Once the connection is selected, select the dbo.Culture table. This table was created by our T-SQL sentence during the test database creation. Finally, press OK.
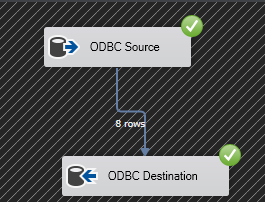
Finally, run the package to export the data from the Adventureworks into the test database.
Conclusion
In this article, we learned how to use ODBC drivers for SQL Server in SSIS. We created source and destination connections and learn about the options related during creating. Then, we created an SSIS package and added an ODBC Source and Destination. We used the ODBC connections to connect to source and destination and then we selected the table to import data. Finally, we run the package to import data from Adventureworks to the Test destination table.
- PostgreSQL tutorial to create a user - November 12, 2023
- PostgreSQL Tutorial for beginners - April 6, 2023
- PSQL stored procedures overview and examples - February 14, 2023


