Suppose you write a technical blog in the English language for your website. You have good followers in a country where the primary language is not English. You want to translate the document content in their native language for a wider reach.
SQLShack is a widespread knowledge-sharing platform for database professionals for SQL Server, AWS, Azure, MySQL. If you browse to SQLShack.com, you get all content in the English language on this site. However, it also translates a few documents into the Spanish language. You can browse to URL for all Spanish language documents.
Similarly, if you require to translate documents into multiple languages, it isn’t easy to translate manually. You require specific language experts for translation. Sometimes, I receive emails from a client written in their native languages. They also send documents, attachments specific to their language. Usually, I use Google translator for text translation.
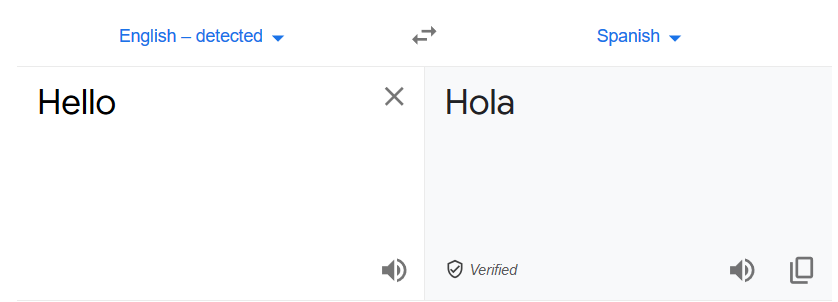
However, it is a manual process. Therefore, I tried looking for an automated way of translating documents into multiple languages. This article explores how to achieve text translation into different languages using the Azure Logic Apps.
Steps for implementing Azure Automation for text translations using Azure Logic Apps
Azure Logic Apps enables you to automate workflow, business logic using a variety of connectors, actions. Previously, we implemented the following azure automation using logic apps.
- Scale-up and down service tiers for Azure SQL database with Logic Apps
- Extract email attachments, store them into Azure storage container and import them into Azure SQL Database
- Performing sentiment analysis and storing Tweets in Azure SQL database
- We created an Approval based automated workflow for importing data into the Azure database
Therefore, In this article, I would assume that you have a basic understanding of Azure resources and familiar with the Azure portal.
A quick overview of the Azure Cognitive Services
Azure Cognitive Services uses artificial intelligence (AI) to build solutions in the following categories using REST APIs and client library SDKs.
- Vision
- Language
- Speech
- Decision
- Search
In this article, we use Language APIS that supports a service called Translator. It is a cloud-based machine translation service that can translate your text into multiple languages( more than 70 languages) in near real-time. It also supports language detection, text transaction and transliteration.
You can refer to Microsoft Docs for more details about the Cognitive Services. To use the cognitive services, logon to the Azure portal and search for Cognitive Services. Here, create a new service for Translator.
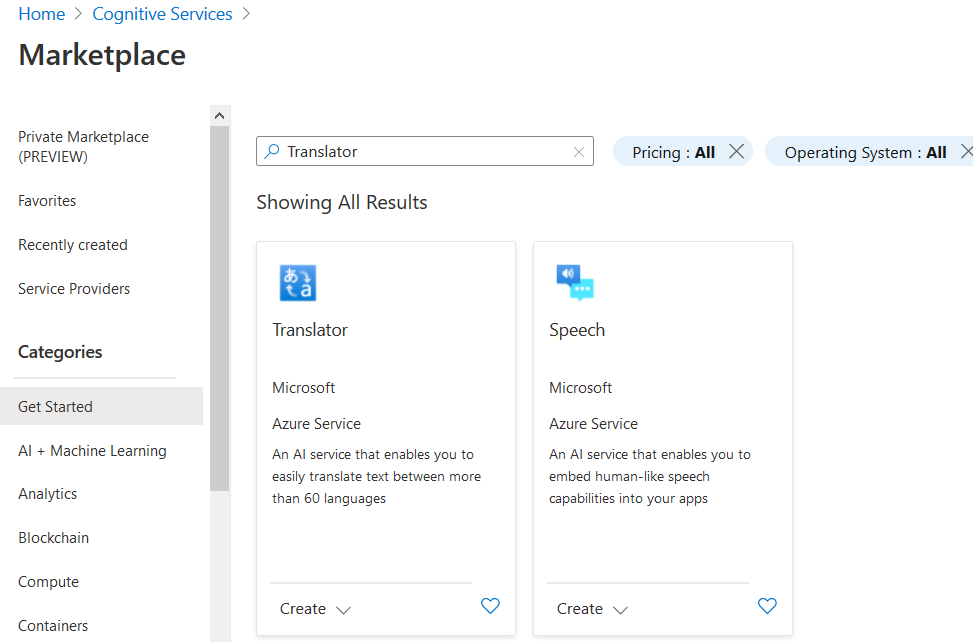
Click on Create in the Translator and enter the following details:
- Subscription
- Resource Group
- Resource Region: You can select a global region unless you require a specific region.
- Pricing tier: In this article, I use a free pricing tier that offers 2M characters for language translation.
You can refer to Cognitive Services pricing—Translator for details regarding available pricing options suitable for your requirements.
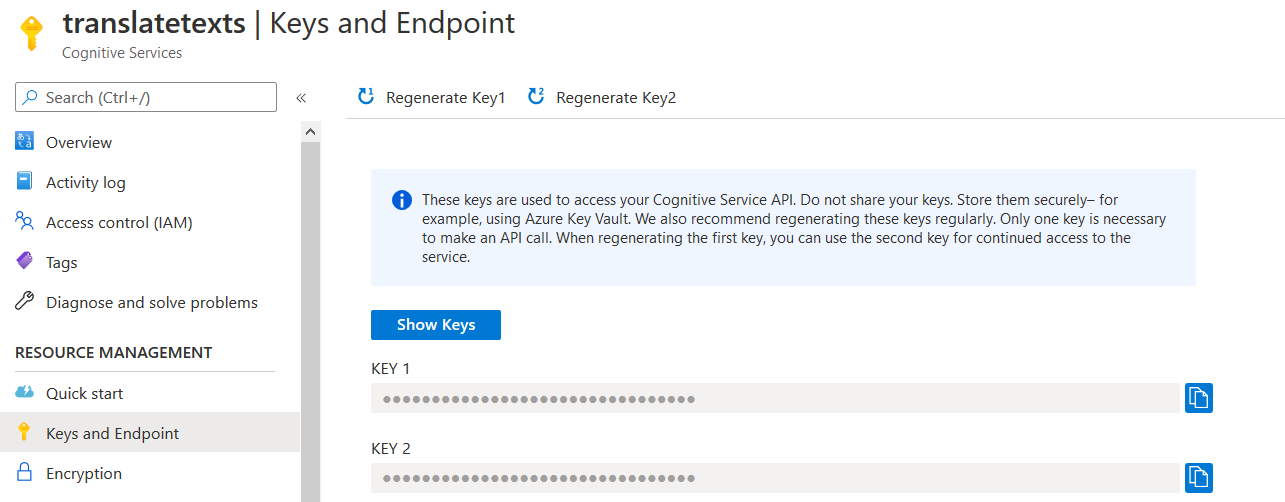
Once the cognitive service resources are deployed, click on Key and Endpoint. Here, note down the access keys. These keys are required in the Azure logic apps connector.
Azure Logic Apps for text translations
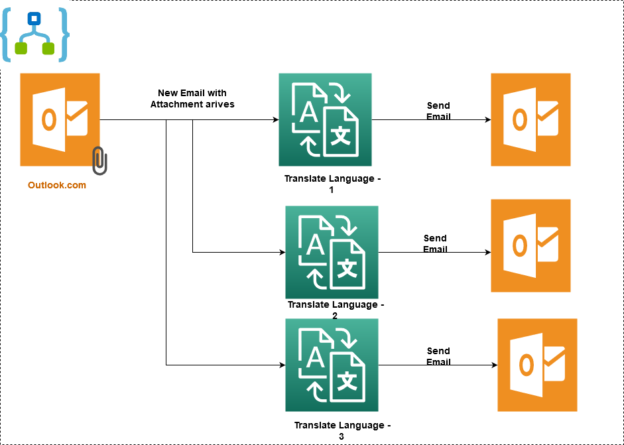
In this article, we implement an azure logic app for the following scenario.
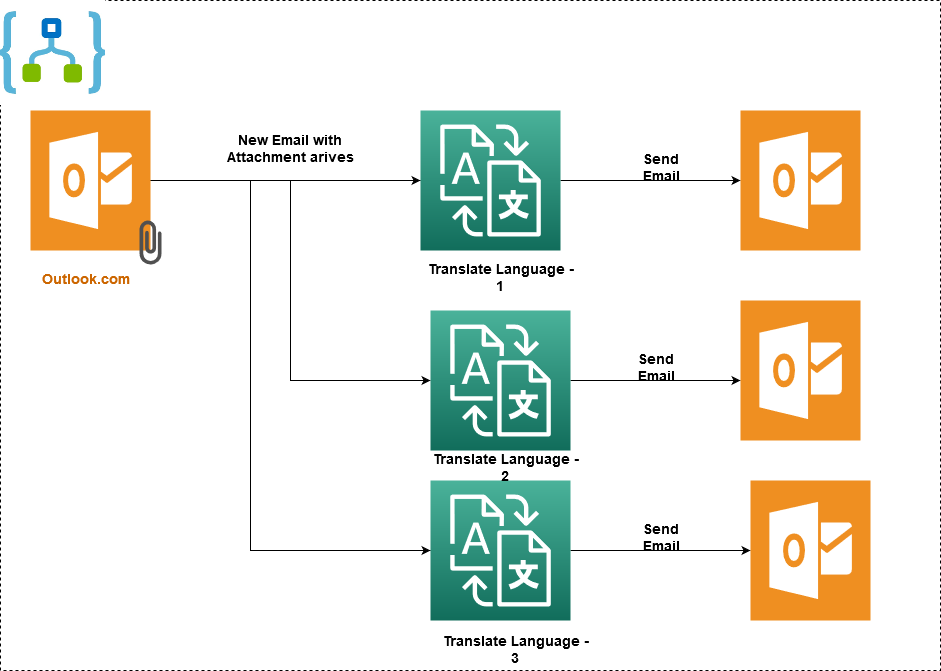
- The logic app detects a new email with a specific subject. The email has a file for the English language text in a text file as an attachment
- It uses a cognitive service translator and coverts the attachment contents into specified languages and sends the email with specific language content. Here, we convert a single email attachment into 3 different languages – Hindi, Spanish and French
Step 1: When a new email arrives (V2)
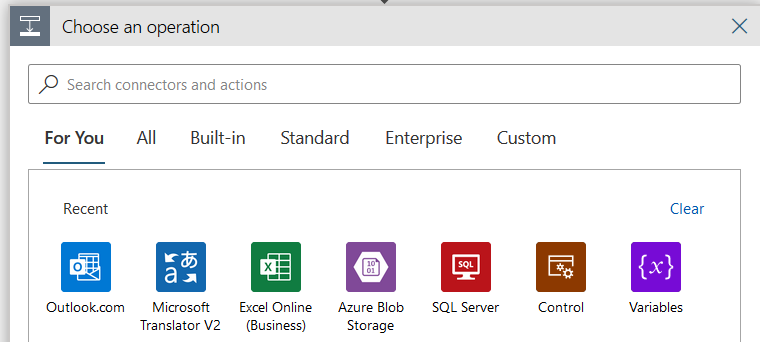
Create a blank template logic app in the Azure portal. The logic app requires a trigger for workflow execution. Here, search for Outlook.com connector and select When a new email arrives (V2).
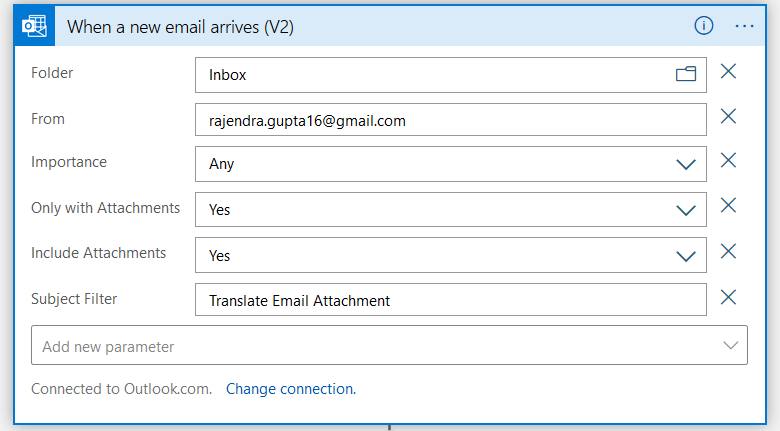
If you have not authenticated your outlook profile using a Logic app, it asks for your credentials and permissions. In the new email arrival form, enter the following.
- Folder: Here, we specify the folder name for monitoring the target email. By default, it monitors Inbox for emails
- From: If you receive an email from a specific email address, enter it to filter emails
- Importance: Any
- Only with Attachment: Yes. We want the Logic app to check the email with attachments only
- Include Attachment: Yes. We will covert attachment texts into a different language; therefore, select yes from the drop-down
- Subject Filter: Specify the subject for further filtering emails by logic apps
Step 2: Add Microsoft Translator V2 connector
Click on New Step and search for Microsoft Translator V2 connector.
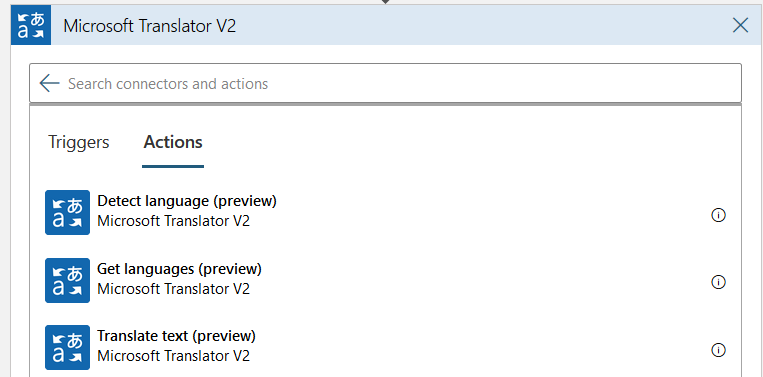
In the Microsoft Translator actions, choose the Translate text (preview).
It requires the following inputs.
- Connection name: You can specify any name for the connection
- Subscription key: Enter the access key from the azure cognitive service, we implemented earlier

Once the connection to cognitive service is successful, it ass you to specify the target language and text.
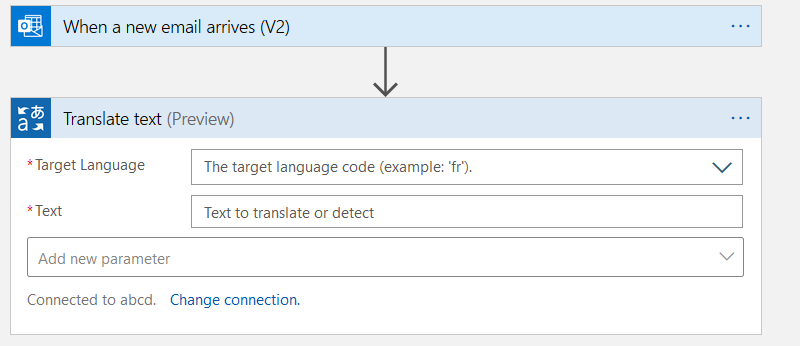
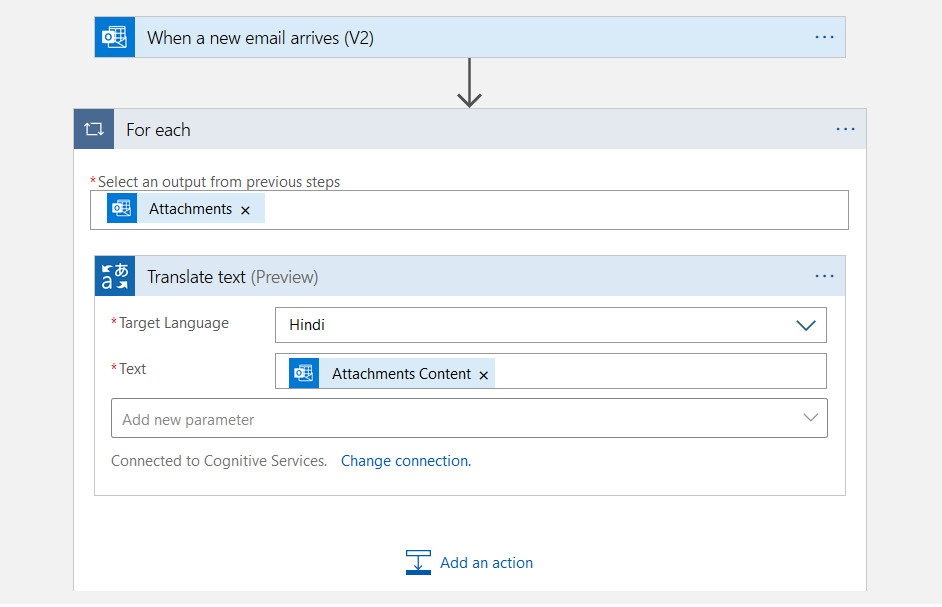
- Target Language – Hindi
- Text: Select the Attachment Content from the dynamic contents
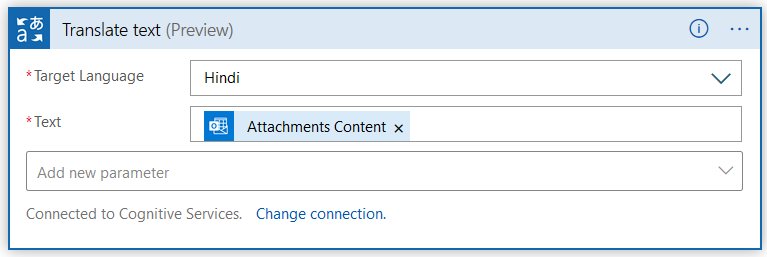
It automatically places a for each loop as shown below.
Step 3: Add Send an Email(V2) action
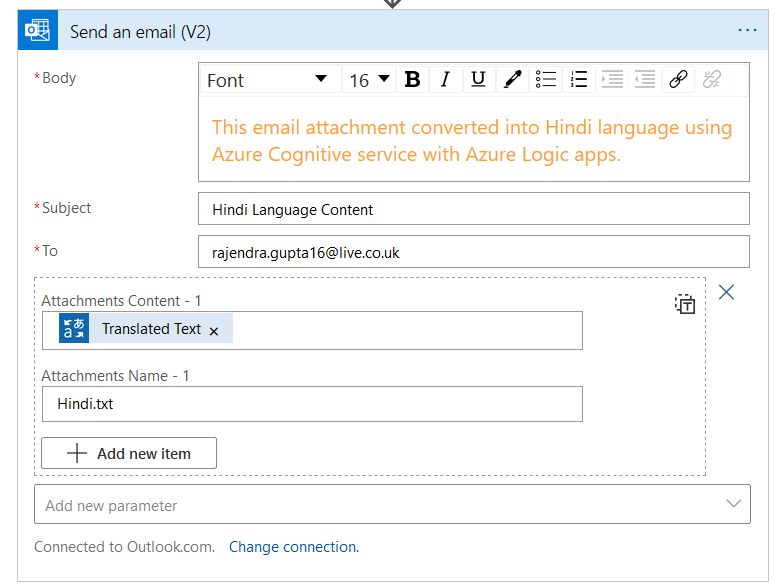
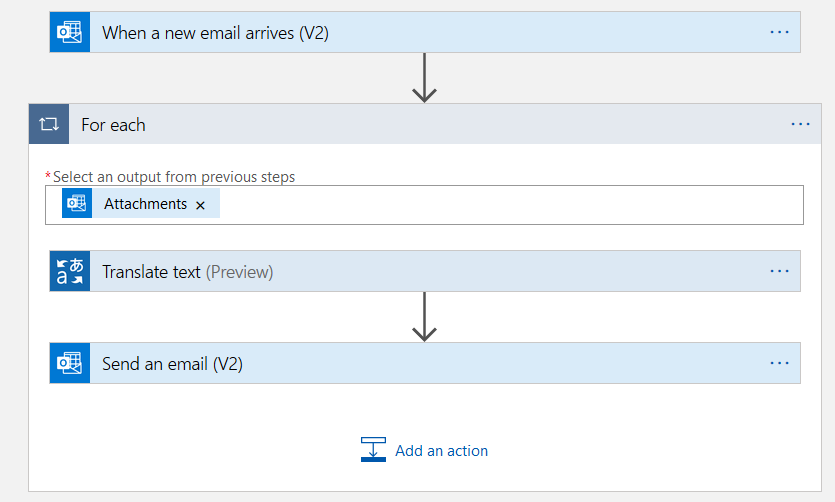
Click on Add an action and select Outlook.com connector with send an email (V2). In this send an email, enter the body, subject and recipient email address.
Click on Add new parameter and select Attachments. In the attachment, do the following configuration
-
Attachment Content – Select Translated text from the dynamic content
-
Attachment Name: Give a suitable name for the attachment

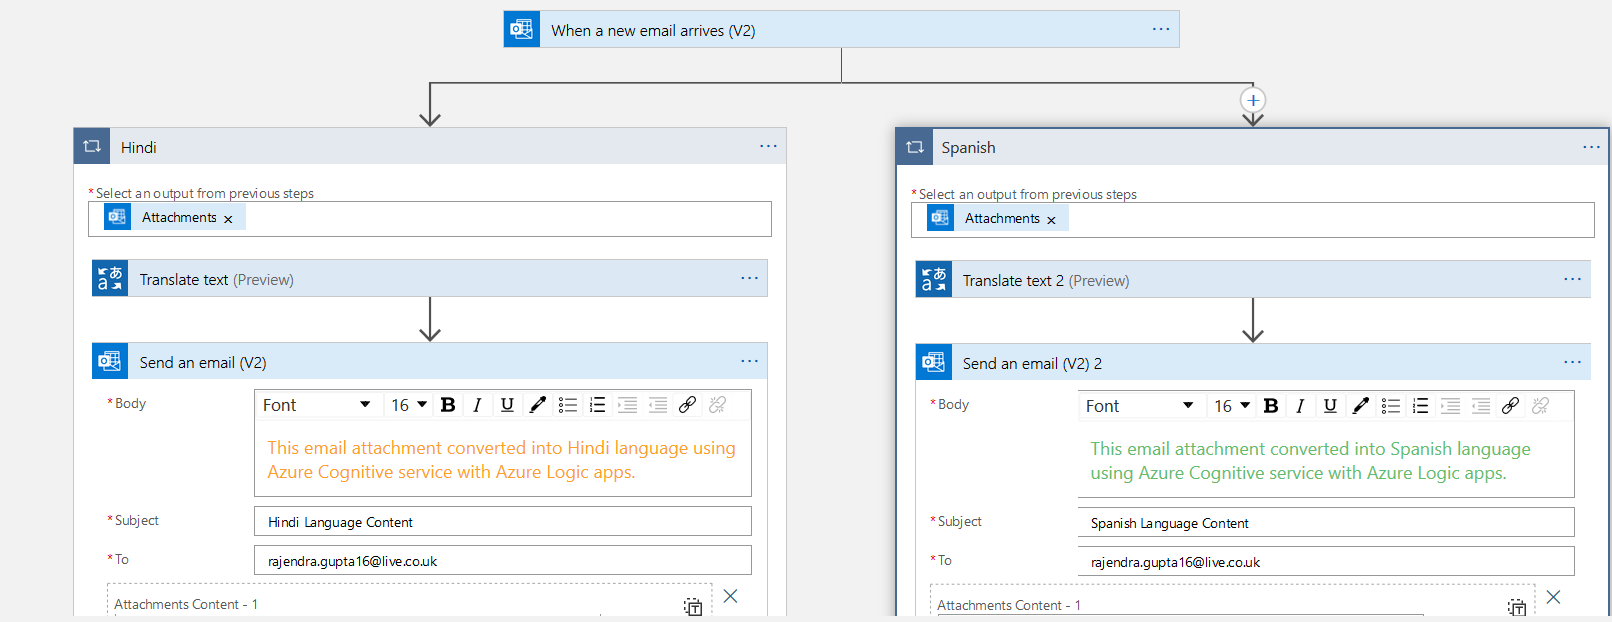
We have done Logic app configuration for converting text from English to the Hindi language. To covert the texts into different languages, we can either do a serial configuration or a parallel configuration. The parallel configuration executes all tasks parallelly and reduces the time in completing the workflow.
Step 4: Add a parallel branch
Click on the connector between the new email and for each block. It gives you an option to add an action or add a parallel branch.

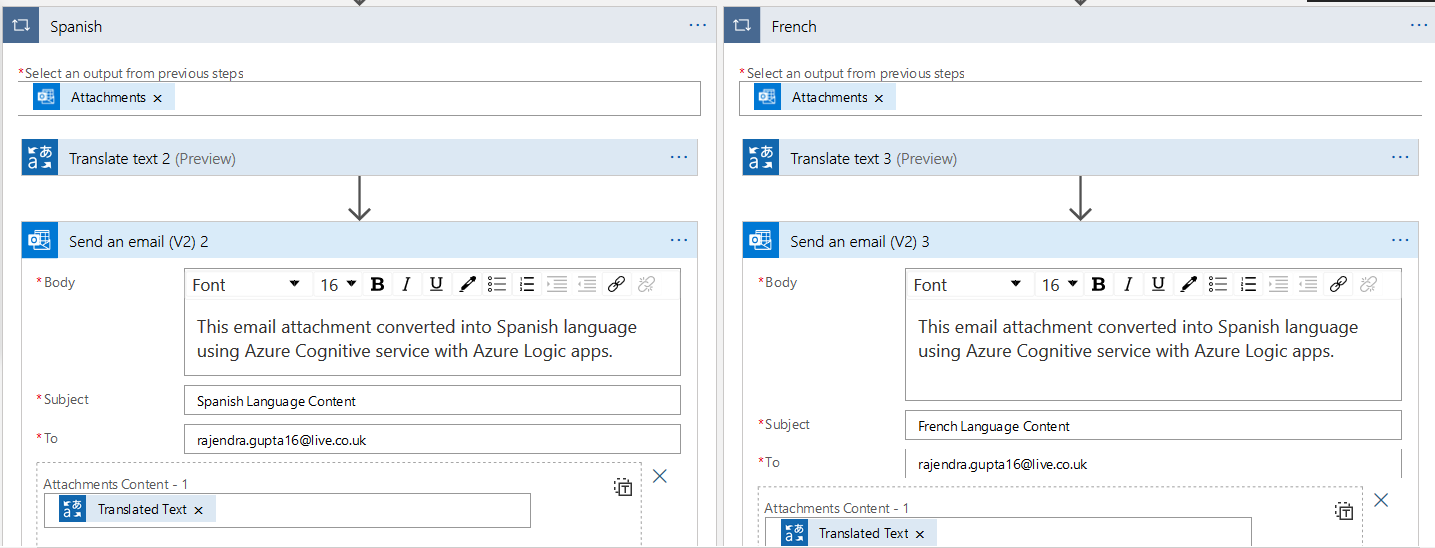
Click on Add a parallel branch. In the parallel branch, configure the Microsoft Translator V2 and send an email task for the Spanish language.
Similarly, add another parallel task for the French language as well.
At a high-level, once we execute the logic app and it detects an email with a specified subject and an email with an attachment, it triggers the workflow of the language transaction for Hindi, Spanish and French parallelly.
Step 5: Validations
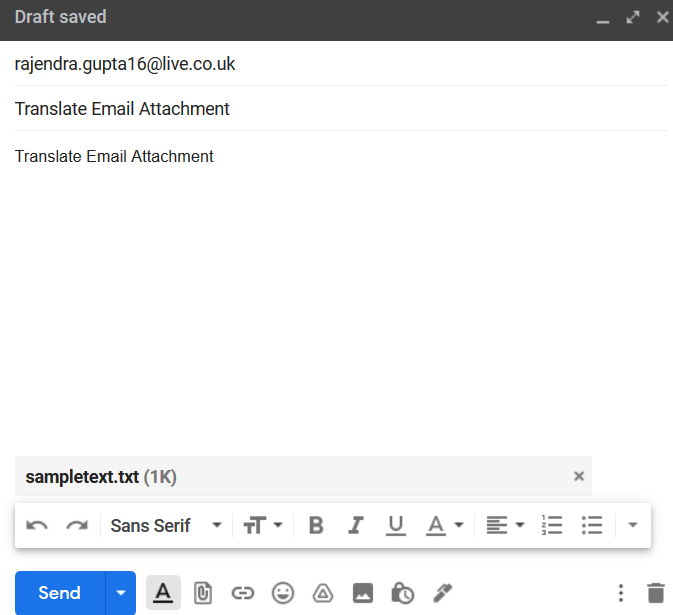
Save the Logic app and click on Run. Now, send an email with the “Translate Email Attachment” subject and attach the sample text in an attachment.
Send an email with a specified subject and text in the attachment.
As shown below, all the workflows steps are completed successfully.
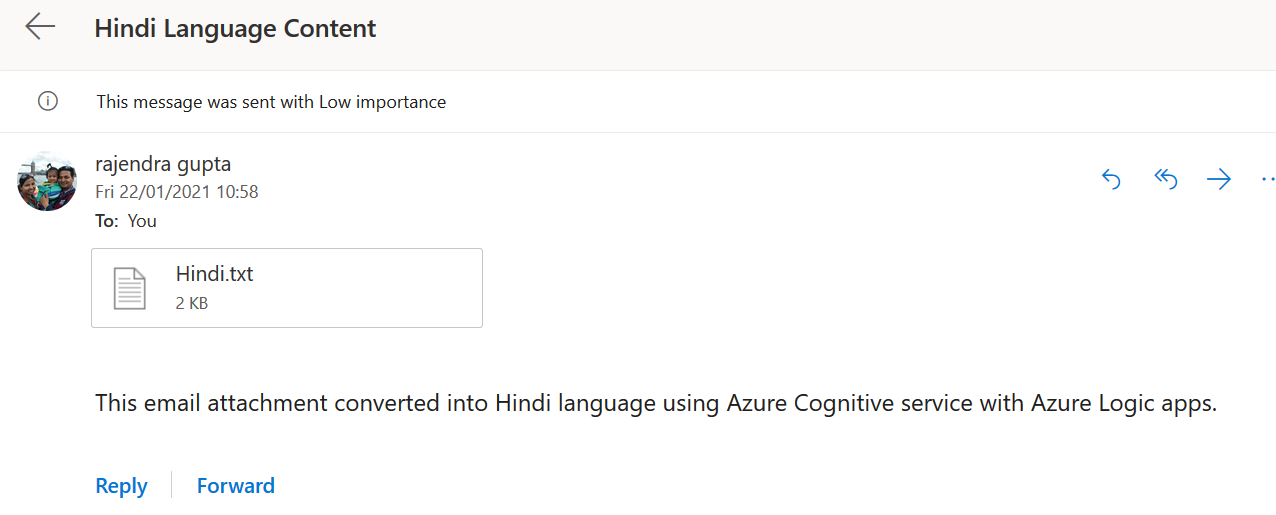
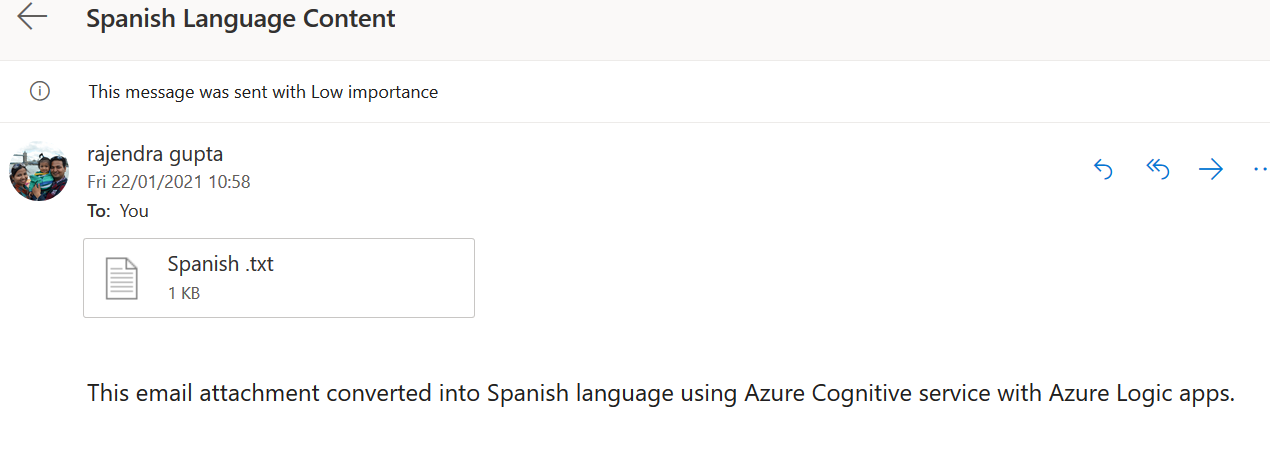
It triggers an individual email for Hindi, French and Spanish language.
Let’s view the original text and translated texts into the respective language.
Original text:
Translated Hindi text
Open the email for Hindi language content. It has an attachment named Hindi.txt.
Open the attachment and view the translated content from English to the Hindi language.
Translated Spanish text
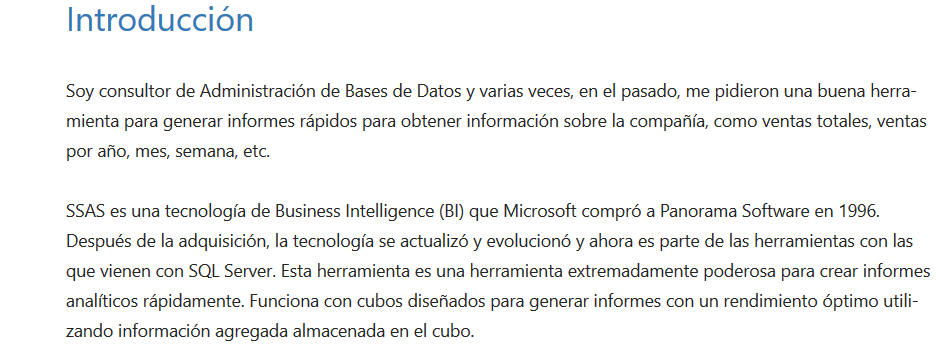
Similarly, we open the email for Spanish text attachment and view its content.
Translated French text
You can view the translated text from English to French language using the Azure Cognitive service with Azure Logic Apps in the below screenshots. We get the content configured in the email body to send an email(V2) action item.
French text
Conclusion
This article explored another azure automation feature using Azure logic apps for translating the document into a different language in near real-time. It supports around 70 languages for conversion. You can configure the logic app and Microsoft Translator for converting text into your required language automatically.
Table of contents
- Understanding PostgreSQL SUBSTRING function - September 21, 2024
- How to install PostgreSQL on Ubuntu - July 13, 2023
- How to use the CROSSTAB function in PostgreSQL - February 17, 2023

