This blog will share with you a way to copy data from an AWS RDS SQL Server database to an Azure SQL database.
Introduction
Data migration is nothing new. Data has been migrated from one server to another for decades. However, the need for data migration has increased exponentially ever since the advent of virtualization and cloud computing. Data needs to be migrated from one cloud database to another, from an on-premises database to a cloud database, or from one cloud platform to another cloud platform.
Data migration between different databases is a challenge for every enterprise. When you move from one platform to another, you need to find the best method to migrate your data to the new database. It can be done through BCP, SQL queries, or ETL software.
You might have a multi-cloud database environment where few databases exist on Azure SQL Database while the remaining databases are on AWS RDS SQL Server. Suppose you need to copy data from source AWS to destination Azure database. How do you do it? Let’s explore this in this article.
Requirements
To work with this article, you require the following setup.
-
AWS and Azure subscriptions
- Utilize Gain free, hands-on experience with the AWS platform using AWS free tier account.
- You can leverage Azure’s free account for building resources in the cloud.
-
AWS RDS SQL Server: You need a source database in the AWS RDS environment. If you already have it, follow the article Deploying an AWS RDS SQL Server and deploy a database.
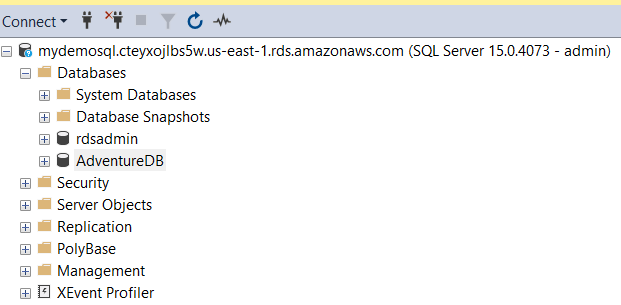
- I have this article’s following RDS instance and [AdventureDB] database.
-
Azure SQL Database: Deploy an Azure database that acts as a destination for data copy.
- I am using the following Azure DB for the demo in this article.

You can refer to SQL Azure on SQLShack for preparing an Azure Database.
Copy database from an AWS RDS SQL Server to Azure SQL Database
This blog post showcases how to utilize the Copy Activity in Azure Data Factory (ADF) to copy data between different cloud environments.
In the articles, Copy Data tool to export data from Azure SQL Database into Azure Storage and Copy Data tool to import data into Azure SQL Database from web sources, we explored the Azure Data Factory copy data tool. The Copy data tool in the Azure data factory helps you efficiently copy/transfer data from almost 100+ data sources.
First, deploy an Azure Data Factory (ADF) V2 instance to use the copy data tool. You can deploy a new ADF instance using Azure portal -> Data Factory.
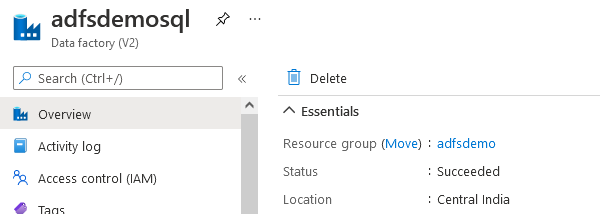
Click on the box – Open Azure Data Factory Studio.
It opens a few options such as Ingest, Orchestrate, Transforms data, and Configure SSIS.

Azure Data Factory contains Amazon RDS for SQL Server connector. It is supported in the following:
- Copy data tool with supported source or sink matrix
- Lookup activity
- GetMetadata activity
The Amazon RDS for SQL Server connector has the following properties.
- It supports SQL Server 2005 or above
- You can use SQL and Windows authentication for database connection
- You can either use a SQL query or the stored procedure for the data retrieval. It also supports parallel copy from the AWS SQL database
You can take advantage of the Copy activity to publish transformation and analysis results for business intelligence (BI) or application consumption.
Image reference: Microsoft docs
This Amazon RDS for SQL Server connector is supported for the following activities:
Let’s configure the copy data tool for data export from AWS RDS SQL Server to Azure SQL Database.
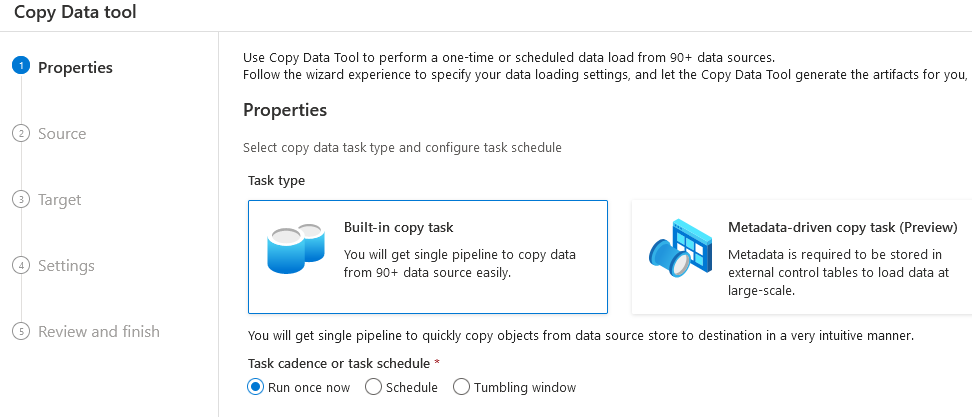
Step 1: Properties
The first step is to choose the task type and task cadence. The Amazon RDS for SQL Server is available under the Built-in copy task. The task cadence or schedule allows you to schedule copy data tools for one-time execution on a specific schedule or using the tumbling window.
Step 2: Source
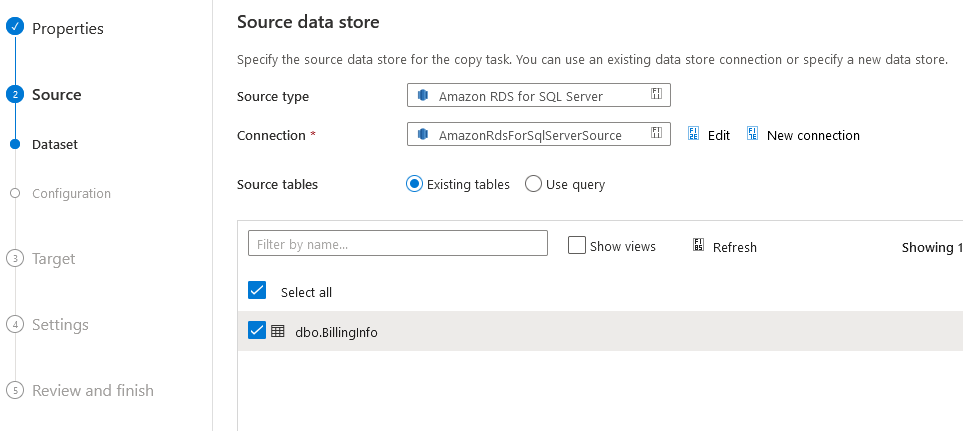
As specified earlier, my database source is AWS RDS SQL Server. Therefore, select the source type – Amazon RDS for SQL Server.
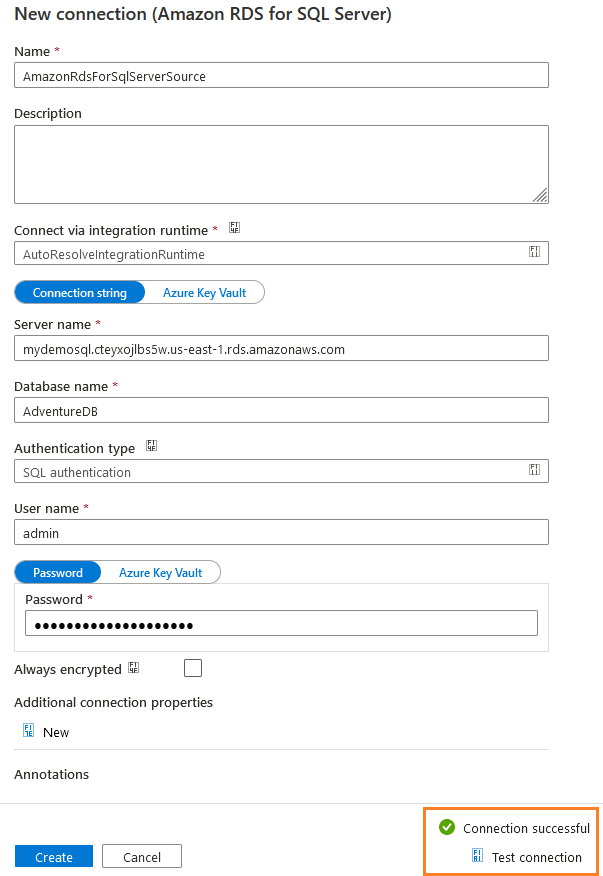
Click on the new connection and specify the following inputs.
- New connection name
- Connect via Integration runtime: AutoResolveIntegrationRunTime
- Server name: Enter the AWS RDS SQL Server endpoint
- Database Name: Specify the source database name from which we want to export data
- Authentication Type: Choose SQL authentication and enter your credentials in the User Name and Password field.
Once you provide the required information, click on Test connection. As shown below, the copy data tool can successfully connect to the AWS database.
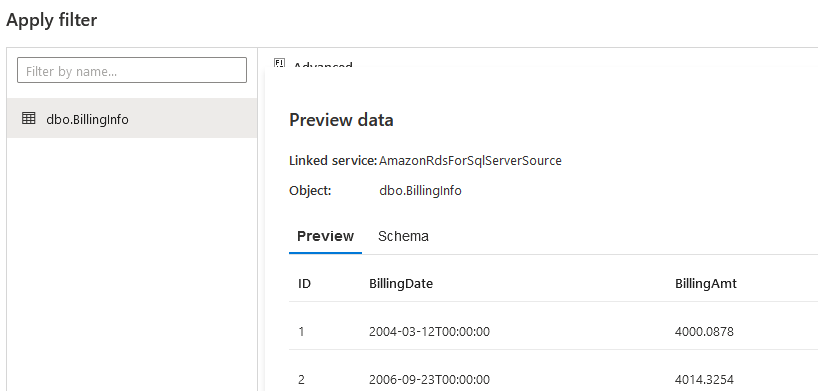
Once it creates the connection, you can select the source table or specify a SQL query. I have a sample table [BillingInfo] in the AWS RDS database. It is a small table with 10 records on it.
Select the table we wish to export into the Azure database and click Next. You can also check the table schema before importing it into the destination database.
You can preview data before importing it into the destination database in the next step.
Target data set configuration
The next step is defining the target type and creating a new connection for Azure SQL Database.
The data tool automatically fetches the Azure SQL Server details for your subscription. You can select the Azure server name, database name from the drop-down menu. However, you need to specify the credentials you wish to use in the data tool. If you have stored your credentials in the Azure key vault,
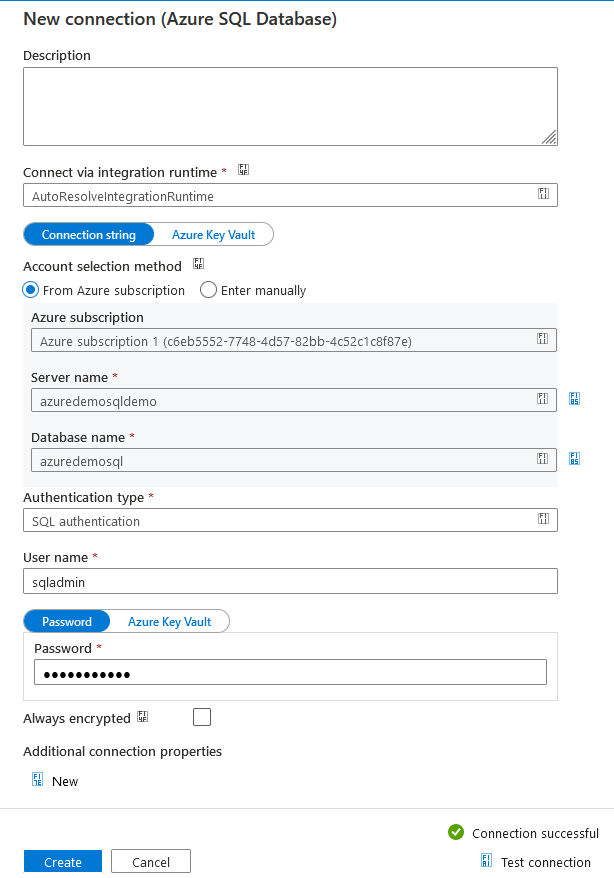
The wizard can create the destination object automatically based on the source database schema. As shown below, it creates the destination table similar to the source table. However, if you have an existing table, click on the option – Use existing table and select the destination table.
The next step is table mappings. You must validate the correct data mapping for successful data import or export operations with different source and destination tables. Here, in my demo, it uses the same column names in both AWS and Azure databases.
As shown below, it creates the source and destination column mappings with supported data types.
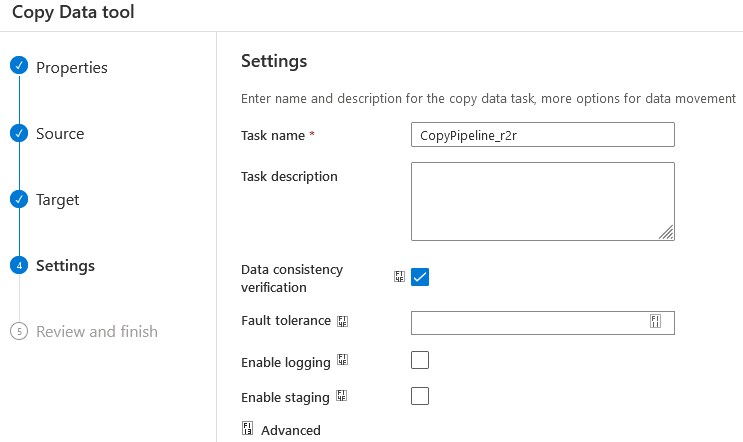
In the next step, specify the task name, description. The wizard can do the data consistency verification for data verification between source and destination databases.
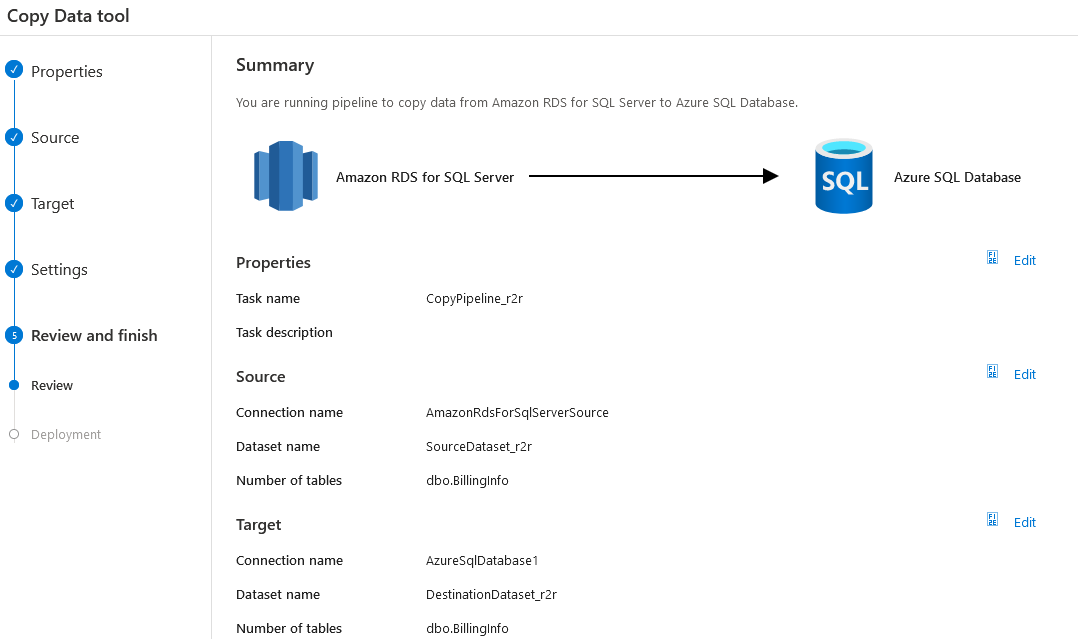
The last step is to review the source, destination connections, database, and object names for the data import from AWS RDS SQL Server to Azure SQL Database.
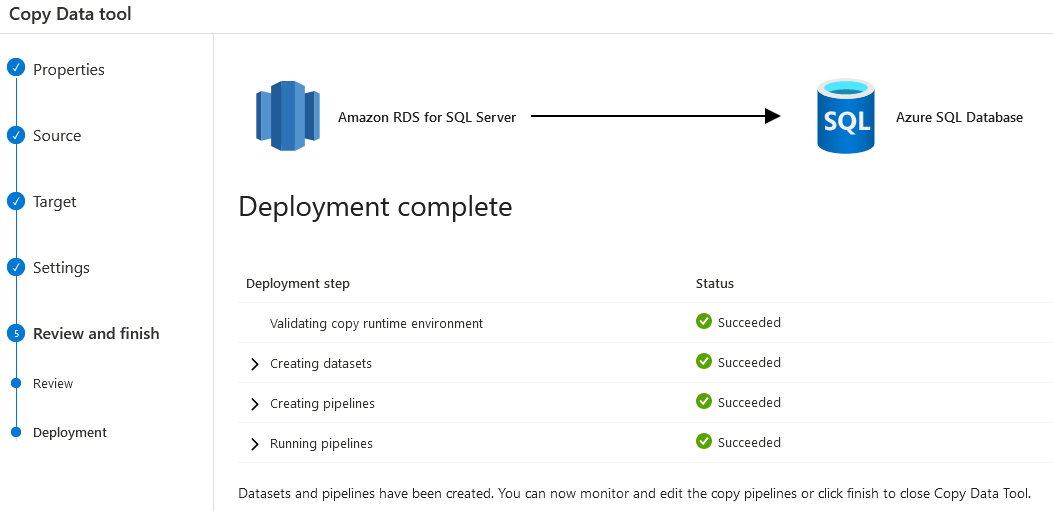
Click on Finish, and the process creates datasets, pipelines and validates the copy runtime environment.
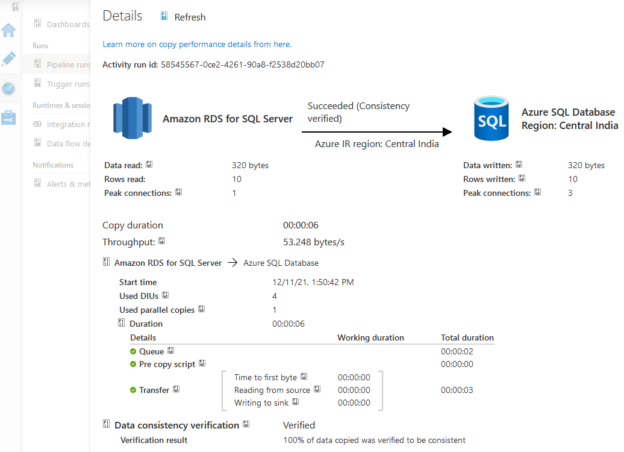
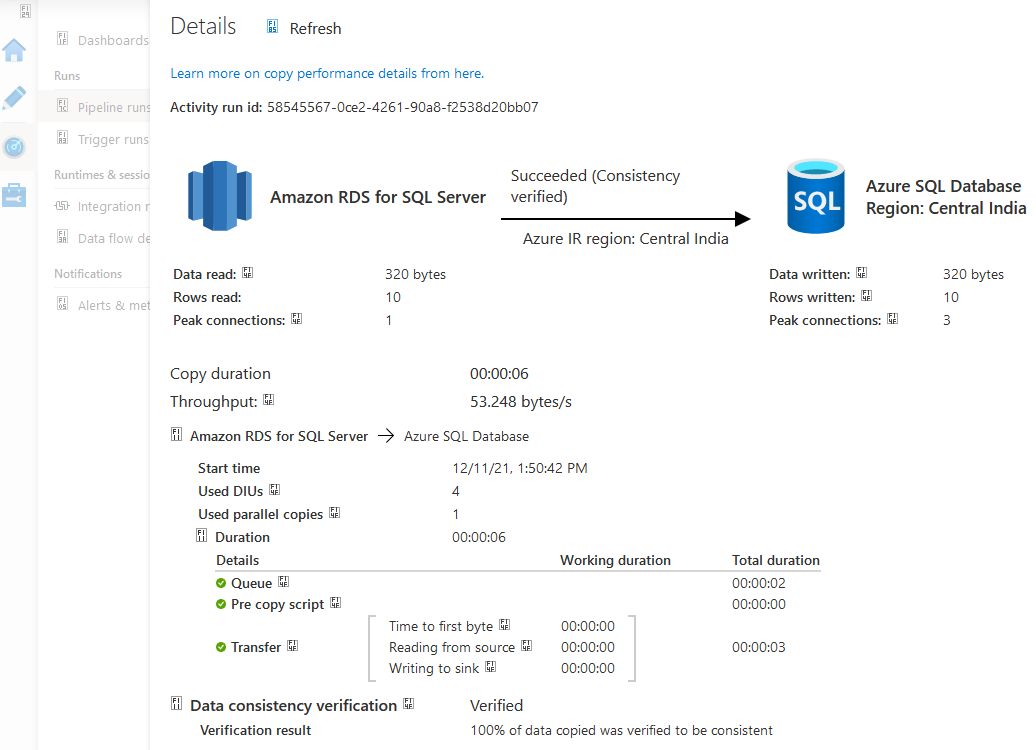
The monitoring Azure data factory pipeline run shows that the data copy task is successful.
The following screenshot gives details about the source and destination data transfer.
Source data
- Source ( Amazon RDS for SQL Server)
- Source data read: 320 bytes
- Rows Read: 10
- Peak Connections: 1
Destination data
- Destination: Azure SQL Database
- Data written: 320 bytes
- Rows written: 10
- Peak connections: 10
Copy task
- Status: Data transfer succeeded ( Consistency verified)
- Copy Duration: 00:00:06
- Used DIUs: 4
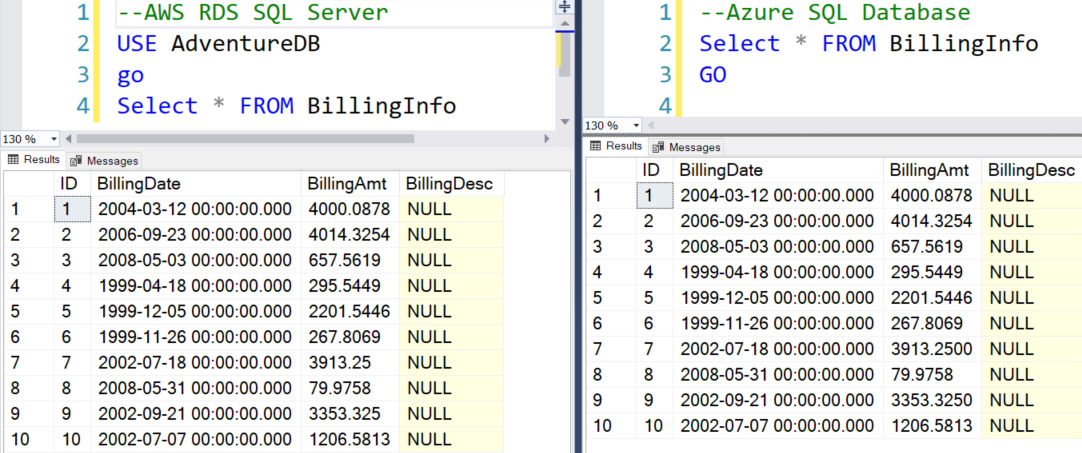
Now, let’s connect to AWS RDS SQL Server and Azure SQL Database for data verification. As shown below, we have successfully transferred data to the destination Azure database.
Conclusion
This article explored transferring data across different cloud databases, i.e., from AWS RDS SQL Server to Azure SQL Database. Similarly, you can utilize the copy data tool in Azure Data Factory for data transfer as per your requirement.
We hope you enjoyed reading about migrating data across different cloud databases. If you have any questions, don’t hesitate to contact us.! You can also check out Azure blog posts for more helpful tips and tricks.
- Understanding PostgreSQL SUBSTRING function - September 21, 2024
- How to install PostgreSQL on Ubuntu - July 13, 2023
- How to use the CROSSTAB function in PostgreSQL - February 17, 2023

