This article explores Azure CLI scripts for deploying Azure Container Instances with SQL Server 2019 image.
Introduction
In the article, Deploying Azure Container Instances for SQL Server 2019, we explored how you leverage Azure infrastructure for deploying containers. The Azure container instances run the serverless docker contains in the Azure cloud with simplicity and speed. The containers do not require the installation of the SQL Server. You can leverage software images with your custom configuration.
Use Azure Container Instances to run serverless Docker containers in Azure with simplicity and speed.
If we deploy containers through the Azure portal, it might be a bit time-consuming and repetitive process. You need to go to Azure services, navigate to container instances, provide inputs for container name, region, SQL Server image, vCPU, Memory, DNS name, port number, tag. The Azure CLI provides various commands to do repetitive tasks using simple configuration scripts.
This article uses Azure CLI for deploying an isolated docker container with SQL Server 2019 image and configures a fully qualified domain name (FQDN).
Requirements
You require an Azure subscription for Azure resource deployment, and you can leverage Azure’s free account to build in the cloud.
Install Azure CLI
You can use Azure CLI from the integrated Azure cloud shell or install it locally on your system. To explore the Azure cloud shell, refer to the following articles.
To install CLI locally, navigate to Microsoft docs and choose your platform for installation. It supports Windows, macOS, Linux, Windows subsystems for Linux. This article uses Windows OS for Azure CLI. We can install Azure CLI on Windows in Graphical mode or using PowerShell script.
Open Administrative PowerShell editor and execute the following script.
|
1 |
Invoke-WebRequest -Uri https://aka.ms/installazurecliwindows -OutFile .\AzureCLI.msi; Start-Process msiexec.exe -Wait -ArgumentList '/I AzureCLI.msi /quiet'; rm .\AzureCLI.msi |
It downloads the CLI latest version and installs it. If you have an older version of CLI installed, it automatically upgrades it. Once installed, restart the Windows PowerShell to use CLI scripts.
The PowerShell screen displays the installation progress of Azure CLI on Windows.
Deploying SQL server 2019 on Azure Container Service
In this section, we will explore CLI commands for installing SQL Server 2019 on Azure container service.
Connect to Azure portal interactively
In the Windows PowerShell, run the az login and connect to the Azure portal with your credentials in a browser. It gives the following prompt once you are authenticated successfully in Azure using PowerShell.
Once you log in interactively in Azure, you can close the browser window.
The CLI prompt returns the JSON output as shown below:

Create a new Azure resource group(RG).
You can use an existing resource group or deploy a new resource group for deploying Azure Container Instances. It uses the CLI command – az group create and requires resource group name, region.
The following command creates a resource group [azurecontainercli] in the east US location.
|
1 |
az group create --name azurecontainercli --location eastus |
In the JSON properties section, it returns Succeeded for successful resource group deployment.
Creating a Container in Azure Container Instances (ACI)
In this step, we create a container in the resource group, azurecontainercli. The container has the following configurations.
- Operating system: Linux
- vCPU: 2
- Memory:2 GB of memory
- Public IP address: Yes
- dns-name-label: mysqlserverlinux
- SQL Server Linux image: mcr.microsoft.com/mssql/server:2019-CU12-ubuntu-20.04
- Note: SQL Server on Linux requires at least 2 vCPU and 2 GB memory as per Microsoft documentation
The SQL Server requires the following environment variables values for configuring in a container.
- ACCEPT_EULA=Y: This parameter confirms the acceptance of the End-User Licensing Agreement (EULA). It is a mandatory setting for SQL Server installation
- MSSQL_SA_PASSWORD: It is the SQL Server SA user password. Always use a strong (complex) password of a minimum of 8 characters
- port 1433: It maps to TCP port 1433 for accepting SQL Server connections
|
1 |
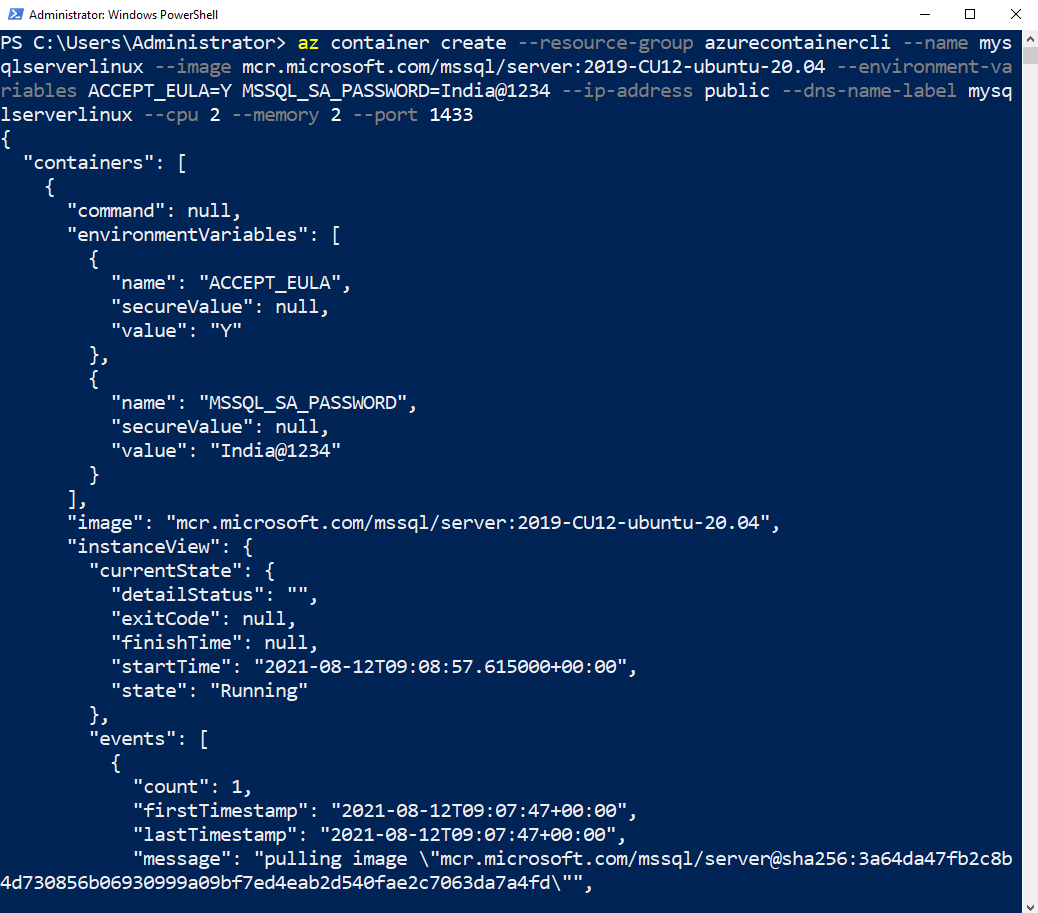
az container create --resource-group azurecontainercli --name mysqlserverlinux --image mcr.microsoft.com/mssql/server:2019-CU12-ubuntu-20.04 --environment-variables ACCEPT_EULA=Y MSSQL_SA_PASSWORD=India@1234 --ip-address public --dns-name-label mysqlserverlinux --cpu 2 --memory 2 --port 1433 |
Once you execute the az container create command, wait for few minutes, and it returns container metadata in JSON format. Initially, its status is Running( for a few minutes), as shown below.
The container metadata includes environment variables – ACCEPT_EULA, MSSQL_SA_PASSWORD, start time, end time, status, and progress messages.

The container is deployed successfully with SQL Server image. Now, we will explore a few CLI commands to return its properties.
CLI script to return the Azure Container Instance status
We can use Azure CLI command az container show to retrieve the current container instance. It can help us to verify whether the container is stopped or running state.
This script requires the following inputs:
- Resource group name
- Container name
|
1 |
az container show --resource-group azurecontainercli --name mysqlserverlinux --query "{Status:instanceView.state}" --out table |
As shown below, our deployed container with SQL Server 2019 image is in a Running state.
CLI script to return the IP address and FQDN
We require either a fully qualified domain name (FQDN) or public IP address to connect SQL Server on Linux in Azure container Instance. We use the az container show command with the following script, and it returns the IP address and FQDN as shown below.
|
1 |
az container show --resource-group azurecontainercli --name mysqlserverlinux --query "{IP_Adress:ipAddress.ip,FQDN:ipAddress.fqdn}" --out table |
Azure CLI script to return the container metadata
As we saw earlier, once we deploy the container, it returns metadata in JSON format. We can get the JSON metadata using the following script.
|
1 |
az container show --resource-group azurecontainercli --name mysqlserverlinux |
Validate SQL Server connection using SQLCMD
We can connect SQL Server in Azure container through client tools such as Azure Data Studio, SQL Server Management Studio, or command-line utility SQLCMD.
You can use the following links for downloading the SSMS, Azure Data Studio, or SQLCMD.
- SQL Server Management Studio: https://docs.microsoft.com/en-us/sql/ssms/download-sql-server-management-studio-ssms?view=sql-server-ver15
- Azure Data Studio: https://docs.microsoft.com/en-us/sql/azure-data-studio/download-azure-data-studio?view=sql-server-ver15
- SQLCMD: https://docs.microsoft.com/en-us/sql/tools/sqlcmd-utility?view=sql-server-ver15
In this article, we use the SQLCMD for connecting to SQL Server on Container. To connect, open the command prompt and run the query with your container IP address and SA password.
|
1 |
sqlcmd -S 20.81.36.216 -U SA -P India@1234 -Q "select @@version" |
The above SQLCMD command has the following arguments.
- -S: It specifies a container IP address
- -U: The user name for SQL Server credentials
- -P: Password for the user-specified above
- -Q: Query that we want to execute
We used the SQL Server 2019 CU12 image in the container. The query returns the same information in the SQLCMD script output.
Stop an Azure Container Instance using Azure CLI
We can stop\start the Azure Container instance in few seconds to save the overall usage and cost. The CLI command to stop container is az container stop.
In the script, use the following parameters:
- -n: container name
- -g: resource group name
|
1 |
az container stop -n mysqlserverlinux -g azurecontainercli |
The script does not return any output that means it executed successfully.
As discussed earlier, you can use the az container show to verify the container status. As shown below, its status is STOPPED.
|
1 |
az container show --resource-group azurecontainercli --name mysqlserverlinux --query "{Status:instanceView.state}" --out table |
Start an Azure Container Instance (ACI)
Stating an Azure Container Instance is similar to stopping it. Use the CLI command az container start, and it boots up quickly.
|
1 |
az container start -n mysqlserverlinux -g azurecontainercli |
The screen shows the Running state for a few seconds while the container is getting ready with a new public IP address. This command as well does not return any output.
Once we start the container instance, its public IP address changes. In my case, the old IP address( before stopping) is 20.81.36.216. You need the new IP address for connecting with the database instance.
Let’s verify the new IP address using the az container show command as stated earlier. As we can see, the new IP address is 20.102.10.186.
- Note: Use the FQDN to connect to SQL Server on Azure Container Instance as it does not change after a restart
Clean up the Azure Container Instance (ACI)
You should clean up Azure resources if they are not in use. In my lab environment, I created the container instance for writing up this article. Therefore, use the CLI command – az container delete with resource group and container name to delete the container.
|
1 |
az container delete -n mysqlserverlinux -g azurecontainercli |
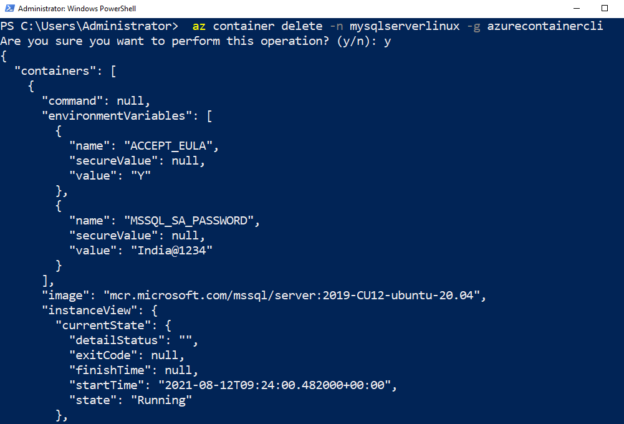
It gives the message: Are you sure you want to perform this operation (y/n). Press Y to proceed with container deletion.
The CLI script returns the JSON for the container, as shown below.
Conclusion
This article explores deploying Azure CLI commands for the Azure Container Instance with SQL Server 2019 image. We further learned few more CLI commands to check container status, FQDN, IP address, stopping, starting, and deleting the container. You can explore container instances documentation for more details.
Table of contents
| Deploying Azure Container Instances for SQL Server 2019 |
| Create Azure Container Instances for SQL Server 2019 using Azure CLI |
| Store SQL Server files in Persistent Storage for Azure Container Instances |
- Understanding PostgreSQL SUBSTRING function - September 21, 2024
- How to install PostgreSQL on Ubuntu - July 13, 2023
- How to use the CROSSTAB function in PostgreSQL - February 17, 2023


