In my last article, I show how to create Database Mirroring for high availability. This time, I will work on Log Shipping.
The Log Shipping as the name says ships the Transactional Log from the Primary Servers to the Secondary Servers.
The Log Shipping process consists in creating a Transaction Log Backup on the Primary Server, Copy the Log Backup to the secondary and restore the database.
Servers used
The SQL Server Log Shipping, requires a Primary Server, which will be used as the main Server with a database. If it fails, the other server (Secondary Server) will be used to replace the Principal Server. Optionally you can use a third server to monitor the Log Shipping. Log shipping applies to a select database.
Once the principal is fixed, you can return using the Principal server.
If you want an automatic failover (when the principal server fails, the Mirror Server will be automatically activated to replace the principal server), a third Server is necessary.
Requirements
- You need three SQL Servers or at least three SQL Server Instances (three instances can be used for testing purposes only, but it is not recommended for production environments). In this sample we will use 2 Servers.
- You can use SQL Server Enterprise, Standard, Business Intelligence or Web Edition for this article.
- Create a folder and assign permissions to the SQL Server Agent Account to this folder on the principal server. In this example, the folder name will be logshipping in the c:\ drive.
- Create a folder and assign permissions to the SQL Server Agent Account to this folder on the secondary server. In this example, the folder name will be destination in the c:\ drive.
Getting Started
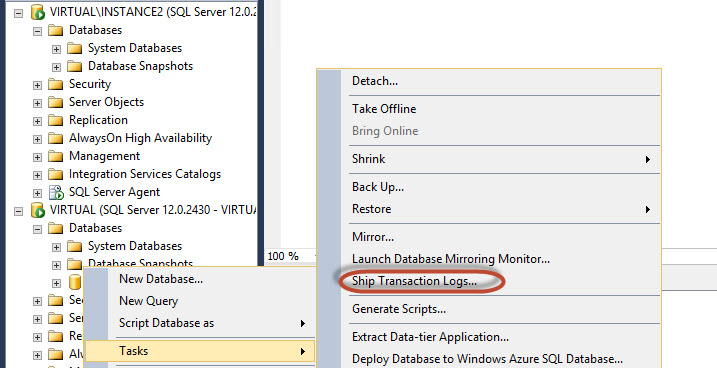
In the SQL Server Primary Server, right click on the database to LogShip and select Tasks>Ship Transaction Logs.
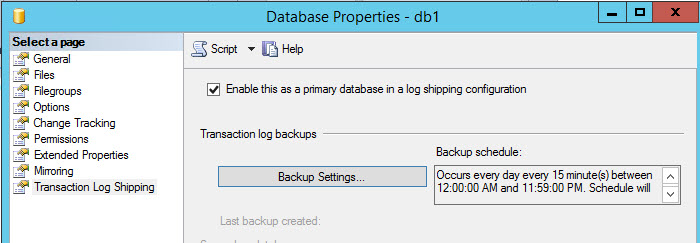
Press The Backup Settings option
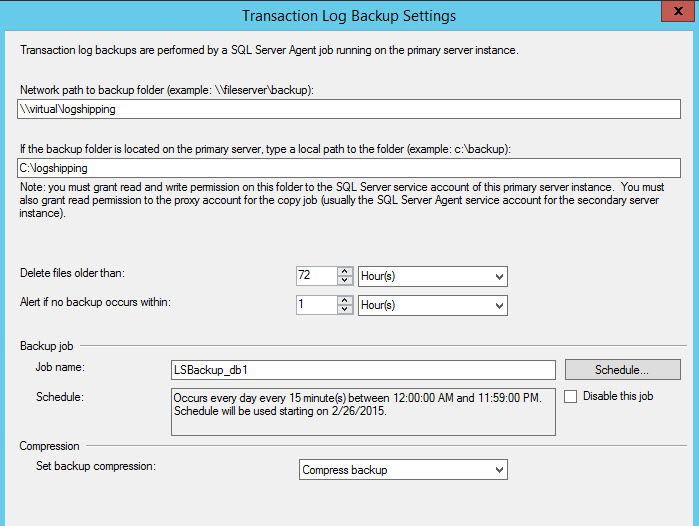
Specify the network path and the local path in the primary server of the folder where the Transaction log backups will be stored. You can rise an alert if the backup does not occur and delete older files within a determined time. The Job name is LSBackup_db (Log Shipping Backup). With the Schedule button you can Schedule de backup every to the time of your preference. By default, it is scheduled every 15 minutes. You can also Disable the job with this Window or compress the backup.
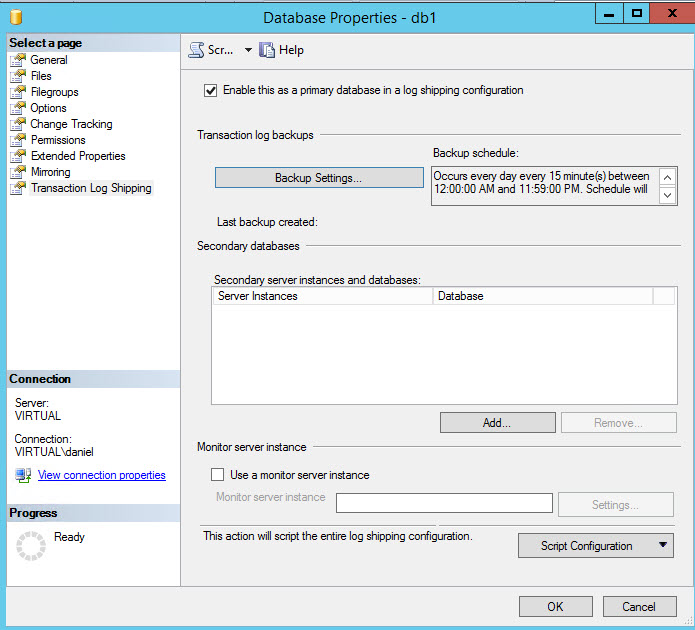
In order to add a secondary Server, press the Add button. You can add multiple Secondary Servers in Log Shipping. Additionally, you can use a third instance to monitor the Log Shipping process by checking the Use a monitor server instance and specifying the settings. In this sample, we will not include a Server Monitor. In this example, we are not going to include a Monitor.
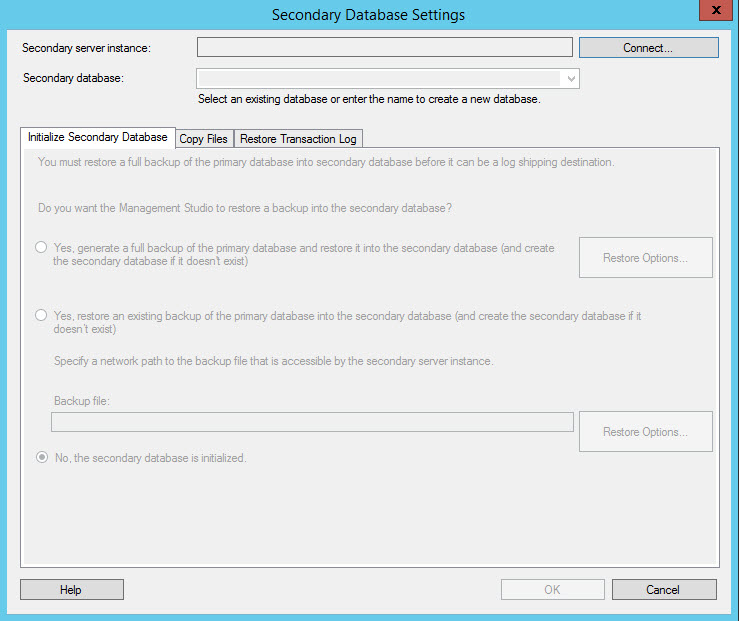
In the Secondary Database Setting Window, press Connect and specify your Secondary Server credentials. Once connected, the options to initialize the secondary database will be enabled.
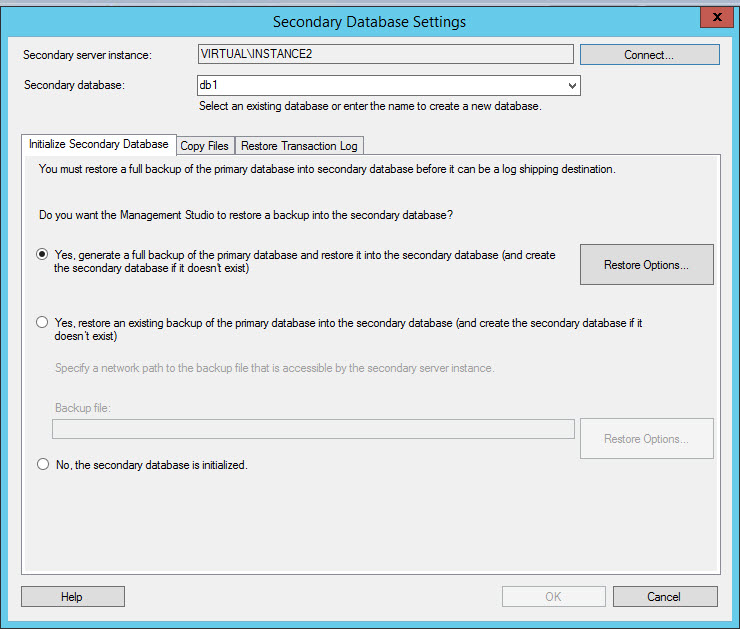
In the Initialize Secondary Database Tab, if you do not have a backup already created on the secondary machine from the primary machine, select the option yes to generate a full backup. If you already have a backup, select the option Yes, restore an existing backup. With the Restore Options, you can select the restore configurations. If you have an already restored database on the secondary server, select the No, the secondary database is initialized. In this example, the first option will be used.
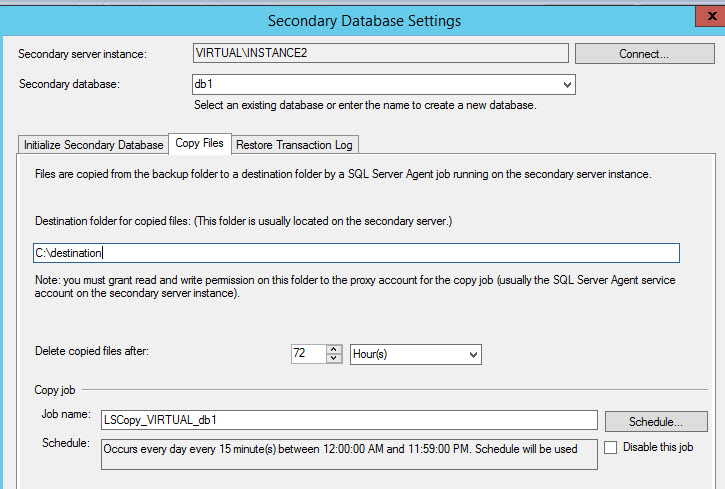
In the Copy Files tab, select the destination folder. In the destination folder, you will have the Transaction log backups created and copied from the primary server. You can delete copied files after a specified time. The folder was created in the requirements of this document. You can delete files copied after a specified period and schedule the copies according to your preferences. The job created will be LSCopy_MachineName_DatabaseName. By default, the copy is programmed every 15 minutes.
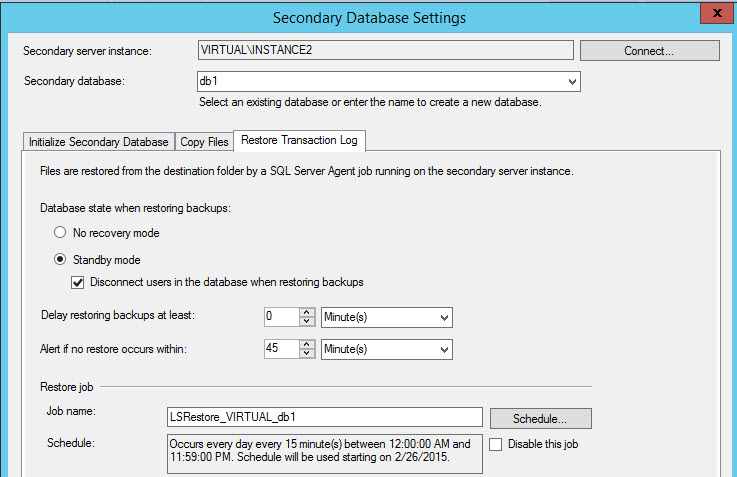
- The third tab is used to restore the transactional logs. There are two restoring options:
- No recovery mode. Is an option to restore the Transaction Logs in a non-recovery status. This option is faster because it does not need to analyze the uncommitted transactions. This option does not allow querying the database from the Secondary Server.
Standby mode. This option allows you to have a read only Database on the secondary database, this option has a higher overhead that the non-recovery node, but it has the benefit that you can access the Database. You can also disconnect the users when restoring the backups to increase the performance. In this example, we will use this option.
You can also have a delay restoring backups. That is in case that the principal server has an error and we do not want to restore the backup with that problem. You also can configure an alert if the restoration fails.
The job name is LSRestore and you can schedule the restore option with the schedule button according to your needs.
By default, the restoration is every 15 minutes.
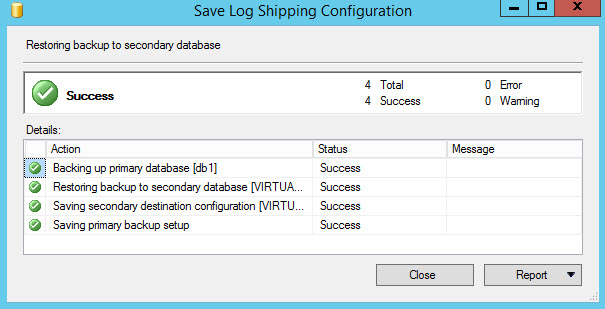
If everything is OK, you will receive Success status messages. The typical error messages are related to folder permissions. If you have problems, make sure that the agent service has permissions to the folders configured.

Figure 9. The success message.If everything is OK, you will be able to see a Standby / read only database on the secondary server.

Figure 10. The read only database on the Secondary Server
Now you are ready. You have a Read only database that synchronizes with the primary Database.
If you update information on tables of the Primary Server in the db1 database, this information will be syncronized on the secondary server after some minutes (depending on the schedules that you programmed to backup, copy and restore).
If you go to the SQL Server Agent of the primary database, you will see LSAlert job which is an alert if the backup fails and the LSBackup to create a backup of the primary database.

The secondary Server has 3 jobs associated, the LSAlert if the restoration fails, the LSCopy to copy the backups from the primary server to the secondary server and finally the LSRestor to restore the database.

- PostgreSQL tutorial to create a user - November 12, 2023
- PostgreSQL Tutorial for beginners - April 6, 2023
- PSQL stored procedures overview and examples - February 14, 2023

