Introduction
After discussing the basic features of Azure Machine Learning in my previous article, Introduction to Azure Machine Learning using Azure ML Studio, we will look at techniques of data cleansing in Azure Machine Learning. Data Cleansing or Data Cleaning is an important aspect when it comes to predicting as quality data will improve the quality of data prediction.
There are multiple options for Data Cleansing in Azure Machine Learning, such as removing duplicate data, replacing missing values, and data normalization. Before performing any data cleansing, it is important to summarise data. Data summarization can be achieved via Summarize Data control.
Summarize Data
There are no parameters to be configured in the summarize data control. Let us configure Summarize Data with sample data, as shown in the below screenshot.
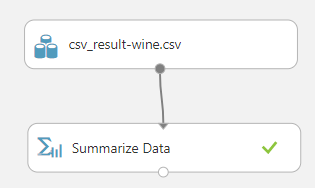
After the summarization, you will see a lot of statistical data such as Count, Unique Value Count, Missing Value Count, Min, Max, Mean, Mean, Deviation, 1st Quartile, Median, 3rd Quartile, Mode, Range, Sample Variance, Sample Standard Deviation, Sample Skewness, and Sample Kurtosis.
The following screen shows a few columns for the summarized data.
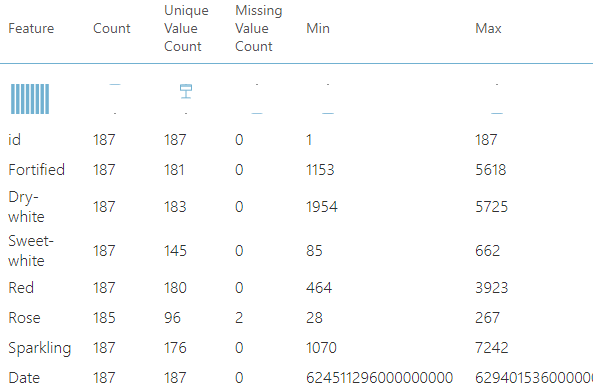
Skewness and Kurtosis measures indicate data distribution so that you can decide what columns need to be normalized.
Selecting the required columns
In machine learning, you may not need all attributes for prediction. Therefore, you have the option of selecting only the columns that you need. For example, you may not need to address columns to predict bike buyer patterns. Therefore, you can exclude those columns using Select Columns in Dataset control in the Azure Machine Learning.
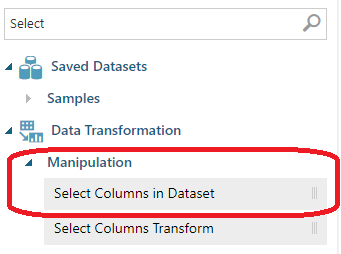
Let us use the adventure works data set. For this purpose, the data set of vTargetMail in the AdventureWorksDW is exported to a CSV file and imported to Azure Machine Learning.
Let us drag and drop the Select Columns in Dataset to the new experiment, and there are a few configuration options in that control. You can select the columns either from their names or rules.
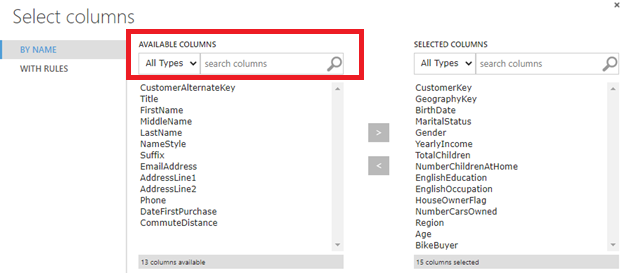
As shown in the above screenshot, you can choose the required columns. In the marked AVAILABLE COLUMNS, you can filter columns by data types or by typing the name of the column.
If you want to remove only a few columns, you can use the WITH RULES option. In this configuration, you can choose the columns that you want to exclude, as shown in the below screenshot.
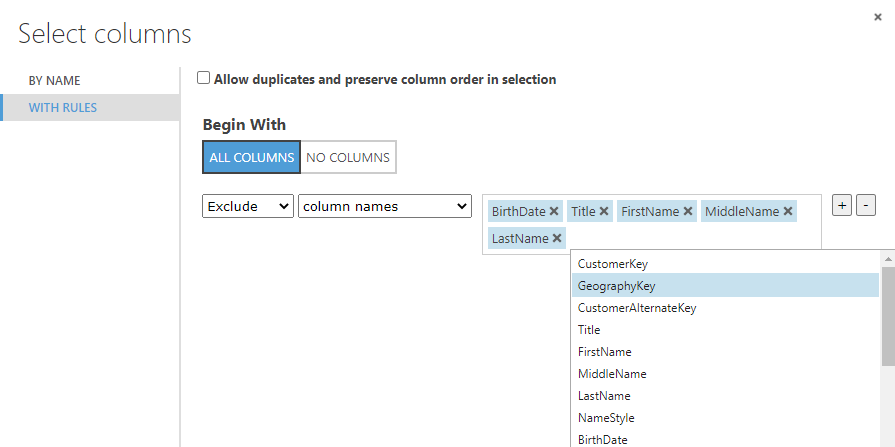
Depending on the number of columns that you want to eliminate, you can choose the required option. The following will be the final experiment once it is configured.
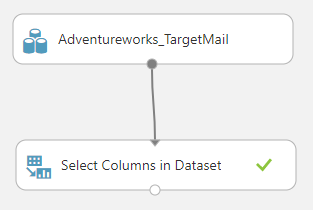
After you run the created experiment, you will see that eliminated columns no longer exist in the data stream.
Please note that Select Columns in Dataset column was renamed from the previous versions, which was named Project Columns. If you are watching older videos or reading older articles, you might find those are referred to as Project Column control.
Let us look at another control for Data Cleansing in Azure Machine Learning that is Clean Missing Data.
Clean missing data
Similar to Select Columns in Dataset, Clean Missing Data is also improved from Missing Values Scrubber. Handling of Missing values as a Data Cleansing in Azure Machine Learning is an important technique.
Since vTargerMail is well-cleaned data set, let us use a different data set. In the following example, the Wine data set of Weka is used. Let us create a data set and visualize the data set.
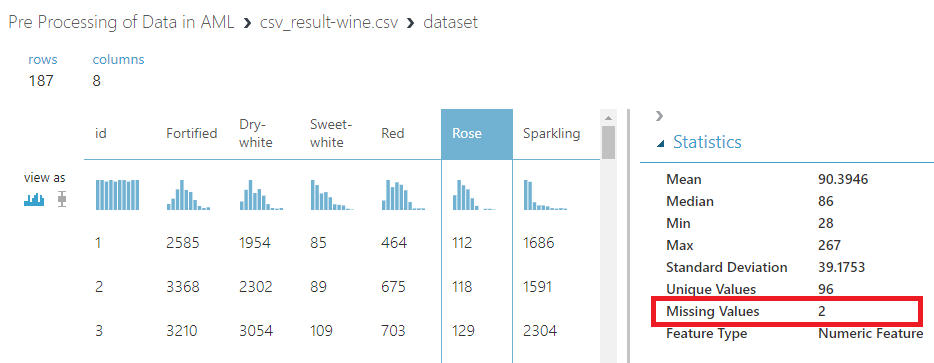
In the above data set, you will see that there are 2 missing values for the Rose column. Let us drag and drop the Clean Missing Data from the control panel and connect to the data set, as shown below.
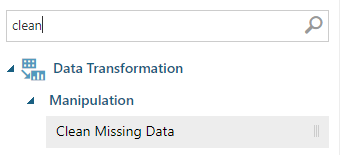
The following is the screen that you will see after the Clean Missing Data module is connected to the data set.
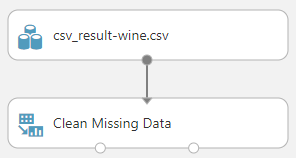
Now let us configure the Clean Missing Data as Data Cleansing in Azure Machine Learning.
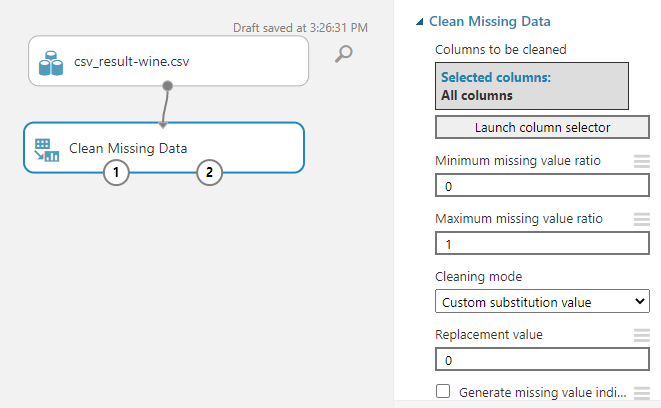
First, you need to select what are the columns you need to configure for missing data from the Launch column selector. This is similar to the configuration that we did for the Select Columns in Data Set.

With the above configuration, now you are ready to configure missing values for Rose as a technique in Data Cleansing in Azure Machine Learning.
Next is to configure the methods of replacing missing values, and there are multiple cleaning options such as Replacing MICE, Custom substitution value, Replace with mean, Replace with Median, Replace with Mode, Remove entire Row, Remove entire Column and Replace using Probabilistic PCA. In these given options, Replace with mean, Replace with Median, Replace with Mode will replace the missing values with statistical operation mentioned in the replacing technique itself. For example, Replace with Median will replace the missing values with the median value of the data set.
Now let us look at Remove entire Row and Remove entire Column options. Removing the entire row and Remove entire Column options are viable options for data cleansing in Azure Machine Learning. Both of those configurations can be done, as shown in the below screenshot.
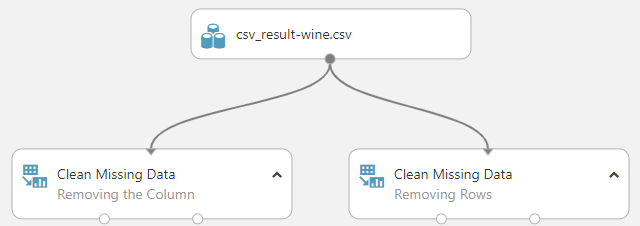
If you analyze both outputs, you will see that Removing the Column has removed the Rose columns, whereas the Removing rows option will see the reduction of two rows.
Another option is to replace it with a custom value that is configured, as shown in the following screenshot.
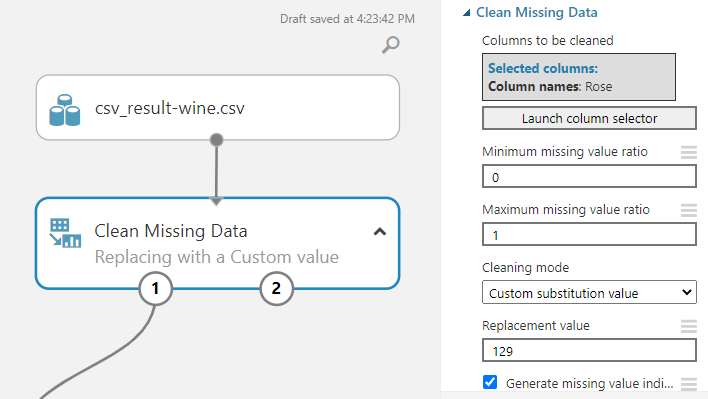
In the above configuration, the missing value is replaced with the value 129, as shown in the above screenshot. Another configuration is the Generate missing value indicator. This will generate a column to indicate that the data is replaced with missing data control, as shown in the following screen.
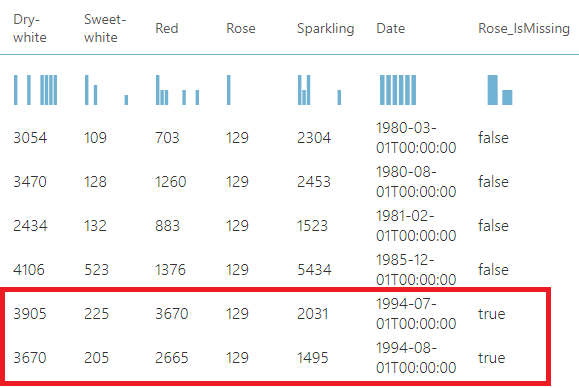
MICE stands for Multivariate Imputation using Chained Equations, and PCA stands for Principal Component Analysis, which are more statistical operations that can be used to replace missing values.
Remove duplicate rows
Duplicate data is another headache for the data scientists. Therefore, Remove Duplicate Rows control is an important control in Data Cleansing in Azure Machine Learning. Let us drag and drop the Remove Duplicate Rows control, as shown below.
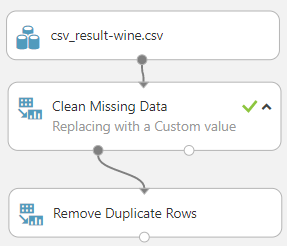
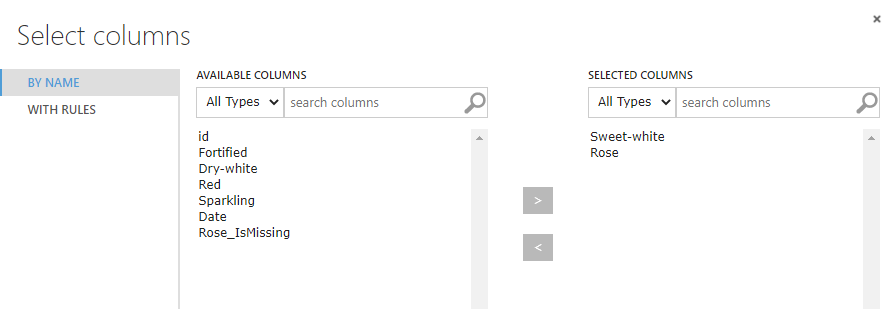
Let us assume that we want to remove duplicates rows that have the same values Sweet-white and Rose, which can be done by selecting the following columns in the Remove Duplicate Rows control.
Since Retain first duplicate row configuration is set, two duplicate rows were removed from the data stream.
Edit metadata
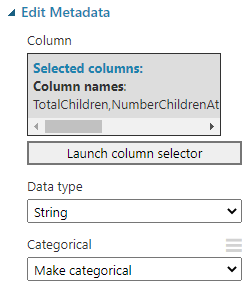
Data type conversion is another task of data cleansing in Azure Machine Learning. In the case of the vTagertMail data set, Column names such as TotalChildren, NumberChildrenAtHome, HouseOwnerFlag, NumberCarsOwned, Age, BikeBuyer are set to the numerical field. Since these are categorical variables, we need to convert them by using Edit Metadata control. After choosing the necessary columns as we did before, next is to convert the string data type to categorical data type, as shown in the below screenshot.
Clip values
Clipping values is another control for Data Cleansing in Azure Machine Learning. You can clip the values which are greater than some value. Let us say you want to clip the Rose value to 150, which is greater than 150. This can be achieved by the Clip Values control with the following configurations.
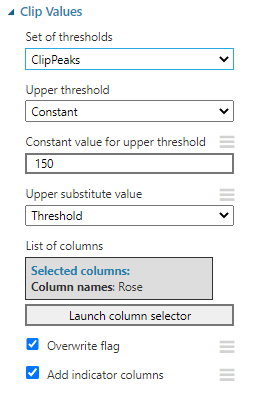
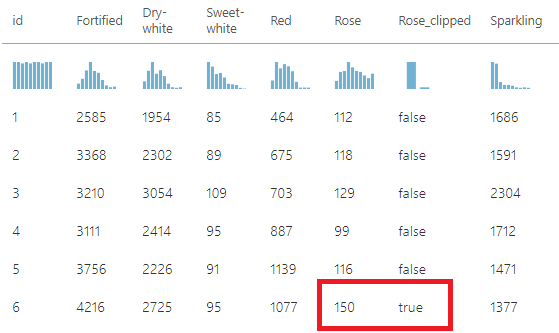
With this configuration, now you will see that rose value, which has more than 150, is replaced with 150 and with an indicator.
Normalize data
When there is skewness in the data, you can use the Normalize Data control. In this control, you have the options of multiple transformation methods such as ZScore, MinMax, Logistic, LogNormal, and Tanh.
Conclusion
Data Cleansing in Azure Machine Learning is an important process that has to be carried out to improve data quality. To achieve this, there are controls such as Selecting Columns in Data Sets, Clean Missing Data, Remove Duplicate Rows, Clip Values, and Normalize Data.
Table of contents
See more
To boost SQL coding productivity, check out these SQL tools for SSMS and Visual Studio including T-SQL formatting, refactoring, auto-complete, text and data search, snippets and auto-replacements, SQL code and object comparison, multi-db script comparison, object decryption and more

- Testing Type 2 Slowly Changing Dimensions in a Data Warehouse - May 30, 2022
- Incremental Data Extraction for ETL using Database Snapshots - January 10, 2022
- Use Replication to improve the ETL process in SQL Server - November 4, 2021

