Introduction
In our last chapter, we talked about Cosmos DB, which is available in Azure and explained that it is an Azure Database used to store NoSQL documents.
In this new article, we will show how to create and query the database from zero. The only requirement is to have an Azure Account. If you have an Azure account, this tutorial will take you just 10 minutes (if not, you can complain in the comments section below 
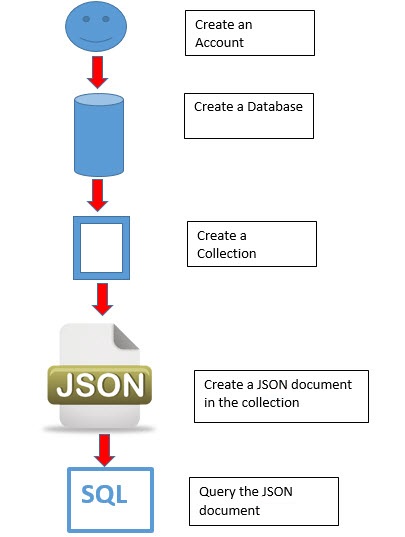
To query JSON documents in Cosmos DB, the following steps will be done during this article:
- An Azure Cosmos DB Account where you can create and store multiple databases
- A Cosmos DB Database in the Account
- A Collection inside the database, which is a container of JSON documents
- A JSON document in the collection created
- Finally, we will query the JSON document using SQL
The following picture illustrates what we are going to do:
Requirements
- An Azure Account.
Getting started
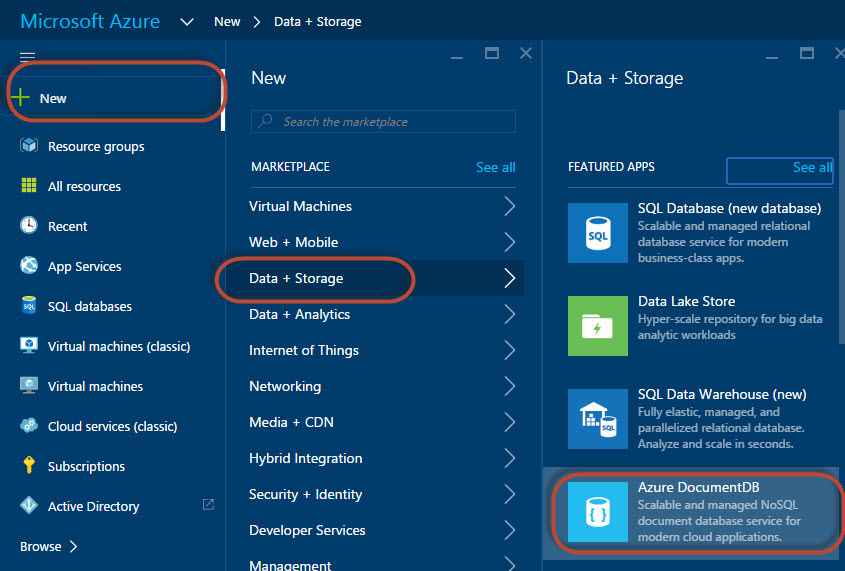
In the Microsoft Azure Portal, go to New ➜ Data + Storage ➜ Azure Cosmos DB:
Figure 1. Azure Portal You will need to specify an ID, the subscription of the Azure Portal information, the resource group and the location. Choose the location that is near to you:

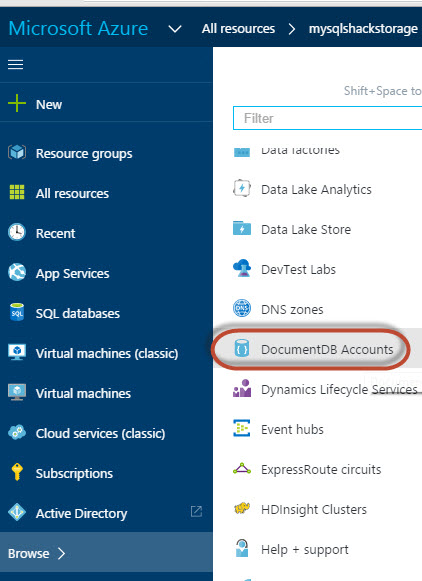
Figure 2. The Cosmos DB Account information. Go to the Cosmos DB account created:

Figure 3. Browsing the Account Click on the Cosmos DB Account created:
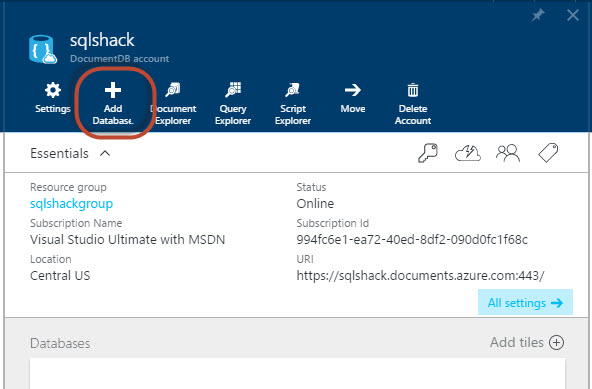
Figure 4. The Cosmos DB Account In the Cosmos DB Account, select the Add Database icon to create a new Database:

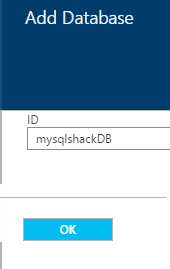
Figure 5. Adding a Database to the Account You can have several databases in a single account. Creating a Database in Cosmos DB is very simple. You only need to write an ID and press OK:

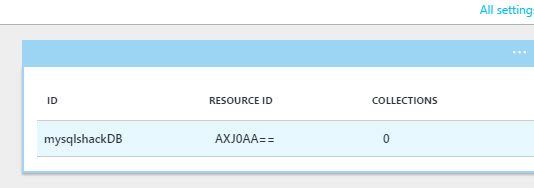
Figure 6. The Cosmos DB Database. Click on the Database created:

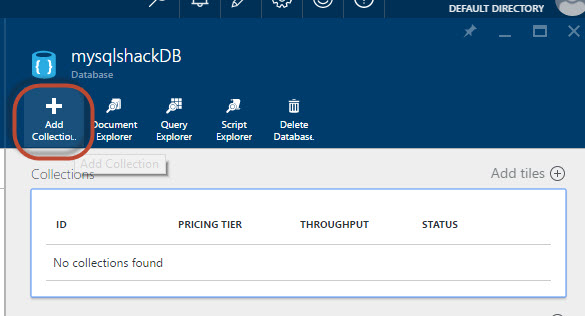
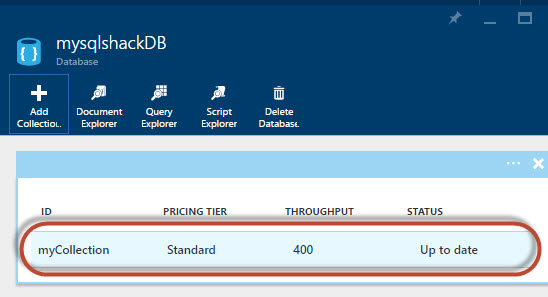
Figure 7. The list of databases In the Database, press the Add collection icon:

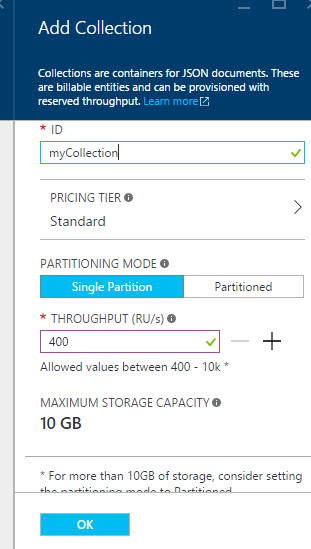
Figure 8. Adding a DocumenDB collection in the Database The Collection is a container of all the JSON documents. You can have multiple containers in a Database. In order to create the container, you will need an ID, the Pricing Tier that specifies the price mode. By default, it is in standard mode. If you have millions of documents or bigger files, you may want to select the Partitioned option. A single partition is usually for small applications with a low number of users. When you need to scale, the partitioned option is required. The throughput is related to the resource units (RU) per second. If you need to handle more RUs, you will need to pay more. The more users, the more RUs/sec you need. A single partition has 10 GB. If you need more space, you will need to choose the partitioned option:

Figure 9. The collection options Click on the collection just created:

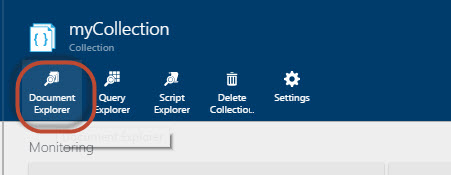
Figure 10. The list of collections We have a Cosmos DB collection empty. In order to add JSON documents to the collection, select the Document Explorer:

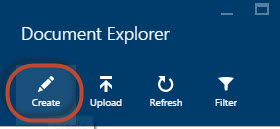
Figure 11. The Document Explorer You could upload existing JSON documents or create documents from zero. In this article, we are going to create a document from zero. Press the Create icon to create a JSON document.

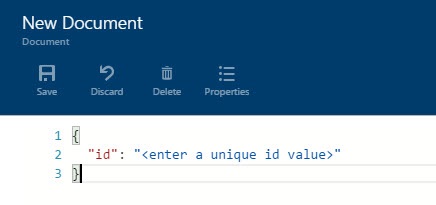
Figure 12. Creating a new JSON document By default you will have the following code:

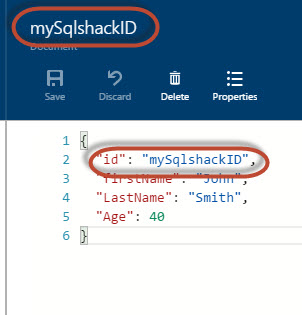
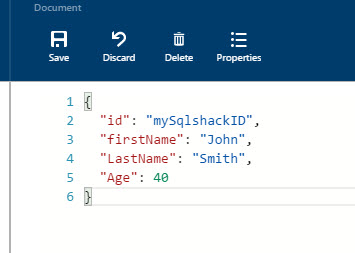
Figure 13. The code by default for JSON files in Azure As you can see, you need an ID, which is mandatory (if you do not add it, Azure Cosmos DB will create an ID for you automatically that you can modify later). We will add a JSON document named mySqlShackID and include a firstName, LastName and Age:

Figure 14. The JSON document syntax 123456789{"id": "mySqlshackID","firstName": "John","LastName": "Smith","Age": 40,}Press the save button and the ID will be displayed at the top of the document:

Figure 15. The JSON document saved The next step is to query the information of the JSON files. To do this, use press the Query Explorer icon to create new queries. You can load files to query or write your query. In this example, we will query all the information from the collection. To do this, we will run a query:
123SELECT * FROM cPress the Run query
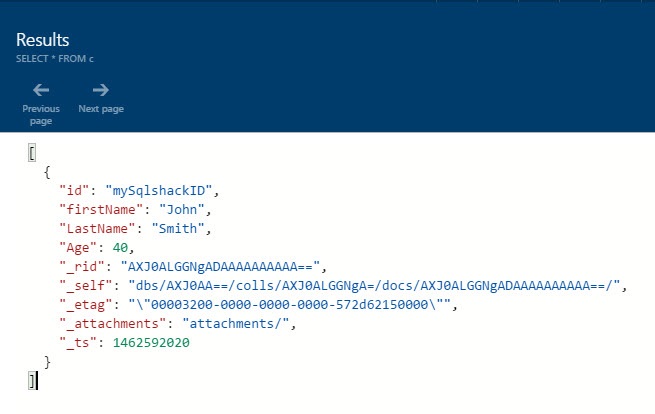
Figure 16. The Query Explorer This query will display all the information of all the JSON documents (in this example just one single file:

Figure 17. The query results. Note that the query results are in JSON format. Note that in the result some properties were added automatically by the system:
_rid: This is a unique resource identifier.
_self: This is a unique addressable Uniform Resource Identifier (URI) of the resource.
_etag: It is an entity tag used for optimistic concurrency control
_attachments: The attachment file is a special file used to store metadata information of the JSON documents. In Cosmos DB, you can store the information in Cosmos DB or specify the location of the remote location. The attachment file will contain the information (location, author, etc) of the remote storage media.
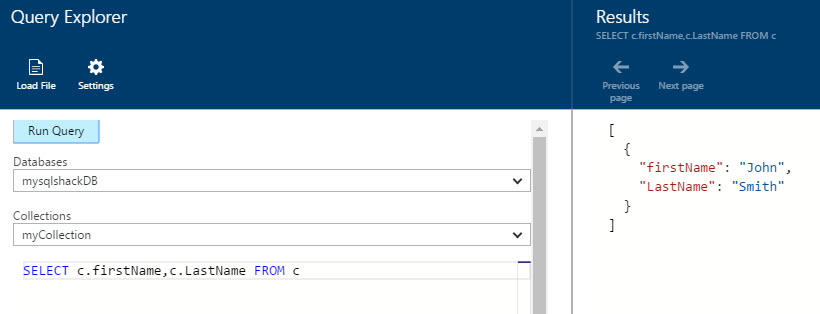
Finally, we will run the following query to get the FirstName and LastName of all the documents in the collection. Note that it is simple SQL, there is nothing new here:
Figure 18. A simple query sample
Conclusion
In this new article, we learned that creating a Cosmos DB in Azure is a straightforward process. We need to create a Cosmos DB account and inside we can create one or more Databases. In the Databases, we can create one or mmore collections and in the collections, we can store several JSON documents.
Querying JSON documents is a straightforward process also, because it requires SQL knowledge only. The results however are displayed in JSON format.
In Cosmos DB, it is possible to create user defined functions, triggers and stored procedures. Creating them is not similar to T-SQL. If you have JavaScript experience, writing them will be a straightforward process. Writing them is out of the scope of this article, but I included nice references to create them. I really hope you enjoyed this article as much as I did.
- PostgreSQL tutorial to create a user - November 12, 2023
- PostgreSQL Tutorial for beginners - April 6, 2023
- PSQL stored procedures overview and examples - February 14, 2023

