This article will get you started with Azure Database for PostgreSQL and understand various options offered by this.
Introduction
In the world of relational databases, SQL Server, Oracle, and similar other commercial products are considered as leaders. With the emergence of the cloud, these products have also made their way on the cloud. Though these databases are available in a service model on the cloud, these are still considered commercial products. In the world of open-source databases, MySQL and PostgreSQL are considered leading relational database products. PostgreSQL is available as a freeware community edition, as well as commercial offerings that support scalable and performant deployments, on-premises and on the cloud are also available. The Azure cloud also offers Azure Database for PostgreSQL as a service. This becomes the primary choice for those who have used PostgreSQL on-premises or in any hosted environment and want to migrate to a compatible database service on Azure cloud. In this article, we will learn Azure Database for PostgreSQL and understand the different options provided by this service.
Azure Database for PostgreSQL
It is assumed that one has required access to Azure cloud, to operate and administer Azure Database for PostgreSQL service. We would be focusing on creating a new instance of this service. Navigate to the Azure portal, click on All Services, and select the Databases section. In this section, we should be able to find Azure Database for PostgreSQL Servers. This is the service that will enable us to create different types of PostgreSQL instances. Click on the same and it would navigate us to the dashboard page as shown below. As this is the very first time, we are accessing this page and we do not have any instances created already, it would be blank.
The first step to start creating a new database instance is by clicking the Create Azure Database for PostgreSQL server button, which will invoke the database creation wizard. Once clicked, it would show a new page with the options as shown below. On this page, we need to select the type of deployment we intend to create, which would effectively result in the selection of the capacity and mode of the PostgreSQL instance.
There are four different types of options available, as of the draft of this article. The first option is the Single server option. This is the most basic as well as most frequently used option. Usually, when one starts with a proof-of-concept or development phase of a solution, the first step is that one may set up a community edition of the PostgreSQL server instance. In a cloud-based project that uses Azure cloud, one may want to start with the most basic option in lower environments and then scale or transform to more specialized deployments as per the use-case.
The second option available with this service is the Flexible Server option, which supports fine-grained custom configuration that supports cost optimization. This option provides features like starting and stopping the database instance, burstable instances, etc. This option is in preview as of the draft of this article. The third option is the Hyperscale (citus) server group. When data scales from hundreds of gigabytes to terabytes, there is a need for high-performance sub-second response, scenarios like multi-tenant data hosting are required to be catered, the hyper-scale option is suitable. If this scenario is extended further where there is a need for high-capacity and high-performance PostgreSQL server instance, but on-premise, which can be the case in certain highly regulated industries, a hybrid option like Azure Arc enabled PostgreSQL can be employed.
For demonstration purposes, we will continue with the Single server option. Click on the Create button to proceed further.
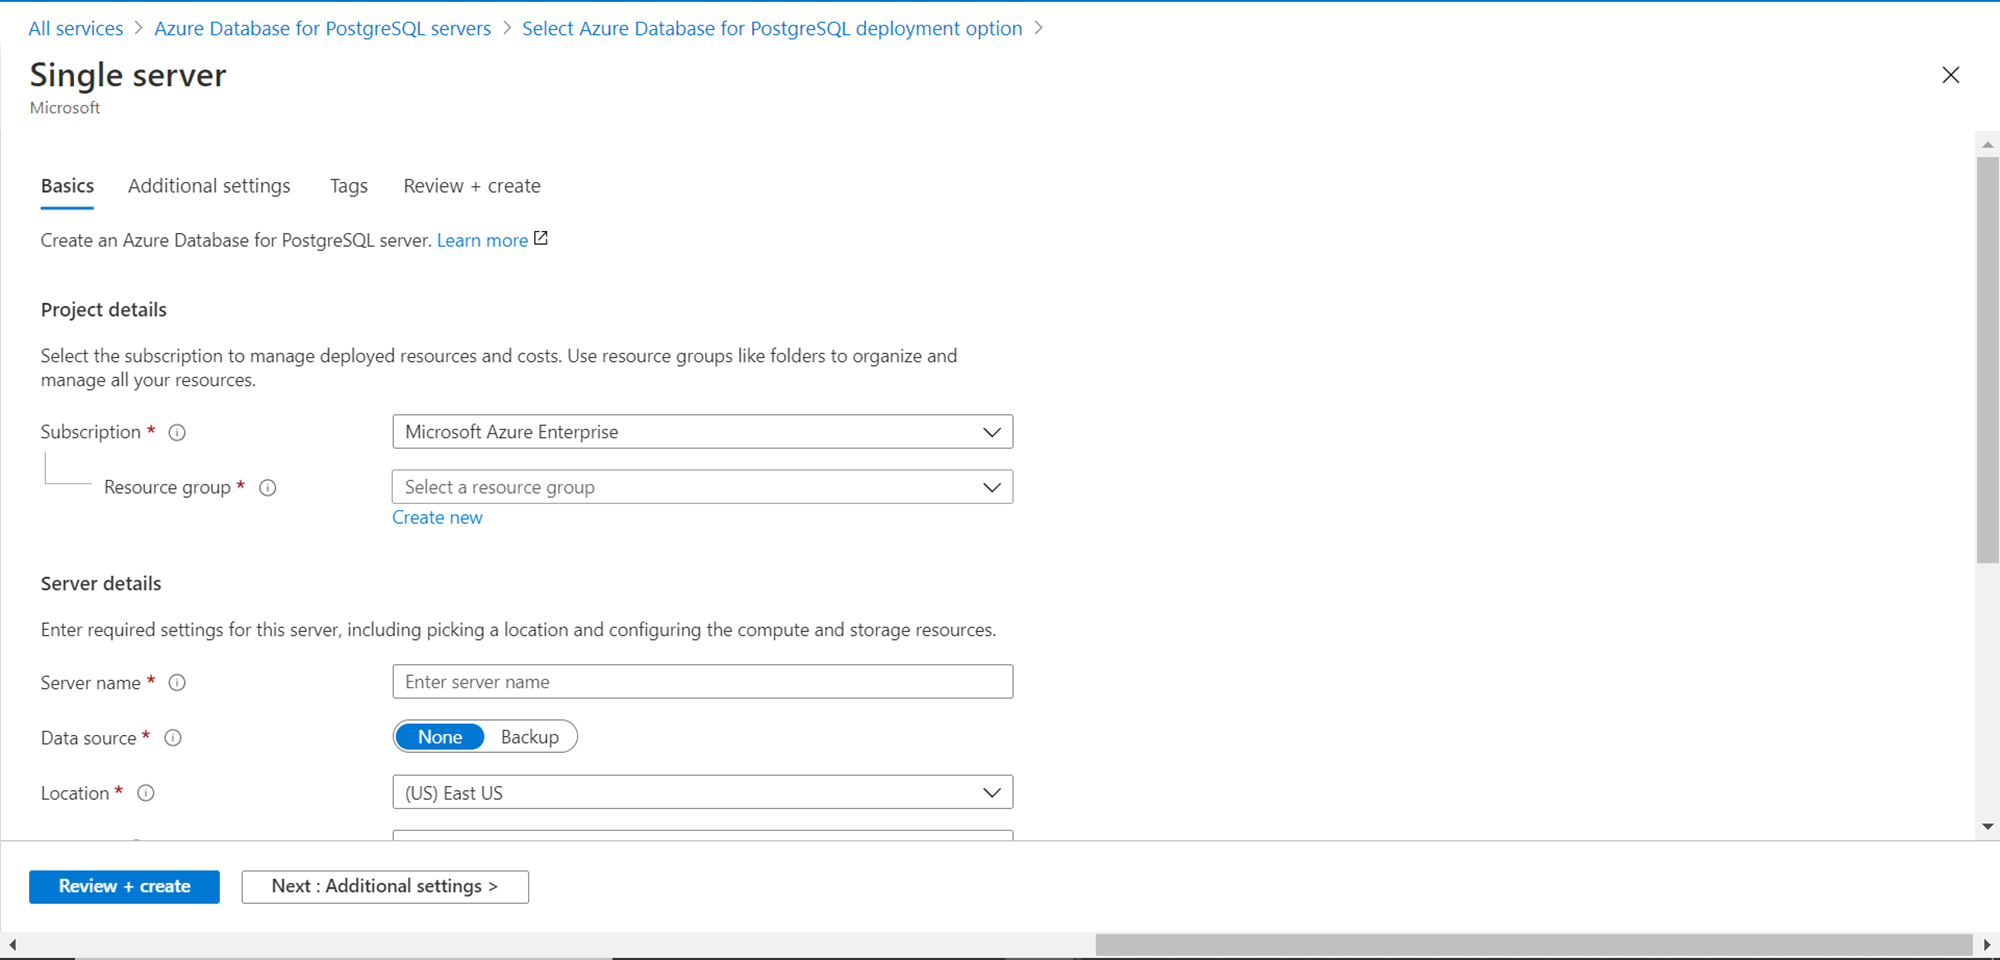
We need to start filling up the basic details first, like subscription name, resource group, server name as well as the location in which the instance needs to be created. There is an option to restore the database from an existing backup or create a brand-new instance. We intend to create a fresh instance of Azure Database for Postgres, so we will continue with the default options.
Provide the database credentials i.e. username and password and click on Additional settings to move to the next step in the process.
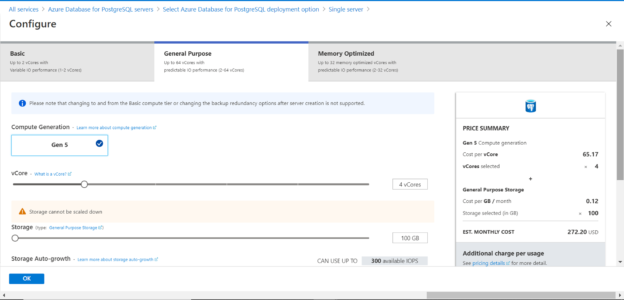
Before we move to the next step, one important detail to consider is the compute + storage default setting which is set to 4 vcores and 100 GB of storage. It’s important to review this capacity as it may be insufficient or over-allocation for one’s requirement. Click on the Configure Server option and it would show the details as shown below. The default selected tier is the General-Purpose tier, which would result in a monthly cost of 272.20 USD. In our case, for a demo environment, we do not this capacity and even a basic tier option would be sufficient, just to explore the features and options provided by Azure Database for PostgreSQL.
Click on the Basic tab, and it would show the details as shown below. The configuration shows here is 2 vcore and 50 GB of storage which would result in a monthly cost of 55.59 USD. The cost reduction comes due to reduced capacity and lesser features like only locally redundant data storage. For now, this option would fare reasonably well for us, so we would continue with this option.
Now that we have selected the basic options as well as the capacity required for our Azure Database for PostgreSQL instance, we can continue with the next step. In this step, we can configure data encryption as shown below. The storage used for hosting the data stored in the Azure Database for PostgreSQL instance is encrypted by default. But if one needs to encrypt the infrastructure layer as well with customer-owned encryption keys, that option is also available. At times, this option may not be enabled for certain instance types and regions as shown below. We can click on the Tags button and move to the next step.
We can add metadata to this instance by adding tags to the instance as shown below. It is not a mandatory configuration, so we have the option to skip this step as well.
Click on the “Review + create” button to review the details that we configured earlier. It would list all the configuration details as shown below. At this step, we can conclude that all the details that we have provided so far are finalized. And the cost of this instance is going to be 55.59 USD. Click on the Create button to start creating the database instance.
Once the database instance is created, click on the “Go to resource” button to navigate to the dashboard page of the instance as shown below. On the left pane, we get features like activity log, access control, server parameters configuration, database replication and, many other features to administer the database instance. The dashboard shows charts that show the various utilization metrics as shown below.
Once the database instance is created, generally the first step of acceptance testing is to connect to the database instance. For this, one would need connecting strings that can be used using various programming languages, SDKs, tools, etc. Click on the Connection strings menu option on the left pane and you would be able to find all the connection strings as shown below.
In this way, one can quickly get started with Azure Database for Postgres instance, configure the same and connect to it using a variety of tools.
Conclusion
In this article, we learned about Azure Database for PostgreSQL Server instances, the configuration options and features provided by the same, as well as the different considerations that should be kept in view while creating a new PostgreSQL instance.
Table of contents
| Accessing Azure Database for PostgreSQL using pgAdmin |
| Azure Database for PostgreSQL Cost Optimization |
| Getting started with Azure Database for PostgreSQL |
- Oracle Substring function overview with examples - June 19, 2024
- Introduction to the SQL Standard Deviation function - April 21, 2023
- A quick overview of MySQL foreign key with examples - February 7, 2023


