Introduction
Intended audience
This document is intended for application developers, database administrators and system administrator who plan to create linked servers between instances of Microsoft SQL Server using Windows Authentication.
Context
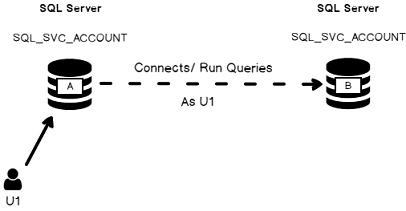
Let’s say we have two separate SQL Server boxes and their service account are Active Directory accounts. We will refer to one of these boxes as instance A and instance B. Assuming we are willing to be able to be connected on instance A and run a T-SQL query which uses data from instance B without explicitly opening two connections in an application.
This is exactly the purpose of Linked Server objects! Most of the time, such an object is created using credentials, but it’s not the only way to do it. As we will discuss in one of following sections, there are four authentication options when we create a Linked Server object. One of them is the “identity forwarding”, which means that the identity of an authenticated user U1 connected to an instance A is used by this instance A in order to connect to an instance B and create a link between instances A and B as U1.
The explanation above is summarized below:

If SQL Server authentication is used for U1 on instance A, it means that a SQL Login U1 must be created on Instance B, with the exact same password.
If Windows authentication is used, it’s not so straight forward: there are a few configuration tasks to be performed and we will discuss them in following sections.
In this article, we will first review the different steps to follow in order to create a linked server to another SQL Server instance using SQL Server Management Studio. We will then test the linked server connection using the “identity forwarding” settings and see the error message that should come up. After that, we will use a tool that will help us in the configuration of such a linked server object.
Creating a linked server using SSMS
First, open SQL Server Management Studio and connect to the instance of your choice. Then, go down to “Server Objects” and right-click on “Linked Server” node.
A contextual menu should appear. Click on “New Linked Server…”.

This will open the Linked Server Creation Dialog:

Here you have two options:
- Select “SQL Server” as Server Type and provide a network name for the target SQL Server instance
- Provide the name you want for the Linked Server object and specify a network name for target SQL Server instance in Data source text box.
No matter the option you chose, go to the Security Page of the dialog.
This dialog is divided into two parts. The first one is a list of local to remote logins mapping. The second part tells to SQL Server how to use the first part:
- The first option can be summarized as: if a local login attempts to use the linked server and it’s not kind of whitelisted in the first part, then this local login cannot use the linked server.
- The second option tells SQL Server to connect anonymously to target SQL Server instance for logins that are not listed in first part of the dialog.
- The third option tells SQL Server to use the security context of the authenticated login to contact remote instance. It’s the one we will use for the aim of this article.
- The last (and less secure) option is to define credentials for any login that is not listed in the local to remote mapping list.
So, for next step, we will let the first part of the dialog empty and select the third option.

If we hit the “OK” button, we may get following error message:

The “Login failed for user NT AUTHORITY\ANONYMOUS LOGON” is a pretty common error message and you can find a lot of requests for help on the internet. Unfortunately, during my researches, I did not find a single thread with the whole solution to my problem. That’s also the reason why I wrote this article.
Now, let’s try to get it working!
There are mainly two configuration issues: the first one is the Server Principal Name and the second one is the Identity Delegation permission. There is a tool that will check these two aspects and it’s the subject of next section.
Useful tool: Kerberos Configuration Manager for SQL Server (KCM)
Kerberos Configuration Manager for SQL Server is a tool designed by Microsoft and available under the following link.
Installation
Once you downloaded tool installer, run it and you will get following dialog:

Click on “Next” button.
Set the installation location, if you want one that is different from default. Then, click on “Next” button.

You’ll get on a confirmation panel. Click on “Next” button.

Then, a license agreement appears. Accept it and click on “Next” button.

And the installer begins and completes very fastly. The only step that remains is to click on “Close” button.

Solving linked server connectivity issue with KCM
By default, the KCM tool is located in the folder:
C:\Program Files\Microsoft\Kerberos Configuration Manager for SQL Server
There are three files in this folder:

Double-click on KerberosConfigMgr.exe.
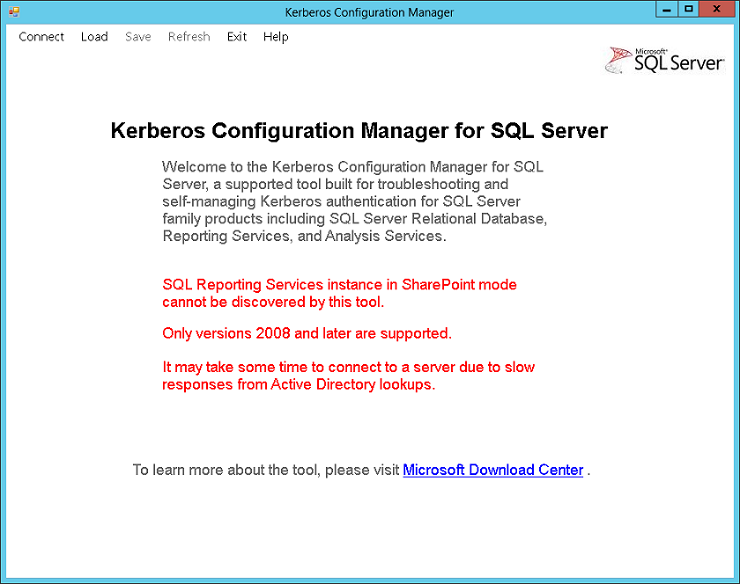
Here is the default view for Kerberos Configuration Manager tool:

Click on “Connect” menu. It will open following dialog:

Specify the information required to connect and click on “Connect” button.
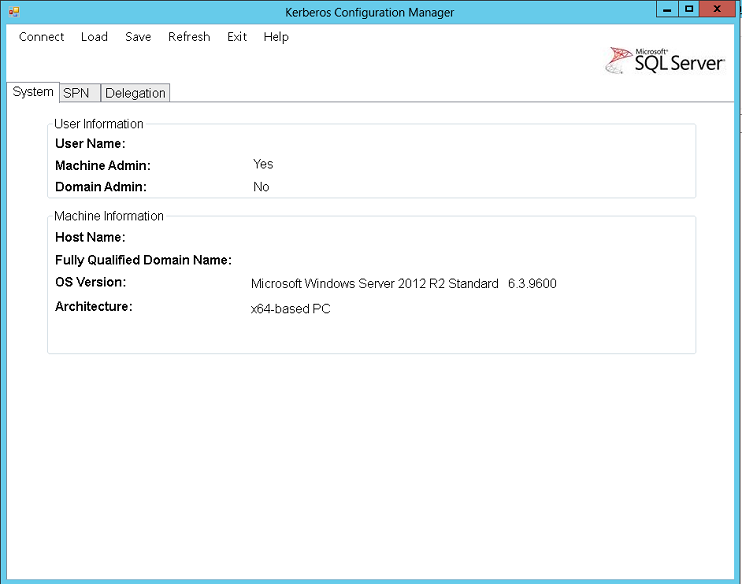
As soon as we click on the “Connect” button, the tool will start collecting data using WMI providers and when its collection completes, we get a summary view, which starts by a server and user summary:

Then, there are the two tabs of interest for our problem: SPN (for Server Principal Name) and delegation. Let’s first have a look at SPN tab.
As you can see in the image above, I can see directly that the required Server Principal Names are missing. But you can also see that there are two possibilities for us: either generate the script for fixing the problem or actually fix it.
Here is the content of a generated script:
|
1 2 3 4 5 6 7 8 9 10 11 12 13 14 15 16 17 18 19 20 21 22 23 24 25 26 27 28 29 30 31 32 |
@echo off /* Some comments */ echo Changing SPN configuration may affect other services running on the same machine. By selecting to continue, the following action(s) will be performed: echo. echo Add SPN "MSSQLSvc/TestServer" to account "AD\SQL_SVC_ACCOUNT" echo. echo It may take several minutes for the updated SPN information to be visible to all servers in the domain. For more information, go to http://go.microsoft.com/fwlink/?LinkID=316972 . echo. :Prompt set /p answer=Are you sure you want to continue? (Y/N): if %answer% == Y goto Yes if %answer% == y goto Yes if %answer% == N goto No if %answer% == n goto No cls echo Unknown input goto Prompt :No exit :Yes SetSPN -s "MSSQLSvc/TestServer" "AD\SQL_SVC_ACCOUNT" set /p answer=Press any key to continue... @echo on |
It’s very handy in big organizations because you can provide those scripts to your system/domain administrators and ask him to run it.
The last tab in the tab pane is “Delegation”. In short, for Kerberos authentication and some other authentication protocols, the SQL Server service account should be trusted and allowed to act on behalf of another user (which is the already authenticated user in our case).
Personally and as an example, I got following results, saying that no delegation is not configured.
To resolve this, we will need to connect to the Active Directory management console, find the AD user corresponding to the SQL Server service account for the instance from which connection will be established. Once you got it, open its properties.
There is a “Delegation tab” and you can either choose to trust the account no matter the service or to trust the user for a list of specified services, as you can see below:

Note
- Always prefer security by default, so you should select “Trust this user for delegation to specified services only” and add the SQL Server service account.
- This part could be done by a system/domain administrator instead of a DBA.
If your Active Directory is composed of multiple nodes, it will take a while to replicate this setting. The easier way to check is to restart SQL Server.
As soon as our settings are done for delegation and for SPN, we should rerun KCM tool and find this as a result for SPN:

And delegation tab should be showing something else than “None”.
If everything has been done correctly, we should now be able to right-click on the linked server we created and test connection:

And we should get:

References
- Social Technet – Linked Server: The old “Login failed for users “NT Authority\Anonymous Logon” issue
- How to easily Check your SPN and Delegation settings for SQL Server in an Active Directory environment
- Using Kerberos Configuration Manager to resolve Microsoft SQL Server SPN issues
- Demystify Kerberos usage: How-to for SQL Server
- Understanding Kerberos Double Hop
- Register a Service Principal Name for Kerberos Connections
- New tool: “Microsoft Kerberos Configuration Manager for SQL Server” is ready to resolve your Kerberos/Connectivity issues
- SQLServerCentral: Create linked Server using the login current security context (Active Directory)
- How to perform a performance test against a SQL Server instance - September 14, 2018
- Concurrency problems – theory and experimentation in SQL Server - July 24, 2018
- How to link two SQL Server instances with Kerberos - July 5, 2018


