Introduction
In this new article, we will use Visual Studio to connect to a SQL Server Database Installed in a Virtual Machine in Azure.
Visual Studio is one of the most popular development tools in the world and connecting to Azure with Visual Studio is a very common need.
We will modify an existing SQL Server table in Azure from Visual Studio. Later we will create a stored procedure and finally, we will create an inline table-valued function.
Requirements
- An Azure subscription.
- A virtual machine in Azure with SQL Server Installed.
- The Adventureworks example database installed in the VM.
- A local machine with Windows and Visual Studio installed. In this example, the Visual Studio 2015 was used.
- It is also necessary to enable the port of the Azure Machine and enable Endpoints, Enable the SQL authentication and to create a SQL account. For more information about these requirements, refer to the migrate Azure chapter.
Getting started
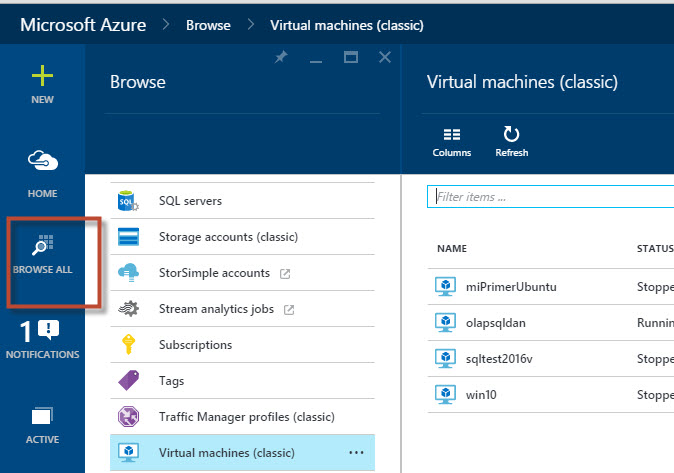
In the Azure portal, select Browse All➜Virtual machines and select the Virtual Machine with SQL Server installed.

Figure 1. Virtual Machines in Azure Copy the Machine name which is also the SQL Server name (if you are using the default instance).
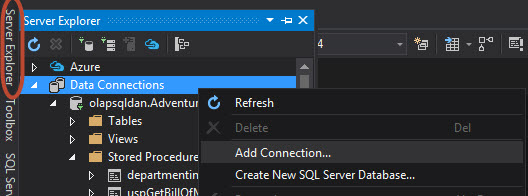
Figure 2. The Server Name in Azure Click on Server Explorer and in Data Connection, select Add Connection.

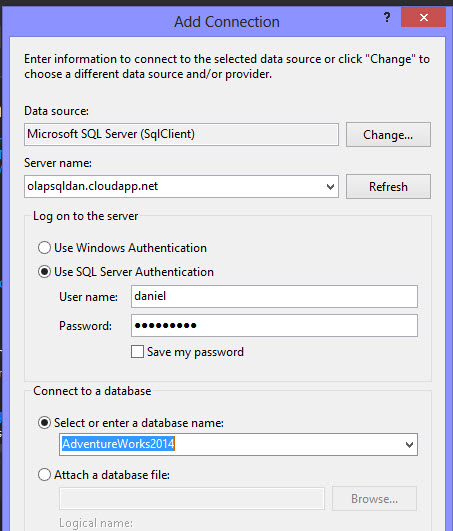
Figure 3. Adding a new connection Use the server name of the step 2, unless the SQL Server instance is not a default instance of SQL Server and specify the SQL Server Authentication user name and password. Finally, write the Database name. In this example, we will use the AdventureWorks2014 database.

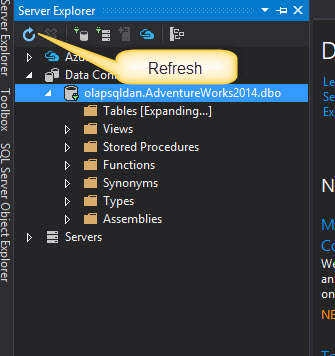
Figure 4. Connection information In order to see the connection, press the refresh button and you will be able to see the new connection

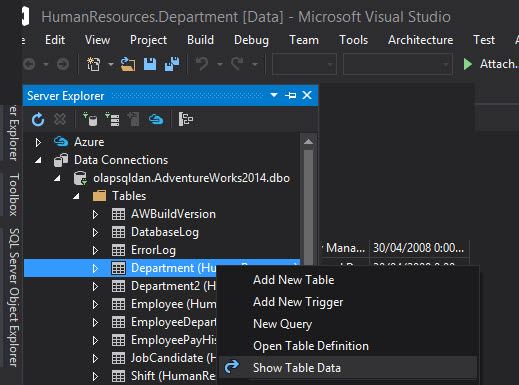
Figure 5. Refreshing connection To view the data of the table, right click on it and select Show Table Data.

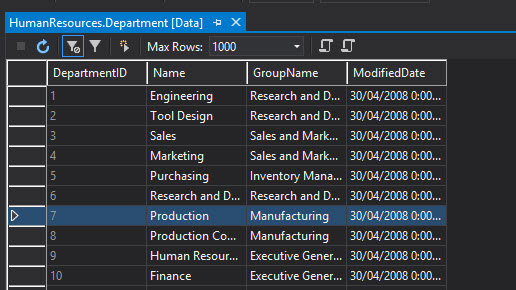
Figure 6. Showing Table Data You will be able to see the table data.

Figure 7. The Department information To insert new data, go to the last row and write new data. In this example, we are adding the IT department.

Figure 8. Adding data to the table In order to verify that the new data was added, connect to your VM in Azure.
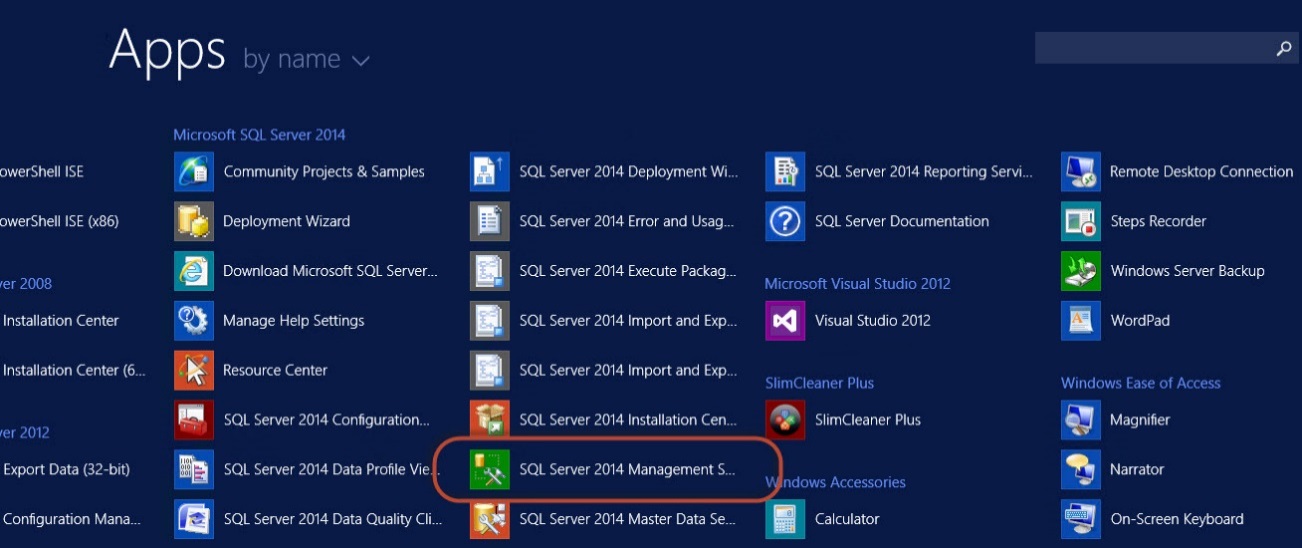
Figure 9. Azure VM connection Open the SQL Server Management Studio
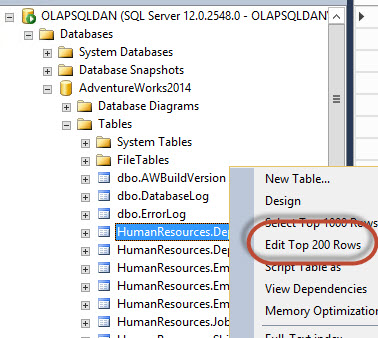
Figure 10. SQL Server Management Studio Verify that the table has the new data.

Figure 11. Reviewing the table data You will notice that the new row created on step 8 was successfully added.
Figure 12. Verification of the insert in the VM Azure table Now, we are going to create a stored procedure with a parameter. In Visual Studio, right click on Stored Procedures and select Add New Stored Procedure.

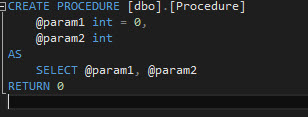
Figure 13. Adding a new stored procedure By default, you will have this code:

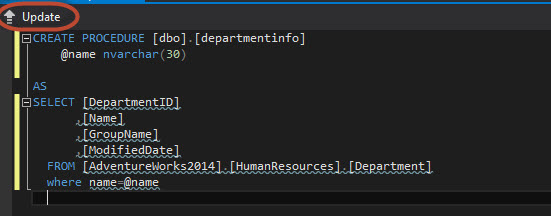
Figure 14. Stored procedure code by default In this example, we will create a stored procedure that will show the department information if we specify the name of the department. The @name will be the parameter with is the name of the department. The code will be like this:
123456789101112CREATE PROCEDURE [dbo].[departmentinfo]@name nvarchar(30)ASSELECT [DepartmentID],[Name],[GroupName],[ModifiedDate]FROM [AdventureWorks2014].[HumanResources].[Department]where name=@nameThe stored procedure name is departmentinfo and the input parameter is name. It shows all the information of the department table of the database Adventureworks where the name is equal to the parameter. Once the stored procedure code is done, press update.

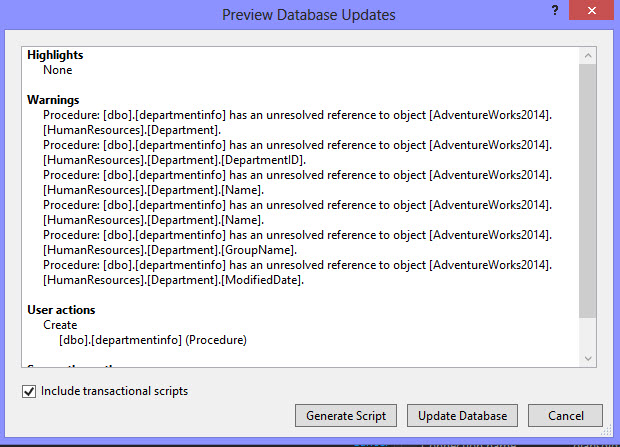
Figure 15. Stored procedure with parameter In the Previous Database Updates window, press the update database button.

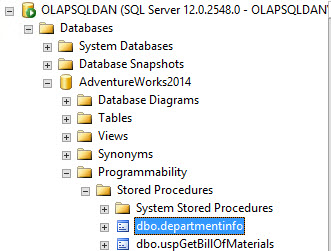
Figure 16. Update database You can verify in the SSMS of the Azure VM that the stored procedure was created successfully.

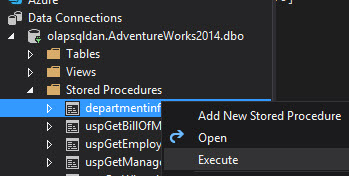
Figure 17. The stored procedure created. To execute the stored procedure, on Visual Studio, right click on the stored procedure and select Execute.

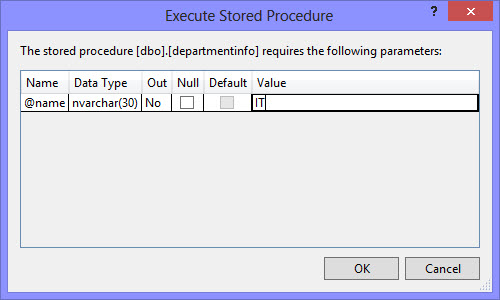
Figure 18. Executing a stored procedure In the value section specify a value. Check the step 8 to verify valid values. The stored procedure receives the Department name and returns the information of the department. In this example, we are inserting the IT name. Press OK.

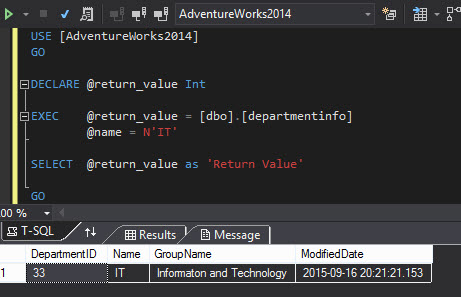
Figure 19. Parameters for the stored procedure. As you can see, the stored procedure was executed successfully. You can see the T-SQL code generated and the results of the stored procedure. It is showing the information related to the department name specified as input.

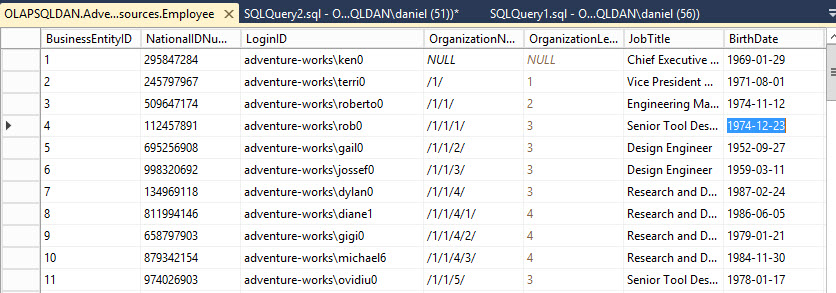
Figure 20. The stored procedure execution results Finally, let’s create an Azure function using Visual Studio. We will use the Employee table that contains the following information:
Figure 21. The table that will be used to create the function. The table contains Employees information. We will send the the function the LoginID and we want to receive the age of the employee based on the birthdate. For example, the login Adventure-works\ken0 has 46 years.
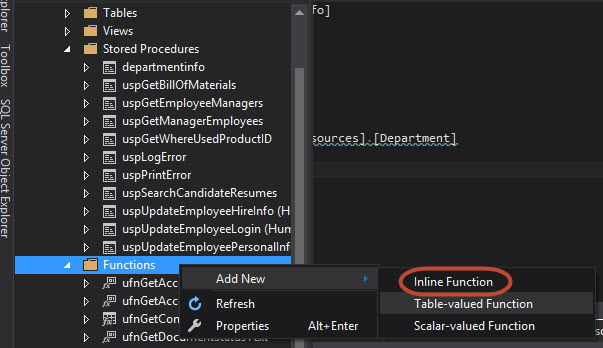
To create a Functions right click on Functions in Visual Studio.There are several types of functions:
- Inline Functions: They return a table. It is like a parameterized view. We will use this type of functions today.
- Table-valued Function: They also return a table, but they allow a more powerful programming logic that the other functions.
Scalar-valued Function: They return a scalar value.

Figure 22. The types of functions Write the following code to create the function:
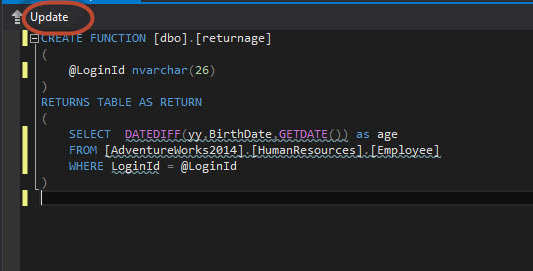
123456789101112CREATE FUNCTION [dbo].[returnage](@LoginId nvarchar(26))RETURNS TABLE AS RETURN(SELECT DATEDIFF(yy,BirthDate,GETDATE()) as ageFROM [AdventureWorks2014].[HumanResources].[Employee]WHERE LoginId = @LoginId)The Function name is returnage. It receives de loginId from the Employee table and the functions calculates the age of the employee with using the BirthDate.
Once your code is done, press Update and repeat the step 16.

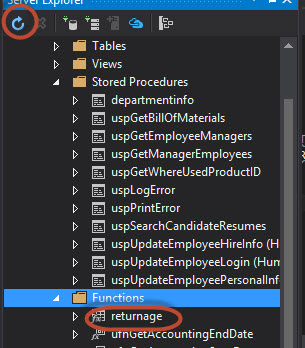
Figure 23. Updating the function To verify that the function was created press the refresh icon. You will be able to see the returnage function.

Figure 24. The Function created If you expand the function, you will be able to see that the loginID is the input parameter and the age the column returned.

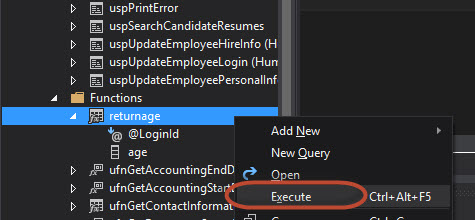
Figure 25. Input function parameter To test the function, right click on the function and press Execute.

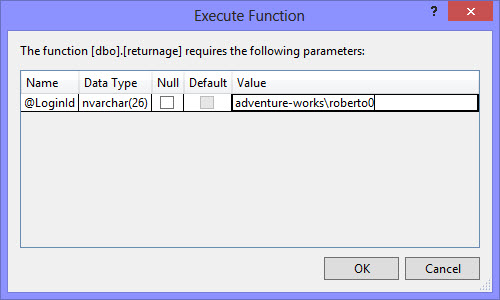
Figure 26. Function execution Write a LoginId, check the figure 21 for valid values and press OK.

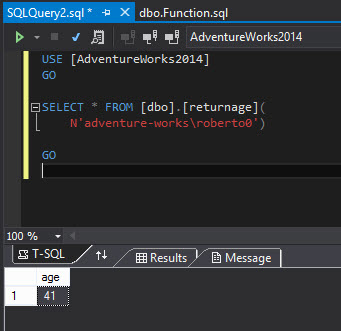
Figure 27. The function parameter specified for execution You will be able to see the function execution T-SQL code and the result. The LoginID adventure-works\roberto0 has the age of 41 years.

Figure 28. The function results - PostgreSQL tutorial to create a user - November 12, 2023
- PostgreSQL Tutorial for beginners - April 6, 2023
- PSQL stored procedures overview and examples - February 14, 2023
Conclusion
Visual Studio is a great and easy to use tool to program. In this article we show how simple is to connect to a VM machine in Azure and create SQL Server stored procedures, functions and to update the information.

