In order to connect on- premise and Azure we have two options, a point-to-site and a site-to-site VPN. On this article I will be showing how to configure a site-to-site VPN using a routing and remote access, step-by-step.
More and more the cloud is present on our lives, on our cell phones, applications, work, etc… In this article we will be specifically talking about Azure and its integration with On-Premises networks. Few months ago, I wrote an article how to connect to Azure using a point-to-site VPN, which is a very limited specific case.
The objective of a site-to-site VPN is connect the two different sites, a specific Virtual Network on Azure and On-Premises network. This will allow us to do a lot of exciting things! I will use this article as base for others where I will be showing how SQL Server can benefit of the cloud to build hybrid solutions.
In a nutshell, we need to follow the next steps:
- Create a Virtual Network on Azure.
- Create a Gateway assigned to the VN.
- Configure the Routing and Remote Access (RRAS) server.
- Route the other servers to the RRAS.
The way I’m going to configure the site-to-site VPN is using a Routing and Remote Access in order to forward the network requests. Basically the RRAS works like a router. For this I have a Windows Server 2012 R2, this server needs two network interfaces, one to connect to the internal network and another one connecting to the internet. Of course, you will need an Azure subscription, if you don’t have, you can create a trial subscription.
So, let’s start! Log-in into the Azure portal, and click on the New (+) button in the bottom of the side menu, as shown:

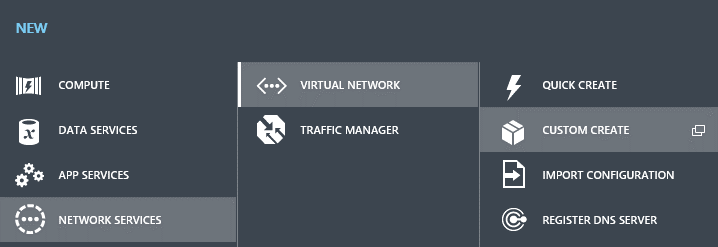
Now we need to create a new Virtual Network, for this follow the steps as shown in the next picture, in order to reach the “Custom Create” option:
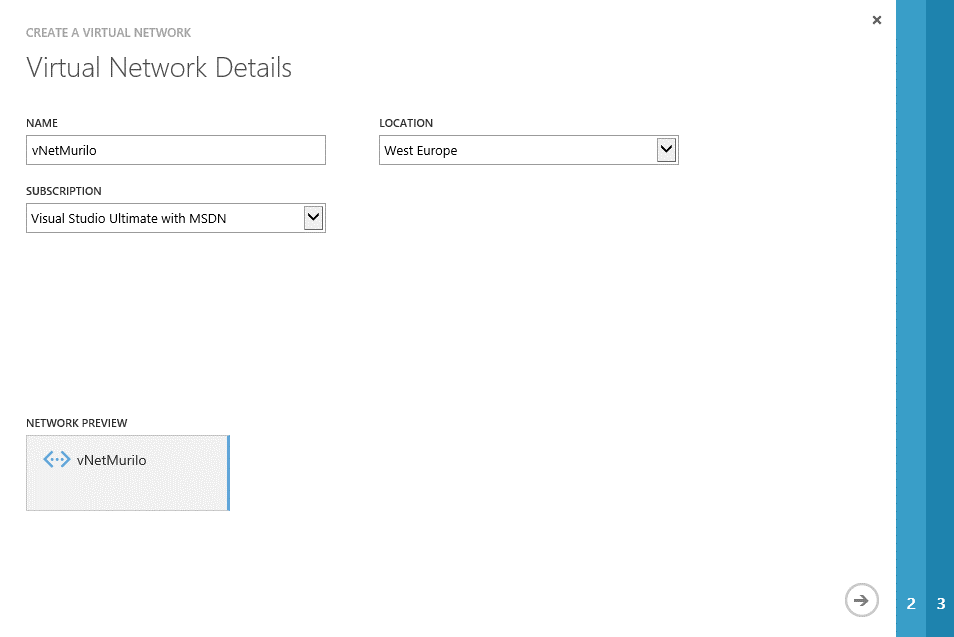
After clicking in “Custom Create”, a wizard-style screen will be presented. Fill all the fields: the name for your new Virtual Network and select the desired location (in my case, as I have more than one Azure subscriptions I need also to pick which one will own this Virtual Network):
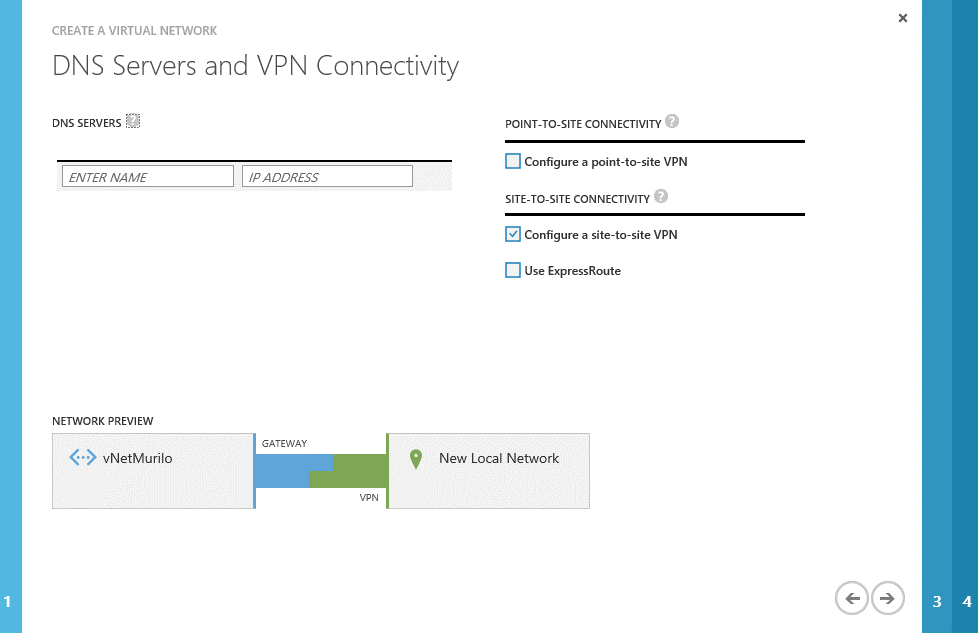
We can skip the DNS settings for now, as this is a more advanced topic. At this step, just check the “configure site-to-site VPN” box, as bellow, and proceed:
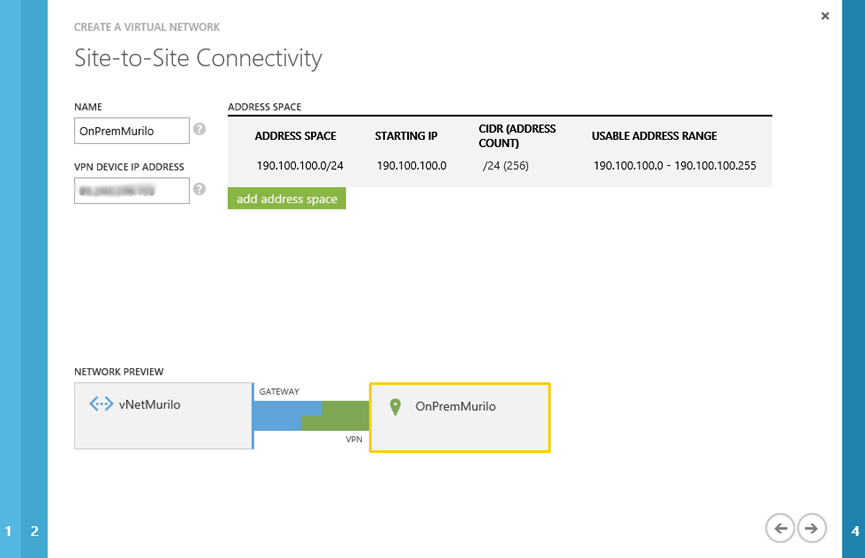
Now we are being asked about the public IP address of our On-Premises network. We also need to provide the address space for On-Premises. We need to pay attention to this, otherwise the communication between Azure and On-premises will not work as expected. I learned a lesson after typing the wrong IP on this step. I lost 3 days trying to understand why only the RRAS server was able to contact the Azure virtual network… At the end of the day (or of the 3 days), the problem was a mistake in the address space of my On-Premises network. If you have the same symptoms, here is the tip. Check it before start digging into all the possible configurations, as I did… “Time is money!” 🙂
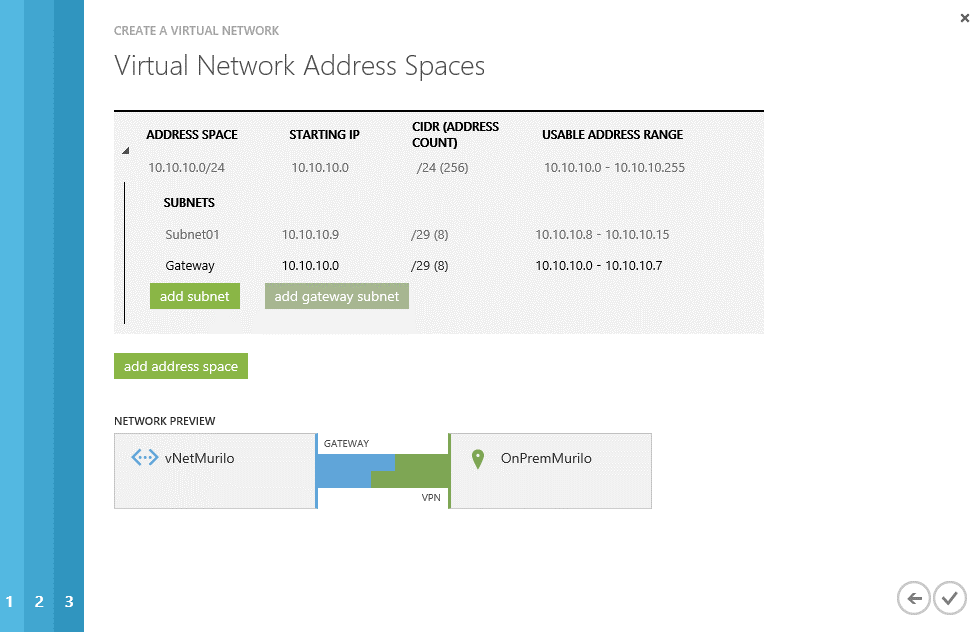
Now we need to define the other side of the coin… The address space to be used in Azure. For the virtual network, on this guide, I will be using 10.10.10.0/24. We also need to define the subnets to be used and a gateway. So I defined the Subnet01 with an IP range from 10.10.10.8 to 10.10.10.15 and added a Gateway subnet (click on the green button “add gateway subnet”) with a network range from 10.10.10.0 to 10.10.10.7.
Now you can click in the checkmark and wait for the Virtual Network creation…
After a successfully creation, you will be able to find your brand new Virtual Network under the “Networks” section.
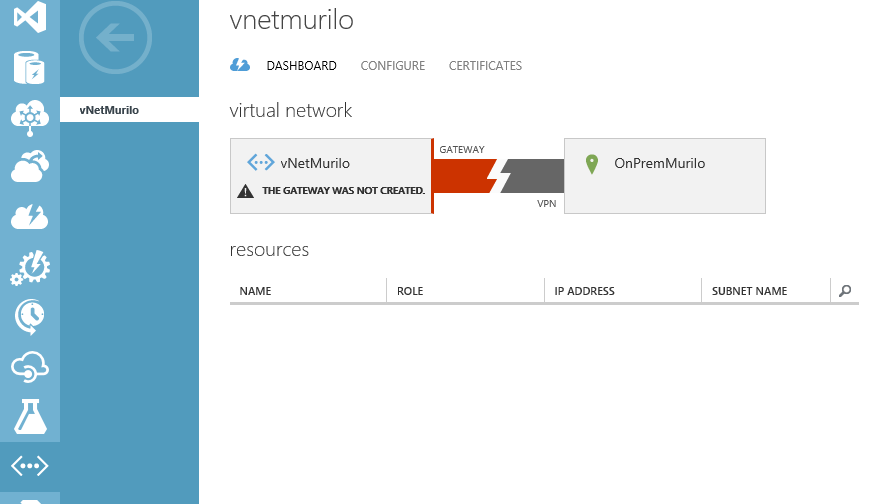
We can also notice that we still need to create a gateway…So let’s go for it!
Still in the dashboard of the created Virtual Network, on the bottom of the page, click in the “create gateway” icon (+) and, as we are going to configure a routing and remote access, select “Dynamic Routing”.

Confirm your intention and go grab a coffee, or two, because it takes a long time to complete 🙂

Once this is created, we will have a new picture in the dashboard, showing the IP address for the gateway and statistics about I/O:
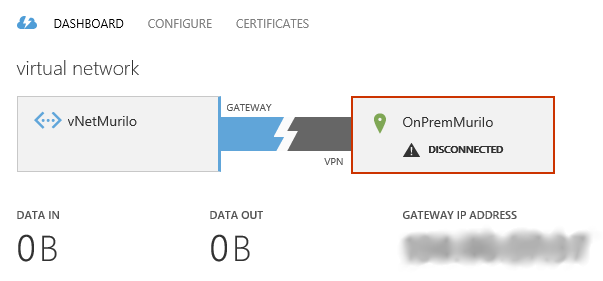
For now we are done with the Azure part… So let’s work into our RRAS server.
The RRAS (Routing and Remote Access) server
Now that the base on Azure is built, let’s focus on our server…
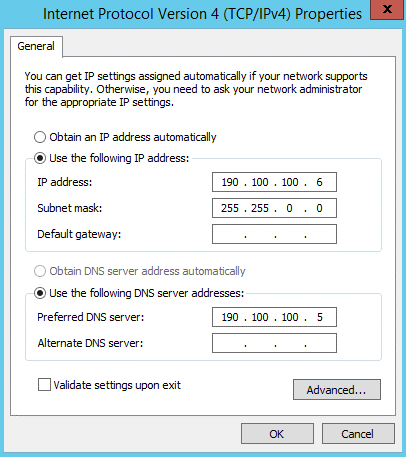
For this guide, I’m using a Windows Server 2012 R2 server with three different networks: Internal, External and Host. I’m using a VM and this is the way I organized my lab network.

The External adapter has the public IP address and the Internal is using the IP 190.100.100.6, as shown in the image bellow:
Configuring the VPN
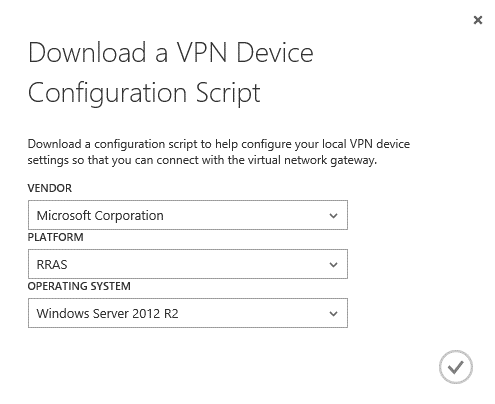
Now that the Virtual Network is configured and we have a working gateway, we can configure the VPN in the RRAS server. For that, go back to Azure on the virtual network dashboard, and click on “Download VPN Device Script” on the right side, as bellow:

In the new window that will be presented, select the vendor “Microsoft Corporation”, platform “RRAS” and your operating system, in my case is a Windows Server 2012 R2. After that click on the checkmark to download the PowerShell script.
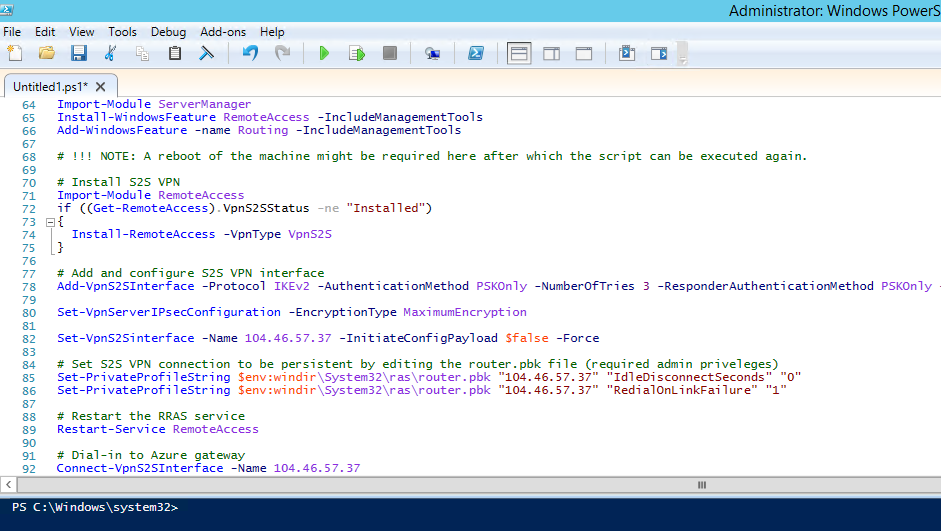
Now, in the RRAS server, run the “PowerShell ISE” as Administrator and open the script (or copy/paste). On this script you will be able to find all the necessary configurations to create the VPN to connect to your new Azure Virtual Network.
Run the script and all the needed features will be installed to the server. You can also check that the “Routing and Remote Access” is in the “Tools” list after a successful execution:
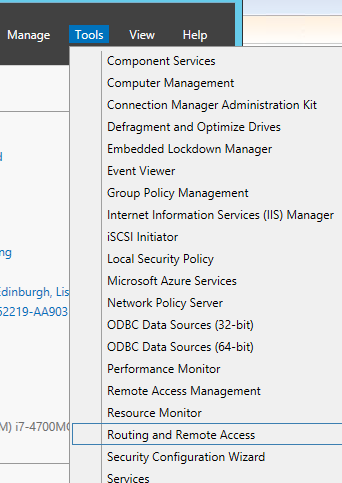
Open the “Routing and Remote Access” and you will notice that your RRAS is started:

Now go to the Azure portal again, and under your virtual network dashboard, click on “Connect” (in the bottom of the page) as shown:
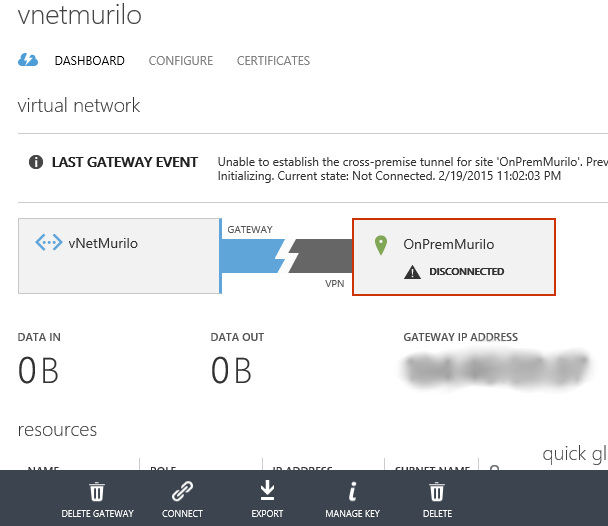
Wait until the operation is completed…

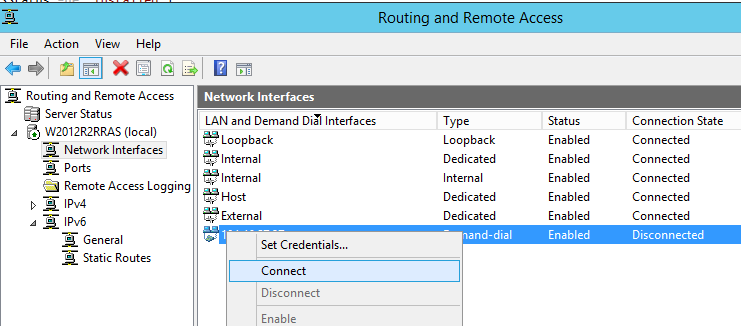
Next you go to the “Routing and Remote Access” manager window, and under the “Network Interfaces” node, you will be able to find the freshly created VPN. Right-click that and click on “Connect”.
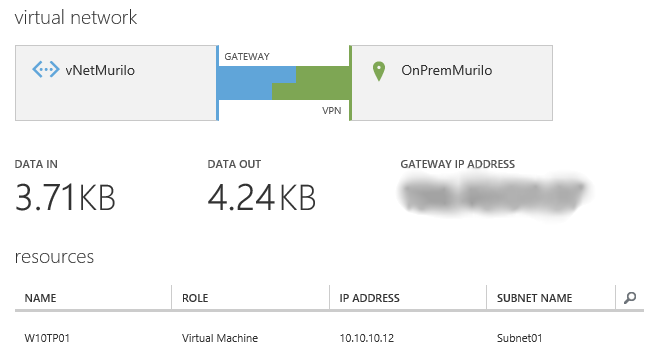
After few minutes, you will be able to see the information in the Azure dashboard showing that you are connected and the data traffic – yes the refresh is slow. In the image bellow, you can also see that I have created a VM (while you were reading this article 🙂 and assigned this VM to the new Virtual Network. We will use this VM to test the communication. The IP for this VM is 10.10.10.12 as you can see in the image.
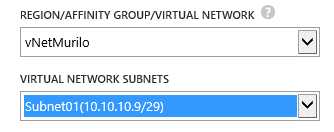
Just as a note, when you are creating a new VM in Azure, you can specify the Virtual network and the subnet where this VM will be connected, here is how I did:
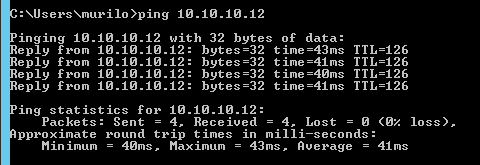
If you try to ping any server on the created subnet in Azure from the server where RRAS is based, it should work, as the route is guaranteed anytime you connect to the VPN. So let’s test with a simple ping (I disabled the firewall):
Configuring the other servers to connect through the RRAS server
Now that we have the Virtual Network up and running, the RRAS server working with the VPN connected, let’s prepare the other servers to use the RRAS as access point to the Azure environment.
As already said, the internal IP of my RRAS server is 190.100.100.6. I need to configure another server of my on-premises network to have access to the created virtual network, by using the RRAS. For this, I need to create a permanent route entry in order to redirect all the connections to 10.10.10.XXX to pass through the RRAS server 190.100.100.6, using the following command:
route add -p 10.10.10.0 mask 255.255.255.0 190.100.100.6
You can confirm that this route is added by executing the command “route print”.
After adding this route, you have all set, and you can contact you Azure subnet! Make sure that you have all the exceptions added in the firewall, on both sides, otherwise even a simple “ping” may fail!
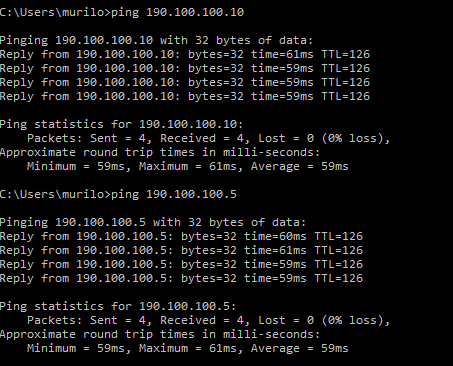
You can also test if the connection is working from Azure to On-Premises, for that, just connect to the created VM on Azure and try to ping, for example, the RRAS server, or any other. This must work if the permanent route has been added in the server on-premises:
We are done here! Now we have a RRAS server serving and a router in order to connect our Azure Virtual Network to On-Premises. As said, I will write some articles talking about SQL Server in a hybrid environment, and this configuration is a base to make a hybrid scenario work, not specifically for SQL Server, but also for other related technologies.
- Understanding backups on AlwaysOn Availability Groups – Part 2 - December 3, 2015
- Understanding backups on AlwaysOn Availability Groups – Part 1 - November 30, 2015
- AlwaysOn Availability Groups – Curiosities to make your job easier – Part 4 - October 13, 2015

