In my previous articles, we installed the SQL Server 2019 CTP 2.1 on Ubuntu Linux. You can follow the below articles to prepare the SQL instance on Linux.
- SQL Server 2019 on Linux with Ubuntu
- SQL Server 2019 on Linux with a Docker container on Ubuntu
- SQL Server 2019 on Linux with Ubuntu and Azure Data Studio
Sometimes we build the server without worrying about the server name. This might be just for the testing purpose. We give it some name but later we might need to change the hostname of the server. It might be due to the naming convention being followed up in the organization. If we rename the hostname of the instance in the Linux operating system, we might need to worry about the SQL instance as well. By default, SQL instance runs on the hostname of the server. Therefore, if we change the hostname, will there be any impact on the application connecting with the SQL Server with the hostname? If we change the hostname of the server, we will definitely want to change the SQL Server name as well to avoid any confusion.
In this article, we will explore these scenarios
- Temporary and Permanent methods to change the hostname of the Ubuntu server
- Rename SQL Server instance on Ubuntu
- View the system error logs
You need to launch the virtual machine configured earlier with SQL instance on it. Launch the terminal from the applications in Ubuntu server.
Run the command ‘hostname’ to get the current hostname. We can see here our current hostname is ‘rajendra-VirtualBox’
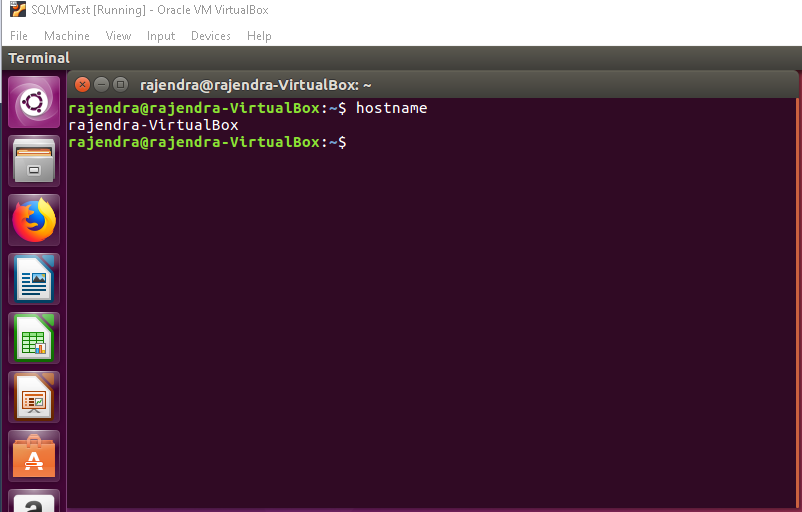
We can change the hostname of Ubuntu with the two methods
- Temporary change
- Permanent change
Temporary change the hostname in Ubuntu
We can change the hostname using the command ‘hostname NewName’. This command needs to be run under the root permissions i.e. sudo. We will get below error message if we try to run the command without sudo permission ‘hostname: you must be root to change the hostname’
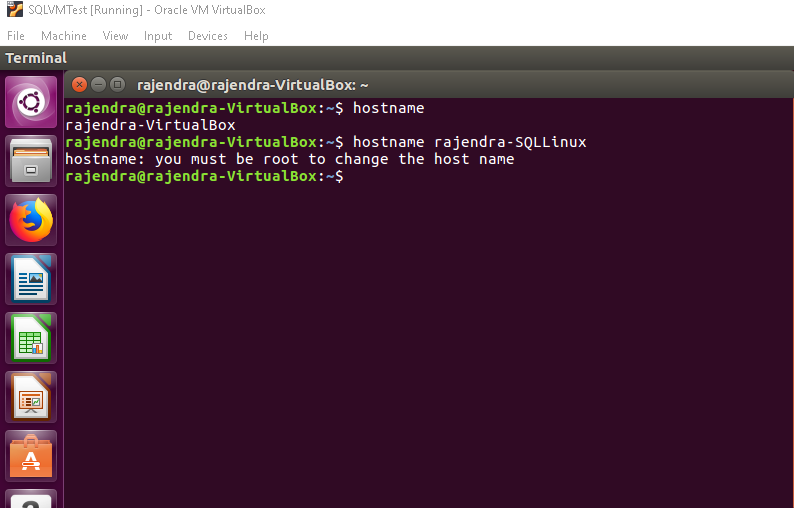
Let us change the hostname from ‘rajendra-VirtualBox’ to ‘rajendra-SQLLinux’ with the below command.
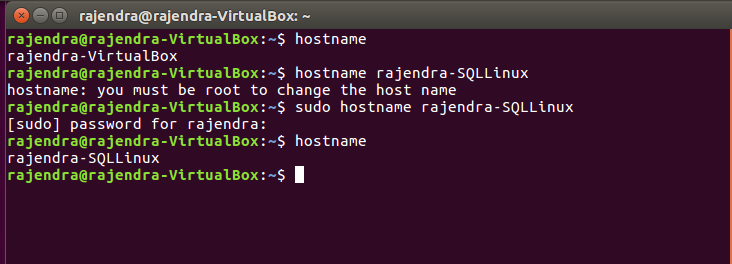
$ Sudo hostname rajendra-SQLLinux

Verify the hostname and we can see the new name for the server. You can notice here the command line still says ‘rajendra@rajendra-VirtualBox’
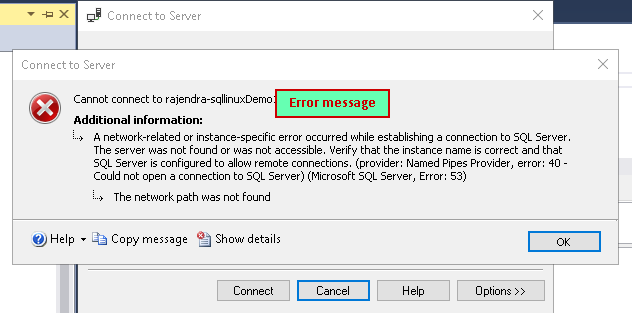
If we try to connect the SQL Server with the new hostname, we get an error message that the server was not found or not accessible. This is due to the instance name is not configured with the SQL Server.
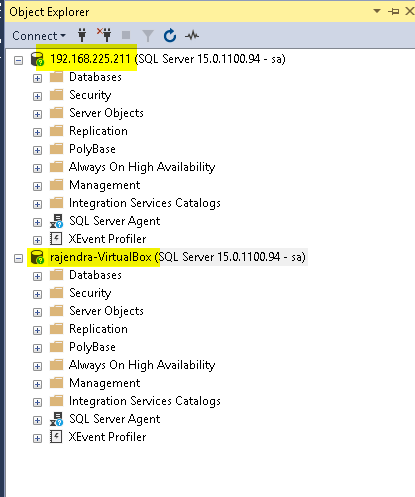
We can connect to the SQL instance using the IP address and the old instance name ‘rajendra-VirtualBox’ in SQL Server Management Studio as shown below. This shows there is no impact on SQL Server even we have changed the Ubuntu hostname.
Let us restart the server using the command ‘shutdown -r’. This command schedules the restart of the server. You can see the message ‘Shutdown scheduled for sat 2018-12-08 08:28:56 IST, use shutdown -c to cancel’
If we want to cancel the shutdown, we can run the command ‘shutdown -c’

We get the broadcast message at the scheduled time and the system starts the reboot process.

Once the server reboot is completed, verify the hostname and we are again back to old hostname ‘rajendra-VirtualBox’

Permanent change hostname in Ubuntu
We can change hostname permanently using the GUI as well as the command line mode. Click on the ‘system settings’ icon in Ubuntu followed by the details.
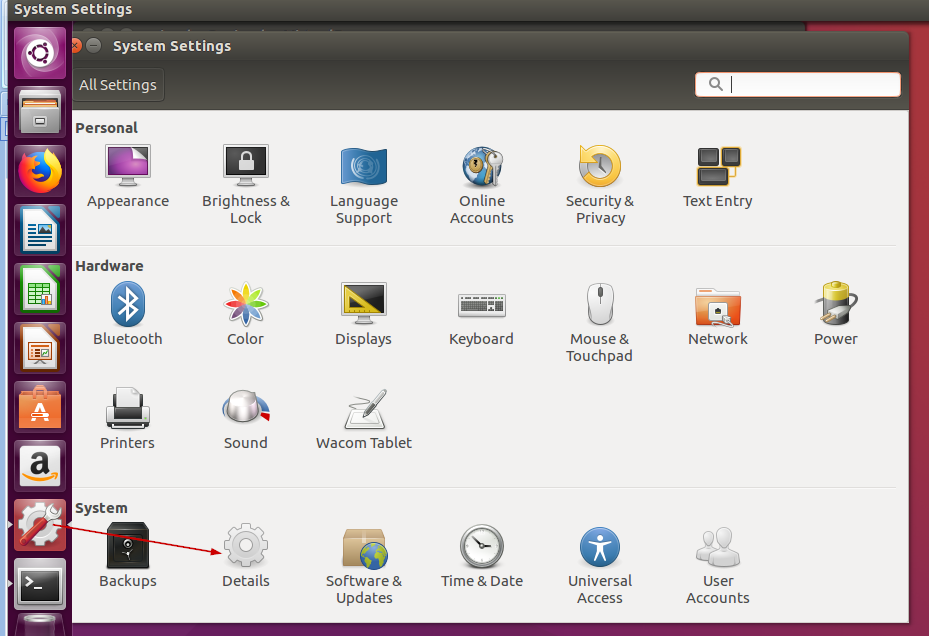
In details, it opens the device detail and you can see device name as highlighted.
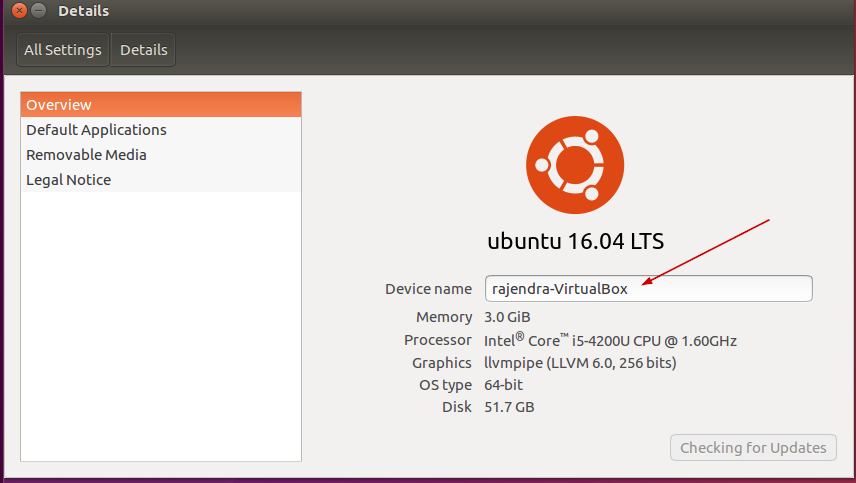
Device name section is having a text box, therefore enter the new name and close it with the ‘x’ icon on top left side.
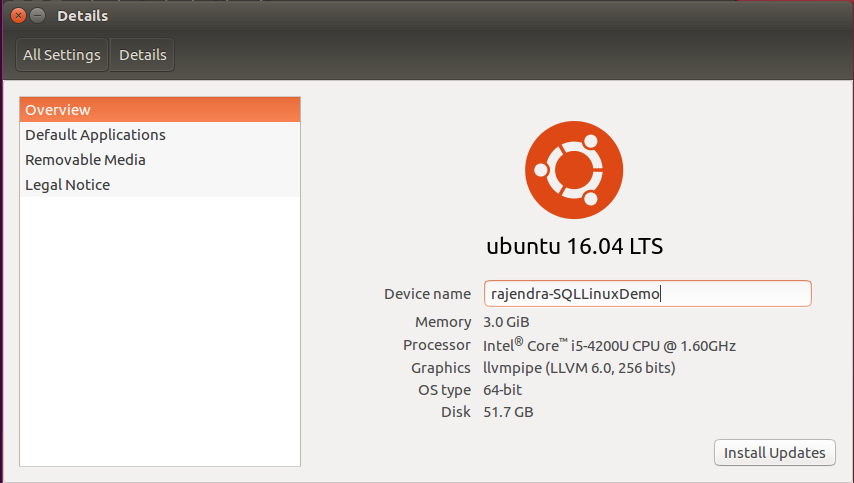
We are done now. We are having the new server name for our virtual machine.

From the command line, we can run the below command and edit the hostname.
sudo vi /etc/hostname
You can restart the server again and verify it. It changes the hostname permanently.

Now, connect to the SQL instance and check the instance name using command ‘select @@servername’. We are still having an old hostname for the SQL Server.
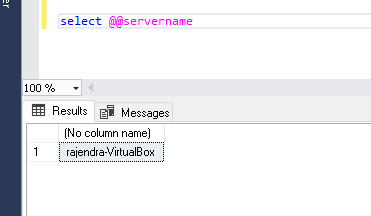
We need to drop this server name using the command
sp_dropserver ‘server name’
In our case, execute the below command in the SSMS.
Sp_dropserver ‘rajendra-VirtualBox’
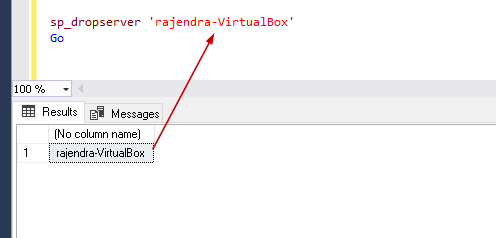
Now, register the new instance name using the sp_addserver command.
Sp_addserever ‘server name’,’local’
Therefore run the command as below
Sp_addserver ‘rajendra-sqllinuxDemo’,’local’
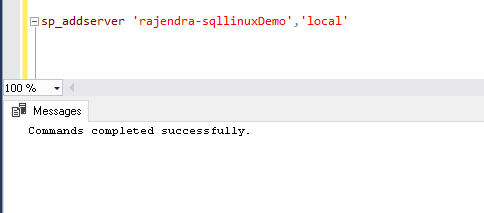
We need to restart SQL Server on Linux to apply this new hostname.
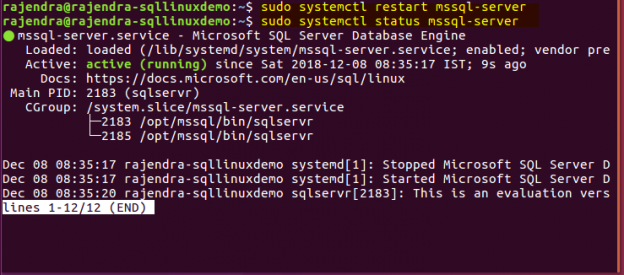
Restart the mssql-server services
Sudo systemctl restart mssql-server
Verify the service status, it should be ‘active (running)’
Sudo systemctl status mssql-server
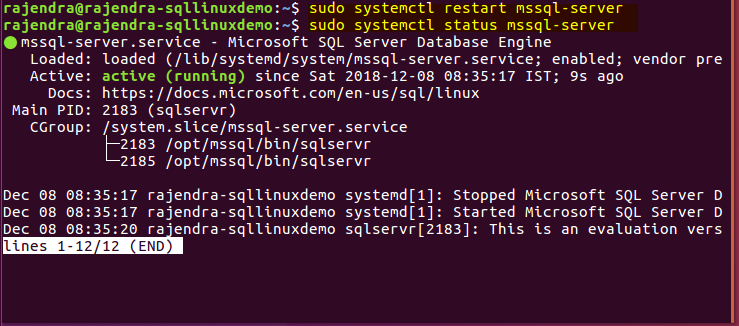
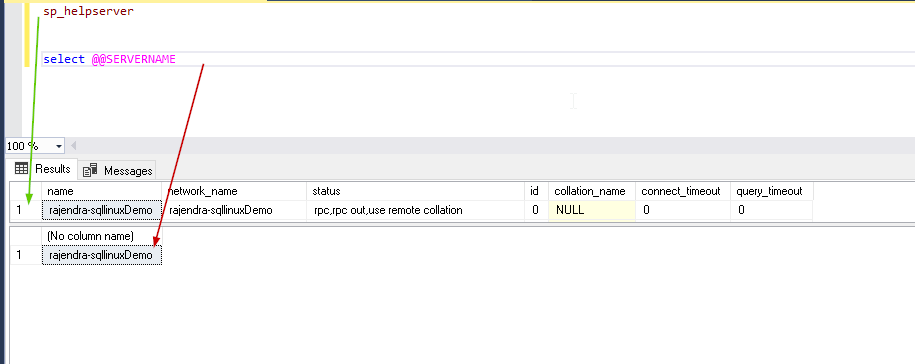
Connect to SQL instance and verify the instance name. Yes, it is now pointing the new hostname similar to the hostname we have configured at the operating system level.
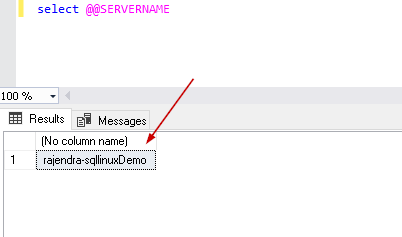
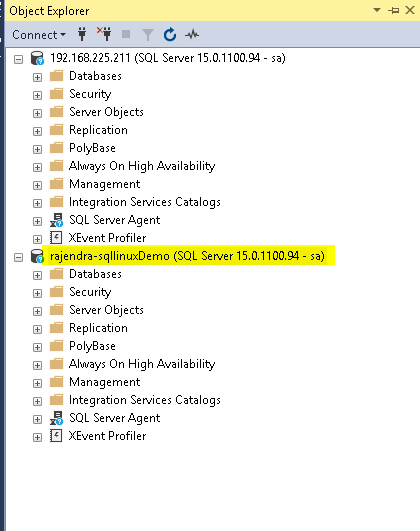
You can now connect to SQL Server using both IP address and the new hostname.
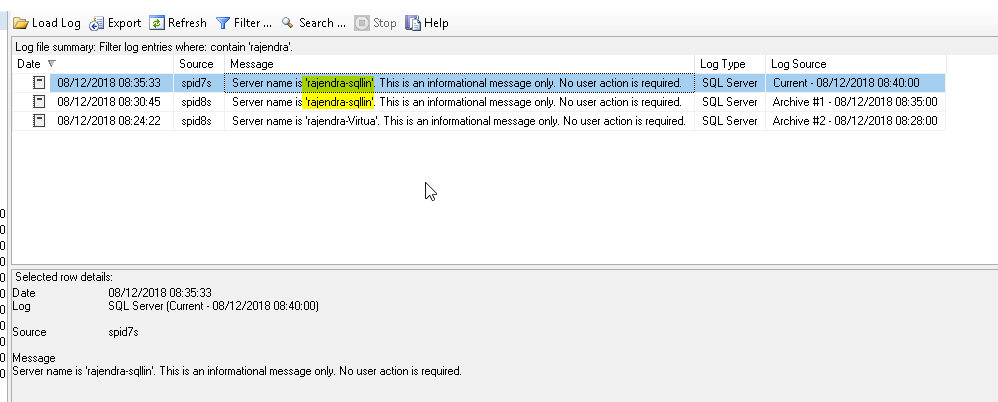
If you look at the SQL Server logs and filter the results for the server name, you get the below message.
I found out the issue with this message in the SQL Server logs. If you look carefully, the message says ‘ Server name is ‘rajendra-sqllin’. This is an informational message only. No user action is required.’
It shows the server name ‘rajendra-sqllin’ while our actual server name is ”rajendra-sqllinuxDemo’. We can connect to the server name ”rajendra-sqllinuxDemo”’ as shown above. It truncates the server name in the error logs. This feature might be improved in the upcoming releases of SQL Server.
We can verify the new instance name using the ‘sp_helpserver’ command as well. In below screenshot, we can see both the commands return the new hostname.
Conclusion
It is an important thing for the database administrators to know the process of changing the SQL Server instance name. You should explore this article in your test instance. Please note this article applies on the standalone SQL Server instance only. If you are running cluster SQL instance, you need to follow additional steps that I will explore in my future articles.
Table of contents
- Understanding PostgreSQL SUBSTRING function - September 21, 2024
- How to install PostgreSQL on Ubuntu - July 13, 2023
- How to use the CROSSTAB function in PostgreSQL - February 17, 2023

