The Azure Portal offers the free tool Cost Management that we can use for managing Azure costs. As we’ll see, we can use this tool to organize how we manage our spending along with setting limits for thresholds to alert the appropriate members. While this tool can be useful for our organization, it has the potential to cause noise or disruptions, so we still want to review how we use it within our organization for managing the spending of our teams.
Cost Management in the Azure Portal
From the home page of the Azure Portal, we’ll see the Cost Management tool and when we click on this tool, we’ll see a blade that pops up that shows Create budget (see below image) with options that we can select. For now, I’ve avoided setting up an action group so that we can set this up for this example. If you already have an action group, you can skip the next three steps. On this screen, we’ll select the option, Manage action groups.

We’ll use the Cost Management tool to test managing our Azure costs.
If you have an action group already, you will see them listed. For this example, we have none, so we’ll set up our first action group by selecting the option Add action group.
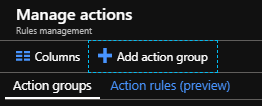
We create an action group to manage Azure costs.
How we organize our Azure resources will matter here, as we’ll be setting our action group on the basis of our resource group – but if we don’t manage our teams by resource groups, this will not be an option for us (we can scale and organize our resources by subscription instead). Also, keep in mind that we want to keep our resource groups named in a way that allows scale. For example, what if we need more resource groups for a team and we’ve named them in a manner that doesn’t allow logic in our code and prevents us from scaling easily, which adds to our Azure costs? I suggest using naming conventions that make scale easy – such as a name like ReportReaderApp00, ReportReaderApp01, ReportReaderApp02, etc. or TeamLavender000, TeamLavender001, TeamLavender002, etc. These easily scale through automation in their naming conventions, whereas coming up with a unique for each resource group for one team or application invites complexity.
In the below image, we add the details for our action group – the action group name, short name, subscription (not shown), and resource group. Our naming convention for the names follows the pattern of our resource group and for good reason – this helps us quickly identify what resources these actions track.
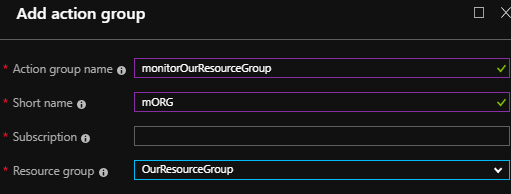
Notice how our naming follows the pattern of our resource group naming – this makes our Azure cost organization easier!
Once we create our action group, we return to our budget page for Azure costs and input the options that we want for this action group. We’ll see that we have many options here such as name, budget, time period, and the percent of our budget. It’s possible that we want this resource to be a percent of our budget. For our example, we’ll set this resource to use the full budget (100%). We also see that we’re setting the limit to $2 for the purpose of generating significant use and getting an alert in a short period of time for testing this feature. While we do this quickly in this example, this budget page is where we want to spend time in large organizations thinking about how much Azure costs we want to allow for each team. We also set a short expiration date for this budget and this will generally be further into the future, if we’re satisfied with our limits and results. In the end, we’ll specify an email address that we’ll send an alert to and we’ll add that (not shown).
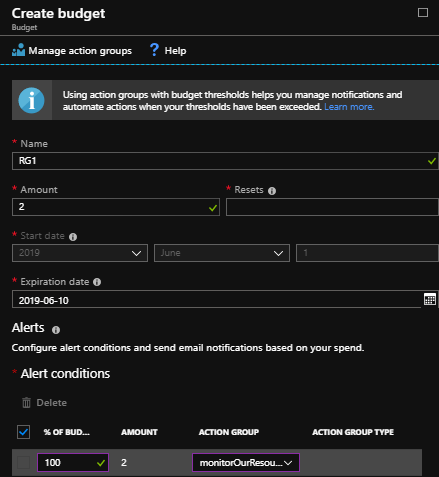
We set our budget for our resource group in the Azure portal.
Now, we’ll create and use a bunch of resources to generate an alert. Soon after we create a resource or two (in my example, I create a MongoDB and add a bunch of large documents in a database), we’ll return to our budget page for our Azure Costs in the Azure Portal and we’ll notice how we’ve progressed toward our budget – your actual result will differ depending on the resources you’ve created. This still hasn’t crossed our threshold, but we’ll notice how far we’ve progressed toward it.
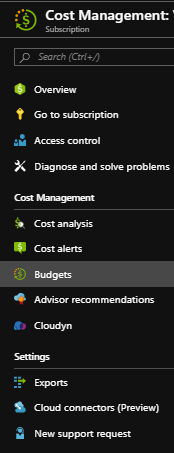
The cost management tool in the Azure portal for managing Azure costs.
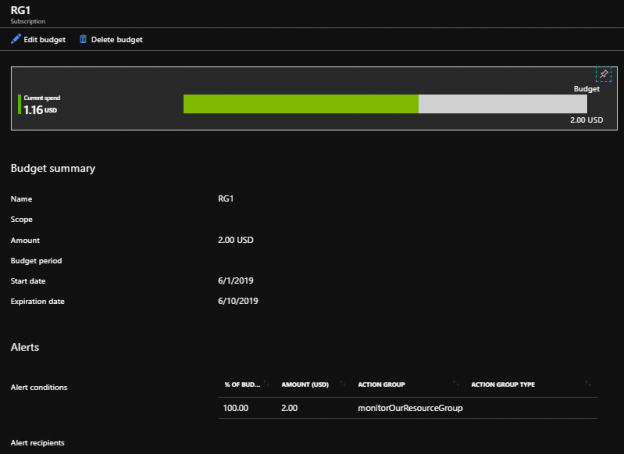
As we see in the Azure portal, we can drill into this budget further to remove or update the details if we need by clicking on the budget (in this case RG1):
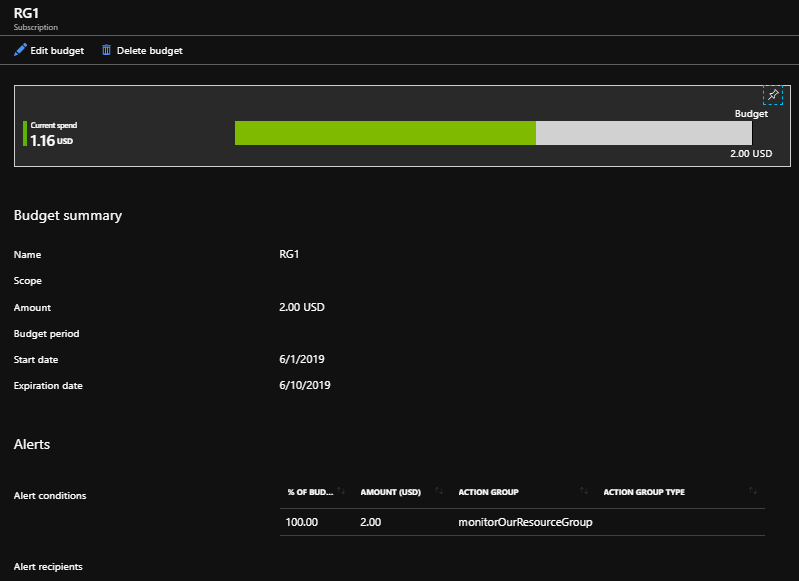
We see information related to our budget, such as the currency, among, start date, etc.
We can continue using our resources that we’ve created to surpass our budget and generate an alert, or we can wait a period of time if the resource we created will cross the use threshold in a day or two. When we update the budget page, we’ll see that we’ve crossed it:

We see our budget for our spending surpassed.
In the Azure Portal, we also see that our resource group called OurResourceGroup is only a fraction of the spending, but it exceeded its budget.
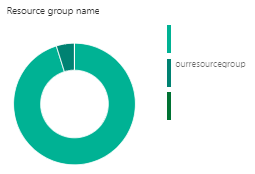
Our budget for Azure costs by resources may only be a fraction of our overall spending.
Avoiding the Email Alerting Spam Trap
When we consider alerting on Azure costs by setting budgets, we still want to follow the best practices on alerting. I’ve witnessed alerts being ignored in environments where developers receive thousands of alerts per day – a load that the average developer cannot handle. Alerts should follow the below rules, or else they should be disabled
- If there are one or two steps to solve the problem, automate the solution and don’t alert. In this case, we need an alert on our Azure spending, but with a new alert added to our development teams or management teams, we need to ensure that other alerts are needed (we’re adding to the alerting load)
- Our alerts should be actionable and in this case with Azure costs, we should have clear action steps that teams will do if they receive an alert about a resource overspending, such as disable the resources, prioritize performance improvements for the resources, etc. This also means that we’ve allowed these teams to have a “time-cushion” each month for possible work injection
- Set lower thresholds than the maximum so there is time to prevent issues and this relates to the above point. If we set the maximum threshold – we cannot spend more than $1000 for an action group – what happens if we cross it? Do we disable the resource? A better step would be to set our threshold at a lower bound value, such as $750 to provide time for our developers to optimize a performance solution
- Delineate who receives the alerts for large teams that may already be seeing many alerts. For development or administrative teams where we have every team member receiving the same alerting, it may be more appropriate with large teams to organize the alerts by groups within the team. For the case of Azure costs, we may want only the manager of the team to receive these alerts
- Because increasing revenue and decreasing costs are the basis of business, with any cost alert, I suggest setting aside some time to review these costs as a team
Alerts can provide us with a useful tool that helps us prevent problems provided that we design them appropriately and we consider other alerts we already have running. We should always err on the side of fewer alerts to prevent overwhelming employees or creating the “boy who cried wolf” problem that often accompanies alerting.
Conclusion
As we’ve seen, we can use the Cost Management tool in the Azure Portal to create and manage action groups and set budgets for these groups. Once these are in place, we can also alert the appropriate teams or team members about these thresholds being crossed – and we’ve reviewed how we may want to set our thresholds at a lower level than the maximum we want to allow. This is one of many tools that allows us to manage our Azure costs by helping us prevent overspending or helping us see resources that must be optimized for performance.
Table of contents
- Data Masking or Altering Behavioral Information - June 26, 2020
- Security Testing with extreme data volume ranges - June 19, 2020
- SQL Server performance tuning – RESOURCE_SEMAPHORE waits - June 16, 2020

