Introduction
BULK INSERT is a popular method to import data from a local file to SQL Server. This feature is supported by the moment in SQL Server on-premises.
However, there is a new feature that is supported only in SQL Server 2017 on-premises. This feature allows importing data from a file stored in an Azure storage account to SQL Server on-premises using BULK INSERT. This feature will be supported in Azure SQL versions in the future.
In this article, we will show two examples. The first example will show how to use the traditional BULK INSERT statement from a local CSV file to Azure and the second example will show how to import data from a CSV file stored in Azure to SQL Server on-premises.
If you are new in the Azure world, this article don’t worry, as we will include step by step instructions to guide you until the end. If you have experience in Azure and SQL Server, but you do not know much about this particular new feature, this article may also be helpful.
Azure is growing each day and SQL Server is improving the features to connect SQL Server on-premises to Azure. BULK INSERT is a powerful tool to import data because it is fast and it can be easily combined with T-SQL code.
Requirements
- SQL Server 2017 installed. If you have SQL Server 2016 or older you will be able to follow the first example only
- An Azure account
Get started
How to import data from a local file to SQL Server on-premises
In this first example, we will create a CSV file with customer data and then we will import the CSV file to a SQL Server table using BULK INSERT.
First, we will create a file named mycustomers.csv with the following data:
1,Peter,Jackson,pjackson@hotmail.com
2,Jason,Smith,jsmith@gmail.com
3,Joe,Raasi,jraasi@hotmail.com
Then we will create a SQL Server table where we will load the data:
|
1 2 3 4 5 |
create table listcustomer (id int, firstname varchar(60), lastname varchar(60), email varchar(60)) |

We will load the data using the BULK INSERT statement:
|
1 2 3 4 5 6 7 8 9 |
BULK INSERT listcustomer FROM 'c:\sql\mycustomers.csv' WITH ( FIELDTERMINATOR = ',', ROWTERMINATOR = '\n' ) GO |
The BULK INSERT statement will import the data from the mycustomers.csv file to the table listcustomer. The field terminator in this file is a comma. The row terminator is a new line (\n).
If everything is OK, the table will be populated. You can run this query to verify:
|
1 2 3 4 5 6 |
SELECT [id] ,[firstname] ,[lastname] ,[email] [dbo].[listcustomer] |
The result displayed is the following:

How to import data from a file in an Azure storage account to SQL Server on-premises
The first example can e brun in SQL Server 2017 or older versions. The second example requires SQL Server 2017 and it is a new feature.
We will load the CSV file to an Azure storage account and then we will load the information to SQL Server 2017 on-premises.
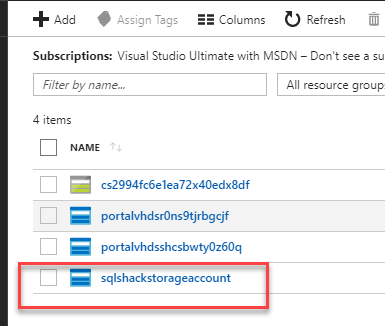
Open the Azure Portal and go to more services (>) and click on Storage Accounts (you can work with the classic or the new one):

Press +Add to create a new Storage account:

Specify a name, a deployment model. In this example, we will use the classic deployment and a standard performance. Press create:

It will take some minutes to create the storage account. Click the storage account:

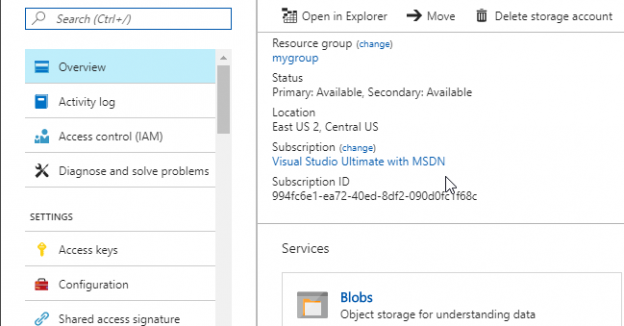
Go to Overview and click on Blobs:

Click +Container:

Specify a name for the container and press OK:

Press Upload to load the file in the container:

Upload the file mycustomers created in the first example with CSV data:

We uploaded data to an Azure storage account in a container. Now, open SSMS in a local machine and connect to a local SQL Server.
We will first create a master key:
|
1 2 3 4 |
CREATE MASTER KEY ENCRYPTION BY PASSWORD='Mysqlshackpwd¡·#$'; |
The master key is a symmetric key used to protect certificates, private keys and asymmetric keys.
In the next step, we will create a database credential to access to the Azure Storage. The credential name is azurecred:
|
1 2 3 4 |
CREATE DATABASE SCOPED CREDENTIAL azurecred WITH IDENTITY = 'SHARED ACCESS SIGNATURE', SECRET = '+gEu0KY2fznnZ2kY3NwGEgn5AFiN0sAyytm+MNzo+uK/zZlRLFmHddWS5HYPlKL/p9gx7Q5Jsg=='; |
The secret password can be obtained from the Azure Portal>Storage Account in the Access keys section. You can use the primary or secondary key:
The next step is to create an external data source. The external data source can be used to access to Hadoop or in this case to an Azure Account. The name of this data source is customer. The type is blob storage. We will use the credential just created before:
|
1 2 3 4 5 6 7 |
CREATE EXTERNAL DATA SOURCE customers WITH ( TYPE = BLOB_STORAGE, LOCATION = 'https://sqlshackstorageaccount.blob.core.windows.net/container1', CREDENTIAL = azurecred ); |
The location can be obtained in Azure Portal>Blob Storage Account>Container properties:
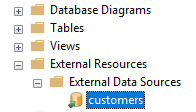
If everything is OK, you will be able to see the external data source in SSMS:

We will create a table named listcustomerAzure to store the data:
|
1 2 3 4 5 |
create table listcustomerAzure (id int, firstname varchar(60), lastname varchar(60), email varchar(60)) |
We will use now the BULK INSERT to insert data into the listcustomerAzure table from the file custmers.csv stored in Azure. We will invoke the external data source just created:
|
1 2 3 4 |
BULK INSERT listcustomerAzure FROM 'mycustomers.csv' WITH (DATA_SOURCE = 'customers', FORMAT = 'CSV'); |
A common problem is the error message ‘Cannot bulk load’. The error message says that you don’t have file access rights:

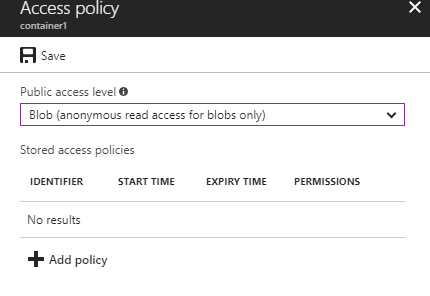
This problem can be solved by modifying the access to the folder. Go to Azure and go to Azure storage account and select the container. Click the option Access policy:
Change the Public access level to Blob (anonymous read access for blobs only) and save the configuration:

Run the BULK INSERT sentence again. If everything is OK now, you will be able to access to the data:

Conclusions
BULK INSERT is a very fast option to load massive data. It is a popular tool for old versions of SQL Server and new ones. SQL Server 2017 supports the ability to run BULK INSERT statements to load data from Azure storage accounts to SQL Server on-premises.
To import data from an Azure storage account, you need to create a master key and then create a credential with a key to the Azure storage account. Finally, you create an external data source with that credential. Once created the external data source, you can use the BULK INSERT. You may need to change the access policies to the container.
Note that a Windows account is not used to connect to Azure. That is the most important difference between a local BULK INSERT and a BULK INSERT to an Azure Account. In a local BULK INSERT operation, the local SQL login must have permissions to the external file. In contrast, when you BULK INSERT an Azure file, the credentials are used, and the Windows local login permissions are irrelevant.
BULK INSERT is not supported in Azure SQL Data Warehouse or Parallel Data Warehouse and the option to import files stored in Azure is by the moment only supported in SQL Server on-premises and not in Azure SQL databases yet.
- PostgreSQL tutorial to create a user - November 12, 2023
- PostgreSQL Tutorial for beginners - April 6, 2023
- PSQL stored procedures overview and examples - February 14, 2023


