SQL Server Management Studio aka SSMS is the default integrated graphical user interface tool that is used to access, administrate, configure, manage, query and monitor the different SQL Server instances that are hosted locally at the user machine, remotely on a server or anywhere in the cloud. It is a comprehensive environment that allows us to edit, debug and deploy scripts written in different languages such as T-SQL, DAX, MDX, XML and more.
In my previous articles, we followed the enhancements to the existing SSMS features, the fixes to the bugs found and reported in the previous SSMS versions and the new features added to each new release. These new features that are introduced in the previous versions include the Connections dialog box new options, the embedded Performance Dashboard, Showplan node search, Import Flat File Wizard, the XEvent Profiler and Always On Availability Group dashboard new additions, which are described deeply in these articles.
Recall that, starting from SQL Server 2017 version, the SSMS versioning track is separated from the SQL Server Engine versioning. Where SQL Server 2017 has version number starting with 14.0, but the SSMS assigned version number starting from 17.X. In addition, starting from SQL Server 2016, Microsoft SSMS tool installation media is separated from the SQL Server Engine installation media, that requires you to download it from the Microsoft Download page to install it to your machine or server.
SSMS 17.5 is released now, and can be downloaded from the Microsoft Download page, with the ability to download SSMS 17.5 complete installation file to install it to your machine for the first time, or download the 17.5 upgrade package file, which is smaller, to upgrade the current 17.X SSMS to the latest 17.5 SSMS version as shown in the installation media below:

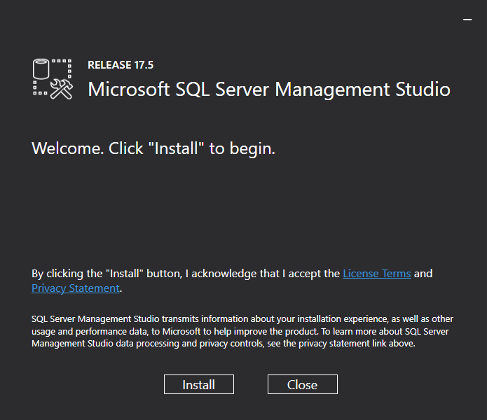
The SSMS 17.5 installation or upgrade process is very easy, double-click on the installation media and the below window will be displayed, from which you can click on the Install option to start the installation, with the ability to install it side by side with earlier SSMS versions:

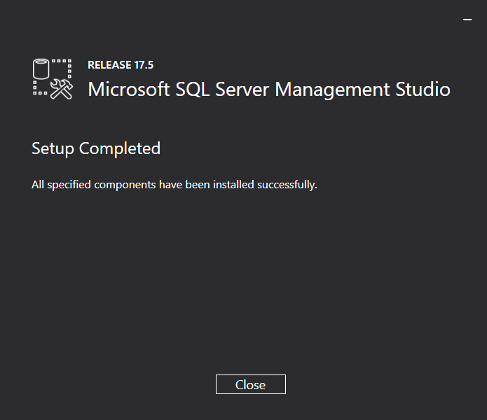
Once completed successfully, the below Setup Completed window will be shown, if there is no issue faced during the installation process:

You can check that the latest SSMS version is installed on the machine with build number equal to 14.0.17224.0 by browsing the About option from the Help menu as shown clearly below:

SSMS 17.5 provides full support for all features on SQL Server 2008 version through the SQL Server 2017 latest version and the latest cloud features available in Azure SQL Database and Azure SQL Data Warehouse, with the ability to connect to SQL Server instances installed on Linux servers using SSMS 17.5 version.
In SSMS 17.5, bugs that have been reported in the previous SSMS versions were fixed. These fixed bugs include:
- Inaccurate Live Query Statistics elapsed time
- Showplan was not able to recognize the Apply logical operator
- An SPID issue when throwing an error such as “Input string was not in correct format” if the query enables the “SET SGOWPLAN_ALL” option
- The Managed Compression would fail for indexes
- An issue with the Merge Audit Files
SSMS 17.5 comes also with two major enhancements to the existing features. The first one is related to the Query Editor that allows us to skip a specific number of rows when loading a delimited text files into the Azure SQL Data Warehouse using the SkipRow option of the Delimited Text External File Format. The second enhancement in that SSMS version, is related to the ShowPlan feature, that enhanced by enabling the display of the Estimated Plan button for the Azure SQL Data Warehouse. SSMS 17.5 comes with one new valuable feature, the Data Discovery and Classification feature, that we will describe deeply in this article.
Data Discovery and Classification
The 17.5 version of SSMS introduces a new SSMS built-in security tool with a set of advanced services, that is used to scan, discover, classify, label and report the sensitive data in the database. These sensitive data include business, financial and healthcare information. The Data Discovery and Classification tool helps us protecting our data, by meeting the data privacy standards and controlling the access to such data. This feature also helps us in the Data Compliance process by meeting the regulatory compliance requirements and generate reports for auditing purposes.
Using the Data Discovery and Classification, the classification engine will scan the database in order to identify the list of columns that contain potentially sensitive data and provide you with that list in order to review it and apply the recommended classification, or manually apply your own customized classification policy. After that, these classification attribute labels will be tagged on the columns that contain sensitive data, and then can be viewed with the database classification state in a detailed report, with the ability to export or print it for different purposes such as auditing purposes.
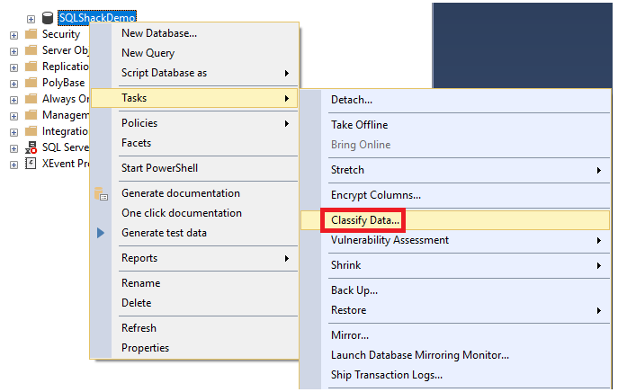
To perform the data discovery and classification process on your database, right click on the database you plan to classify and from the Tasks list choose the Classify Data… option, as shown:

Directly, the classification engine will scan the chosen database for all columns that contain sensitive data and notify us with the number of these matches columns in a notification box as shown:

To view the list of recommended classifications for the detected columns, click on the displayed notification box, and a window similar to the below will be displayed:
The recommended classification list provides us with the name of the columns that contains sensitive data, the schema and the name of the table on which these columns located. In addition, the type of data stored in that column will be shown in the Information Types drop down list, that consider that column data as sensitive data. List of all sensitive data types provided in the Information Type drop down list shown below:

And finally, the recommended classification attribute, that is used to define the sensitivity of the data stored in the specified column, will be also displayed on the Sensitivity Label drop down list, with all possible attributes shown below:

After reviewing the recommended classifications, you can change the Information Type of the Sensitivity Label values provided by the classification engine with any value that fits your company policies or standards. To apply that classification, select all recommendations or set of recommendations on specific columns, by checking the checkbox on the left of these columns then click on the blue Accept selected recommendations button, as shown:
After accepting the recommended classification on the selected column, a notification message will be displayed, showing that the changes will not be updated until you save all changes, as shown:

If there is another column that you manage to classify and not listed in the recommended classifications, you can manually add it by clicking on the Add Classification button in the top menu of the window, as shown:

In the opened window at the right part of the SSMS, choose the name of the table that contains the column to be classified, the schema of that table, the name of the column to be classified, the Information Type of that column and finally the Sensitivity Label of that column. Then click on the Add button at the bottom of the window, as shown:

To complete the classification process and tag the database columns with the classification sensitivity label, click on the Save button in the top menu of the window and the classification changes will be updated as shown:

Data Discovery and Classification feature allows us also to generate a report, that summarizes the classification state of the database. After performing the previous classifications, click on the View Report button in the top menu of the window, as shown:

The displayed SQL Data Classification Report, will summarize the classification state of the selected database. We can derive from the generated report below that:
- The number of classified columns in that database is 5 columns, from the 84 database columns
- There are 3 tables, from the total of 24 tables in that database, have sensitive data
- The classified columns contain 3 types of sensitive information
- A list of the 5 classified columns with the sensitive information type and sensitivity labels are shown also in details in the report, as shown:

The previously generated report can be easily exported to PDF, Excel or Word format or printed directly as an auditing or compliance evidence. It is clear now how the SQL Server Data Discovery and Classification feature is useful in identifying the sensitive data stored in your database as the first step in securing and protecting the company sensitive data, taking into consideration that this needs your touches in classifying the rest of columns that contains sensitive data, but the names of these columns are not chosen well to indicate the type of data stored in these columns. Enjoy this new feature and stay tuned for the new SSMS releases!
Previous articles in this series:
- What’s new in SSMS 17.2; Authentication methods, scripting options and more
- What’s new in SSMS 17.3; Import Flat File wizard and XEvent Profiler
- What’s new in SSMS 17.4; Always On AG dashboard enhancements and more
- Azure Data Factory Interview Questions and Answers - February 11, 2021
- How to monitor Azure Data Factory - January 15, 2021
- Using Source Control in Azure Data Factory - January 12, 2021


