SQL Server Management Studio is an integrated graphical user interface tool that is used to perform wide range of administration and development tasks on the SQL Server instances, hosted locally on the user machine, remotely on a Windows or Linux server or on SQL Azure or Azure Data warehouse instances hosted in the cloud. You can use SQL Server Management Studio to easily administrate, develop, deploy, configure and monitor the SQL Server instances.
In my previous article, What’s new in SQL Server Management Studio 17.2; Authentication methods, scripting options and more, we discussed deeply the new features and enhancements that are included in the SQL Server management Studio 17.2 release, and mentioned that starting from SQL Server 2017 version, SQL Server Management Studio starts taking its own versioning track, that starts with 17.X rather than taking the same SQL Server Engine version number for SQL Server 2017, which is 14.0.
SQL Server Management Studio 17.3 is released now, with build number 14.0.17199.0. In this new build, Microsoft updated the SQL Server Management Studio by fixing a number of bugs in the previous SSMS versions, and added two new features to the current version.
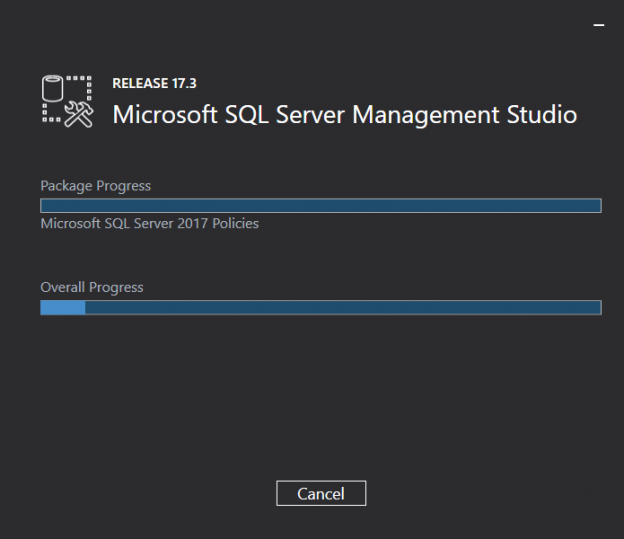
After downloading the SSMS 17.3 from the Microsoft Download website, and installing it to your machine, as a new SSMS side by side with the old versions already installed in the machine, as in the simple installation window below:

You can browse the current version number, to make sure that you are using the latest SSMS version, from the About choice of the Help menu as shown below:

A large number of reported bugs in the previous SQL Server Management Studio are fixed in the SSMS 17.3 version. Some of these important fixed bugs include:
- Problem in the Extended Events “Watch Live Data” when the default database is not master.
- Inconsistent icons for the disabled jobs in the Job Activity Monitor.
- An issue with the “Generate database script” that is not working when the user has a paused DW database on the server.
- An issue when you choose a Custom date range in the “Top Resource Consuming Queries” or “Regressed Queries” graphical reports for Query Store, where the report will ignore the custom date range input and returns information for the past 24 hours instead.
- Although the “Match Script Settings to Source” option is set to True, the resulting comments in the script are misleading.
- Scripting for “Alter” or “Execute” on some database objects is not allowed when connected to an Azure SQL database.
- Intellisense issue when working against Azure SQL databases.
- Creating a Linux AG when the primary is on Windows is not possible.
- Facing “Out of Memory” errors when running queries in SSMS.
- SQL Server Profiler is not working with SQL Server 2005.
- Activity Monitor is not working when running the SQL Server instance on Linux.
In addition to the enhancements that are performed and the bugs that are fixed in the SSMS 17.3 version, two new features are added to that SQL Server Management Studio release include:
- The Import Flat File wizard that provides an easy way with the minimal required effort to import CSV or TXT files.
- The XEvent Profiler node in the SSMS Object Explorer.
In this article, we will go through these two new features in details.
Import Flat File Wizard
The Import Data wizard, existing in the SQL Server Management Studio, provides us with a wide range of import capabilities, by configuring the different available options that are required to build the SQL Server Integration Service package. However, in order to import files with a complex row, semi-structured data structure, such as the flat files, it is better to use a simple task that requires the minimal user configuration effort.
The new Import Flat File wizard provides us with a simple way to copy data from a specified flat file, with CSV and TXT extensions, to a destination table, that we used to perform using the Import Data wizard, reducing the amount of effort required from the user to import the complex flat file structure. The Import Flat File wizard simplifies the flat files import process using an intelligent framework known as Program Synthesis using Examples, also called PROSE SDK. The PROSE technology identifies the input file structure by analyzing the file’s data pattern to specify the column names, types and delimiters, minimizing the knowledge required and effort performed by the user to import the flat file. You only need to provide the wizard with the input flat file and a destination table name. The Import Flat File wizard can work when connecting to SQL Server 2005 instance and higher.
The Import Flat File wizard can be accessed by going through the following steps:
- Connect to the SQL Server instance using the SQL Server Management Studio.
- Expand the Databases node and select the database to which you need to import the flat file data.
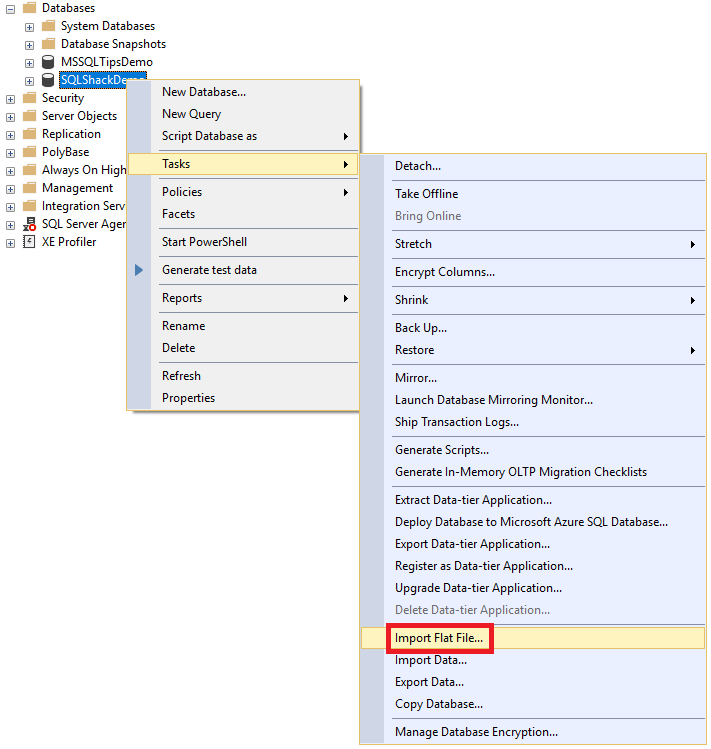
- Right-click on the selected database, point to Tasks and choose Import Flat File option as shown below:

The first page that will appear after choosing the Import Flat File option is the Introduction page. This page will display a brief description for the Import Flat File process. If you do not want to see it again, click on the Do not show this page again checkbox then click Next:

As the name indicates, the Specify Input File window allows you to choose the flat file, with .csv and .txt extensions, that you manage to import, by clicking on the Browse button, and a unique name for the new table, to which that data will be imported. Specify both the flat file location and the new table name then click Next:

After specifying the input flat file, the wizard will analyze the input file structure and generate a preview that allows you to view the first 50 rows of the flat file in a friendly shape. If you find that everything looks good and there is no problem, click Next to continue:

The next step is modifying the schema of the new table, to which the flat file data will be imported. You need to have a deep look at the name of the columns to meet you naming convention, the columns data types to be suitable for the inserted data, the column or columns that will participate in the Primary Key constraint and if these columns will allow inserting NULL values or not. After checking the columns properties and performing the changes that meet your requirements click Next to continue:

In the Summary page, you can review your current configurations. If there is any change required, you can go back to the previous configurations. If you are OK with all configurations, click Finish to start the import process:

The Result page shows whether the import process failed or was completed successfully. If it failed, you need to review the input flat file or review your configurations for the reported error:

Expand the Tables node under your database, you will find the newly created table with the schema specified in the Import Flat File wizard as shown below:

You can also check that the imported data is same as the flat file data previewed within the Import Flat File wizard by performing the SELECT statement below on the created table:

XEvent Profiler
SQL Server Extended Events were introduced the first time in SQL Server 2008 as an alternative event handling system to replace the SQL Profiler tool, due to its impact to the SQL Server instance performance. Although the Extended Events provide a flexible definition and views, it still suffers from the lack of a quick view capability that is available in the SQL Profiler.
The XEvent Profiler is a new customizable feature, integrated into the SQL Server Management Studio 17.3 version, which provides a quick live streaming view for the diagnostics extended event. The XEvent Profiler differs from the SQL Profiler in that it is integrated into the SQL Server Management Studio on the top of the SQL Server scalable Extended Events technology. In addition, the customizable session that is created to view the Extended events is less intensive on the SQL Server instance and less resource consumer than the SQL trace session created using the SQL Profiler. The result displayed in the XEvent Profiler can be also shared as a .viewsetting file. The XEvent Profiler can work when connecting to the SQL Server versions that support the XEvents.
To access the XEvent Profiler, connect to the SQL Server instance using the SQL Server Management Studio. In the Object Explorer, you will find the new extendable XE Profiler node under the SQL Server Agent node as shown below:

When you expand the XE Profiler node, you will find two predefined session templates: Standard and TSQL, with no available option to add extra ones by the user. From these two sessions, double-clicking on them, you will create a new XEvent dedicated session; QuickSessionStandard and QuickSessionTSQL XEvent session accordingly, and be able to start it and open the Live Data View directly in the SSMS, from where you can watch the SQL Server Extended events for troubleshooting purposes with no need for any extra configuration.
The QuickSessionStandard session replaces the Standard template in the SQL Profiler, capturing all stored procedures and T-SQL batches running to monitor the general database activities of the SQL Server instance, by collecting XEvents such as login, logout, rpc_completed, sql_batch_completed and sql_batch_starting.
Double-click on the Standard XE Profiler template, a QuickSessionStandard session will be started as follows:

Viewing all extended events in that session, with a detailed view for each selected events as shown below:
The QuickSessionTSQL session replaces the TSQL template in the SQL Profiler, capturing all submitted T-SQL statements in order to debug the client applications, by collecting XEvents such as login, logout, rpc_starting and sql_batch_starting.
Double-click on the TSQL XE Profiler template, a QuickSessionStandard session will be started as below:

Displaying all logged T-SQL statements currently running, with detailed view for each selected events as shown below:
The corresponding Extended sessions created for both the Standard and TSQL XEvent Profiler templates can be browsed by expanding the Management node to check all Sessions under the Extended Events node as shown below:

You can also use the predefined XE Profiler templates while creating a new XEvent session using the New Session wizard below:

Take into consideration that the XEvent sessions that are created for the Standard and TSQL XEvent Profiler templates will be created with no specified target, as you can see from the XEvent session properties window below:
However, these two sessions will be deployed as any regular XEvent session that is clear from the SQL Server XEvents templates folder shown below:

Conclusion
SQL Server Management Studio is a GUI tool that is mainly used to perform different administration and development tasks in the SQL Server instances. In this article, we mentioned a number of important bugs that are fixed in the newly released SQL Server Management Studio 17.3 version. In addition, we described in details the two new features that are included to that SSMS 17.3 version, that are Import Flat File wizard and XEvent Profiler.
Previous article in this series:
Next articles in this series:
- What’s new in SQL Server Management Studio 17.4; Always On AG dashboard enhancements and more
- What’s new in SQL Server Management Studio 17.5; Data Discovery and Classification and more
- Azure Data Factory Interview Questions and Answers - February 11, 2021
- How to monitor Azure Data Factory - January 15, 2021
- Using Source Control in Azure Data Factory - January 12, 2021


